Tag Archive for: studio

I show you how I started and where we are now (Digital Classroom Love for Photography)

Digital Classroom Love for Photography

It’s been interesting….

It’s been interesting to go through my old work for this episode of Digital Classroom. It was broadcasted on February 14, Valentine’s Day. And we didn’t want to do another model in red.
I thought it would be fun to dedicate a whole episode to Love for Photography.  About the way my photography changed, but also my vision of my work and the way I work with models, sets, lighting, and styling.

I hope you enjoy this very special and personal episode in our digital classroom series.

Don’t miss our live broadcasts and new videos by subscribing to our channel and hitting the bell icon.

Above the recording of the Digital Classroom Love for Photography


Check out our Next Digital Classroom on YouTube 


or the whole playlist on our website 

Working creatively with seamless paper in a totally different way

Being creative with left-over seamless paper

What are seamless paper backdrops again?

Yes, most of the time we use our Click Backdrops. In practically all situations a Click Backdrop is better than seamless. Even white! this article is about working creatively with seamless Paper left-overs

But we started with Seamless paper backdrops so we have much of it. Seamless paper backdrops are large non-reflective rolls of paper that fit on a stand behind your subject. They can be plain or colored, and give a smooth, professional look to your photographs. Seamless paper is often used in portraits, headshots, or baby photography, as the colors can be changed to suit your subject. As you understand very boring and plain.

No, don’t throw it out… yet!

Annewiek must have heard this a million times… yes I have a problem throwing stuff out. Especially seamless (paper)
I somehow always feel you can still use it for something, and when that moment is there it’s better to have it… right?

I am not a huge fan of seamless paper. Over time it becomes unusable due to tears and dirt. And you have to throw it out and get a new roll. But for a nice and long backdrop, it’s still one of the most used backdrops. But what do you do when you can’t use the paper anymore but still have a lot left?

Well…. we can always use it in a shoot 😀

Working Creatively with Seamless Paper

Make a skirt out of seamless paper (or pretend it is a skirt)

working creatively with seamless

In this case, it was the idea of one of the attendees of the workshop. He had some yellow paper left and asked me if it would make a nice prop.
Claudia our model had bright red hair that week (yeah it varies) so that fitted perfectly in this setup.

The combination of yellow and red makes a great contrast which is balanced by the white clothing/hat and the blue background.

Of course, you can use the paper for many different things. We could have built a dress out of it. Used it as a backdrop with loads of wrinkles and tears. Or maybe on the floor with the model lying on or under it, in essence, the sky is the limit. So the next time….

Always reuse… and recycle your seamless paper

We all know recycling is important, but when you think you can use something for a photoshoot… maybe hang on to it just a little bit longer 😀

So what is your next idea about working creatively with seamless paper?


Behind the scenes during a Zebra photoshoot  and how to extend your Zebra backdrop with AI 


Using isolation blankets as a backdrop


Quick portraits on location and to show how easy it is we have a cute labradoodle

Quick Portraits on location

Quick portraits on location are always a challenge. You have to think fast, find a location, set up your lighting and often only have a few minutes with your client. Today we are going to take a look at how we set up a location session and what I use.

Make it easier on yourself

There is always a way to make it harder, but let us focus on the things that can make everything go as smoothly as possible. The first thing is, of course, preparation.

I love to mess around with lighting in the studio but often also have more than enough time. On location, I often have to set up and hit the ground running. This is why we talk with our clients about what they want for most on-location sessions. This means that when I arrive on location I already know where to place my lights, do a quick light meter check, and can start immediately.

Now you might wonder… “Didn’t you forget something?”
Yeah, I know what you think.

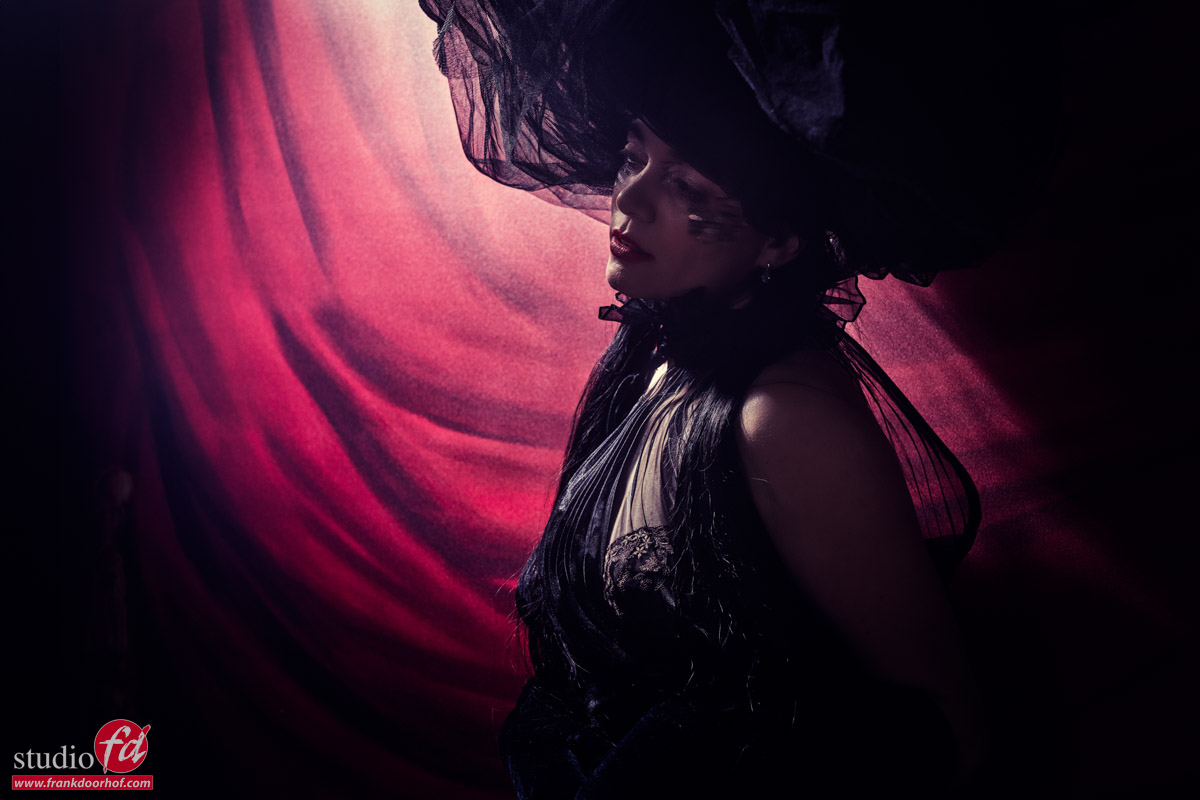
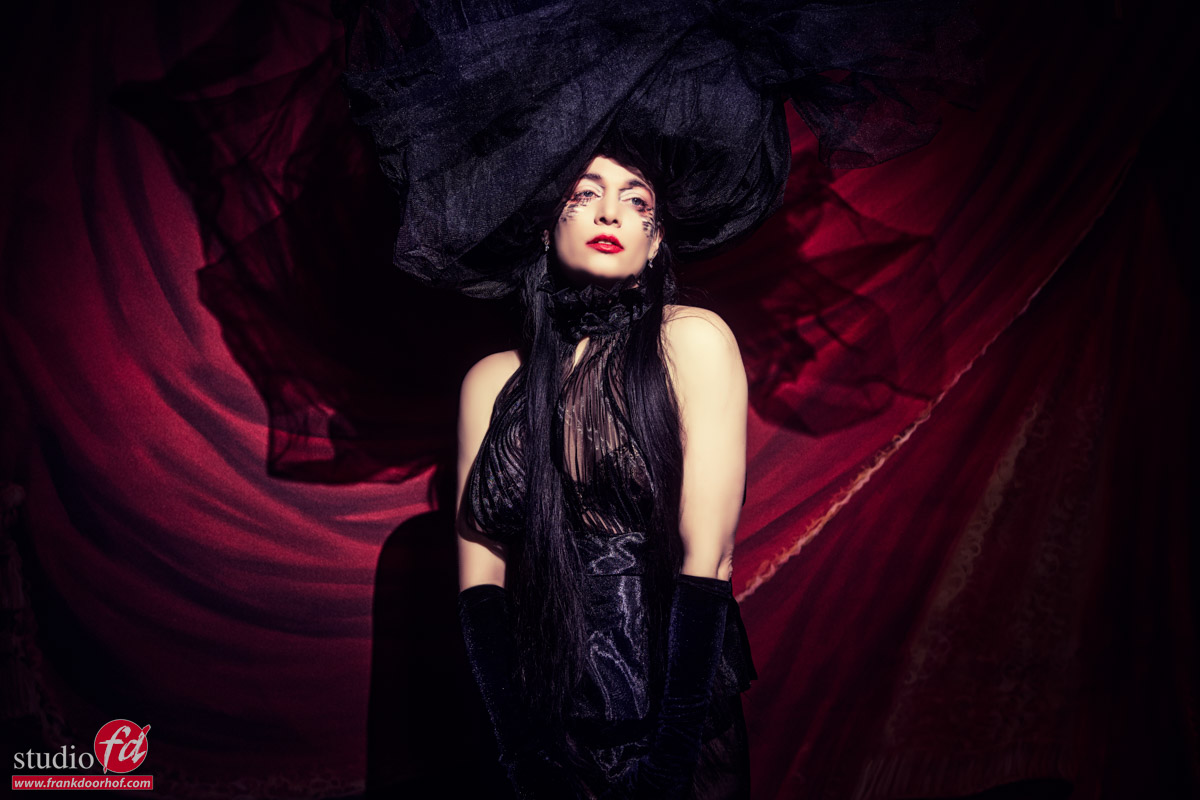
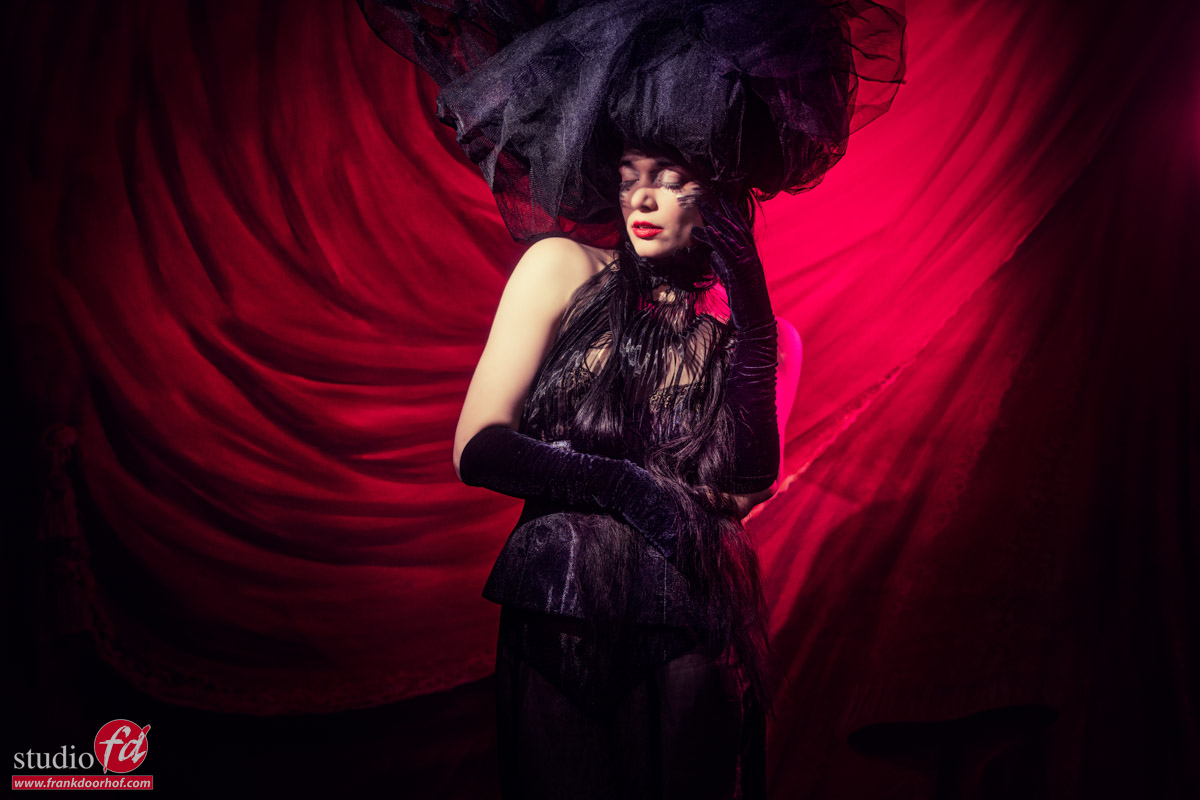
The background for a quick portraits on location

Of course, when we talk to our client before the shoot we also show different kinds of backdrops so the client can choose which one fits their look and brand. Because I’m using strobes I know that ambient light in most cases won’t cause any problems. However, don’t ever forget to take a ColorChecker image during the shoot. On location, you can have the most weird situations that can mess up your color that at first, you won’t notice because you’re using flash.

Now in the past, I’ve used solutions that worked pretty well but were always just a bit too short, narrow, or too large so they didn’t fit in my car forcing me to take the van (I prefer to drive electric of course :D)

Recently ClickBackdrops released the Clicki backdrop system and it’s become my favourite backdrop for quick on-location shoots. It’s wide enough to fit one person for wide (landscape-style) portraits. And with a little bit of AI in Photoshop I can easily shoot 3/4 shots in landscape mode because the subject doesn’t overlap anywhere. Somehow I prefer to shoot in landscape orientation which makes the width vital for me.

The Clicki fits with ease in my car (Hyundai Ioniq EV) and only needs a stand to be assembled on location in under a minute.
Of course, I also need to bring strobes.

Strobes

When we talk about speed I also have to be able to move fast and setup fast. So bringing heavy strobes or battery packs is out of the question.
For location work, I’m using the Geekoto GT200 and GT250 

The main advantage is that I can easily adjust the angle of the strobes via the pistol grip. So I can use almost any studio stand, which not only saves space but also makes setting up much easier and faster. The Geekoto also supports both ETTL and HSS. Combined with a 200/250W power output and 450-500 shots per battery makes it a very versatile setup that can easily suppress sunlight outside. And you can use the thicker more saturated colorgels for some really gorgeous color effects.

And the final piece of the puzzle…

What Light shapers to use for a quick portrait on location

Of course, I’m not using the strobes bare.
Although that can be a nice effect, it’s often not what the client wants to see.
So we need something to modify the light.

If it needs to be compact I love the Rogue products. Especially the new magnetic system is awesome for creative use on location (and in the studio) and of course the “famous” Frank Doorhof Flashbender :D. But for this setup, I’m using the Geekoto 26″ softbox. The main advantage of this system is that it just folds up very small but it also has a detachable speedring which makes it super easy to carry with you.

Enough talk, let’s take a look at the setup.

a quick portrait on location. this is how I did it

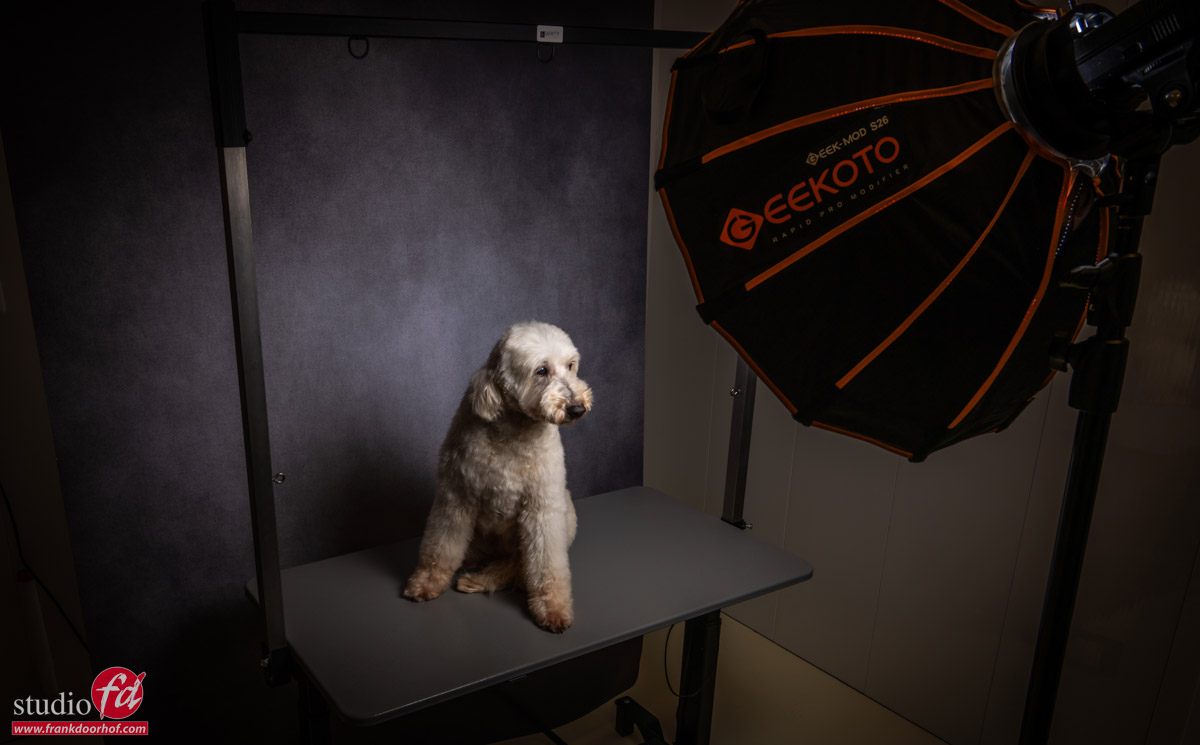
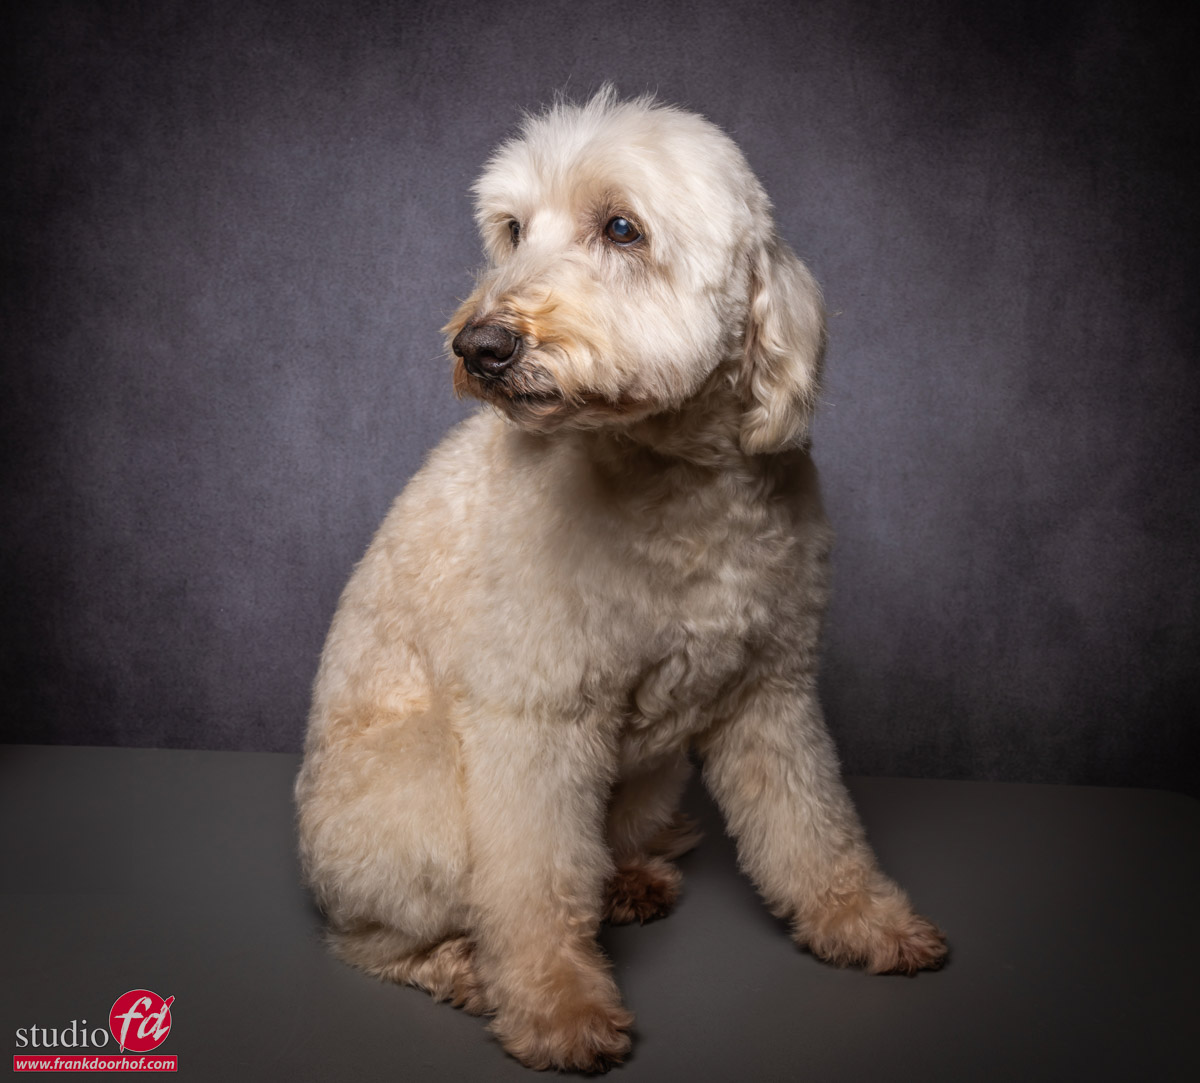
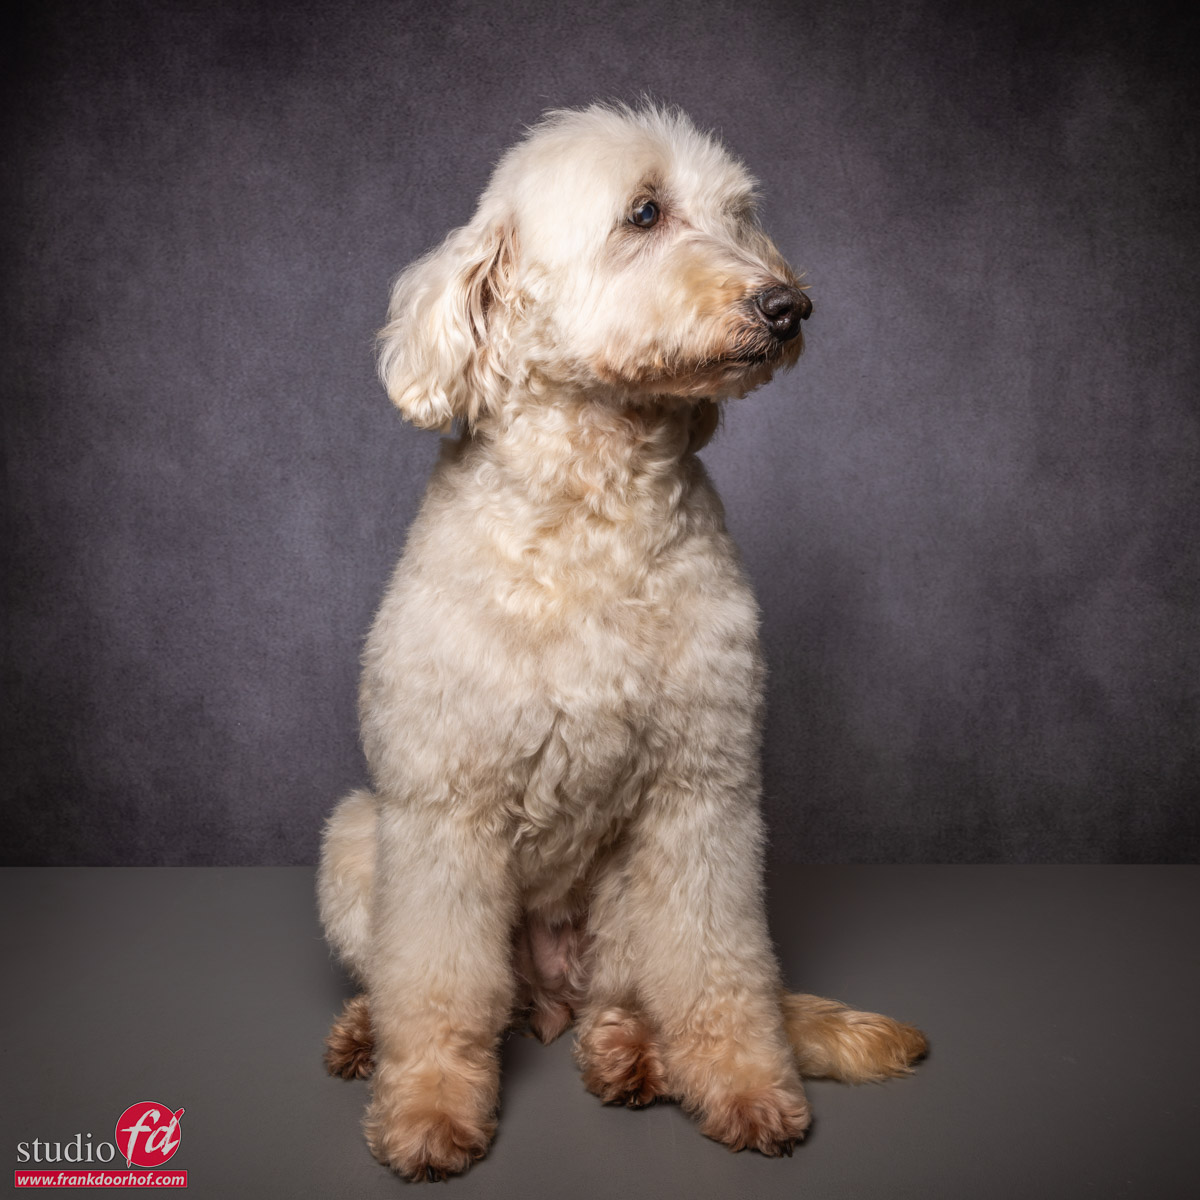
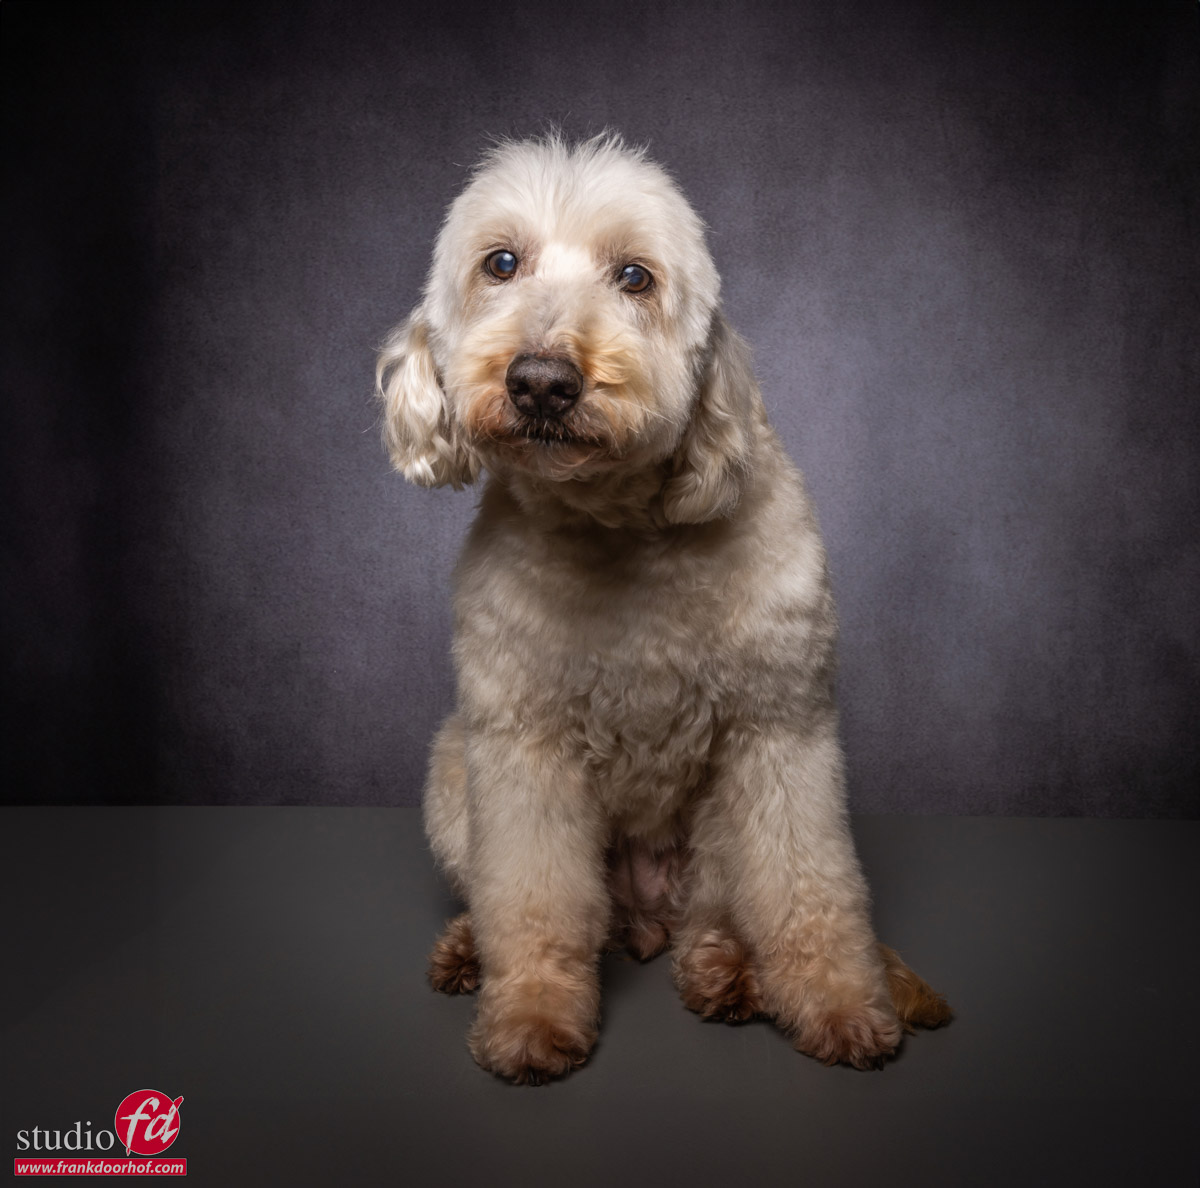
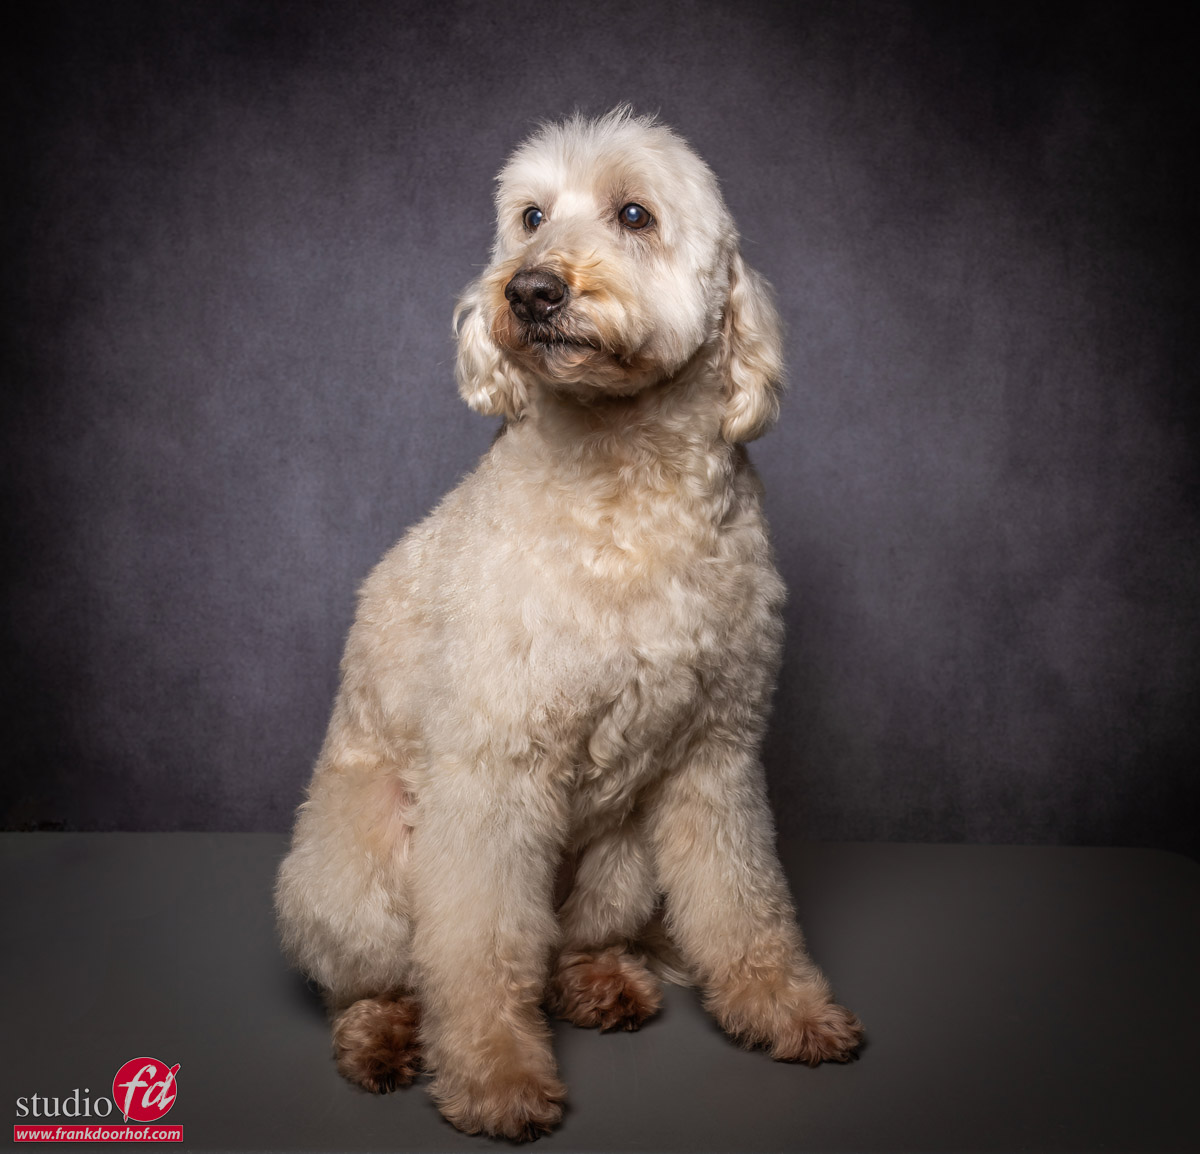
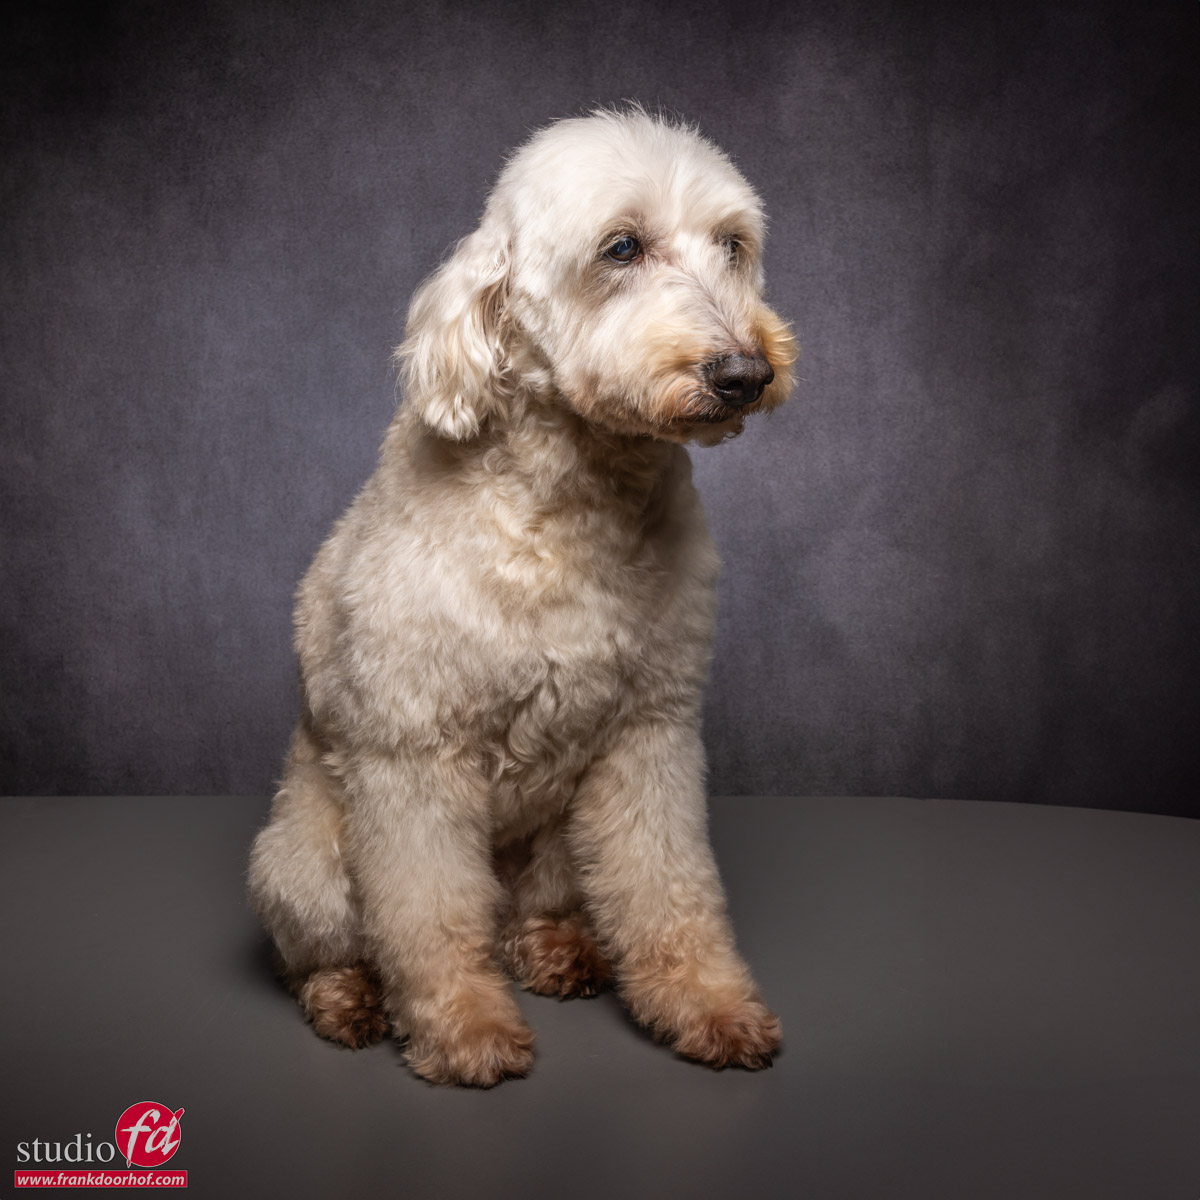
As you can see we just placed the Clicki behind the table. So the dog didn’t have to move and the whole setup was done in seconds (everything was set up, I just had to slide it there). Because we mark the floor when doing the meter readings, it’s a setup that makes it possible to almost immediately start shooting and thanks to the size of the Clicki you can also shoot from a few different angles.

So let’s see the results. It’s never perfect with these kind of one-minute sessions but the owner loved them. And for the trimmer, it’s just an extra service or something they can charge for.

So now you know what I use for quick portraits on location. If you have questions, find me on social media and let me know.

Quick portrait of a lovely labradoodle on location quick portrait on location of a dog a quick portrait on location


see the introduction of the Clicki Backdrop on Photodays in Brussel (2023)


A different background for a totally different look

A Different background for a totally different look

Of course, we all know that changing the backdrop can create a different feel or look. Different backdrop and same styling
But somehow it also always triggers my creativity. We used the same styling.
Model and styling: Nadine
Backdrops: ClickBackDrops
Strobes: Geekoto

Just a backdrop or more?

For me, a backdrop is not just a pattern or something to fill up the space behind the model. I always try to make the backdrop a vital part of the shot. When I want something edgy I’ll often go for a more distressed wall look, when I want something more classical…. mmm maybe something with old curtains?

Well luckily for you guys we did just that with our model Nadine.
We decided to keep the styling and lighting idea roughly the same but change the backdrop.  As you can see even Nadine poses differently. My position is different and the end result is totally different.

Now this might seem logical. But often it’s forgotten that when you really blend background and model together ON SET you get a much more “organic” and “real” result. Not just because the shadow and light play on the backdrop. But also because both model and photographer are “inspired” by the results coming in.

People often ask me if I’m afraid that AI will replace all backdrops?

No, I’m not.
Yes it will replace it for some people, and the possibilities are limitless. But it cannot replace the shadow play, and inspiration the photographer/model experience during the shoot. The shadows could maybe be replicated but you would need a proper knowledge of lighting in the first place and an above-average knowledge of Photoshop to make it 100% convincible.

Let’s first take a look at the first set we did with Nadine.
Different backdrop and same styling. In this picture we use the Black Wash

Buy the ProFabric Black Wash Backdrop in our store (8,92’x8,92′ or 272x272cm)

I just love the way the backdrop seems to add a sensation of movement to the images.
This was shot the day we got the backdrops in so I didn’t use them before 😀

As you can see I played with different looks in tinting, posing, and color/BW.
But there is a certain feel to the images.

Now let’s change to an other backdrop. Same styling, but different look

Now this backdrop is officially unavailable in ProFabric, but I loved it so much they made a custom order on Pro-Fabric (which you can now also order). And as you can see the change is not just the backdrop 😀

Different backdrop and same styling Different backdrop and same styling Different backdrop and same styling, in this case the Theater Curtain on ProFabric

See the backdrops we have in stock. 


Check out the video of a styled photoshoot with Nadine, where I used AI on the backdrop

Read the blog about the backdrops with isolation blankets