Tag Archive for: studio

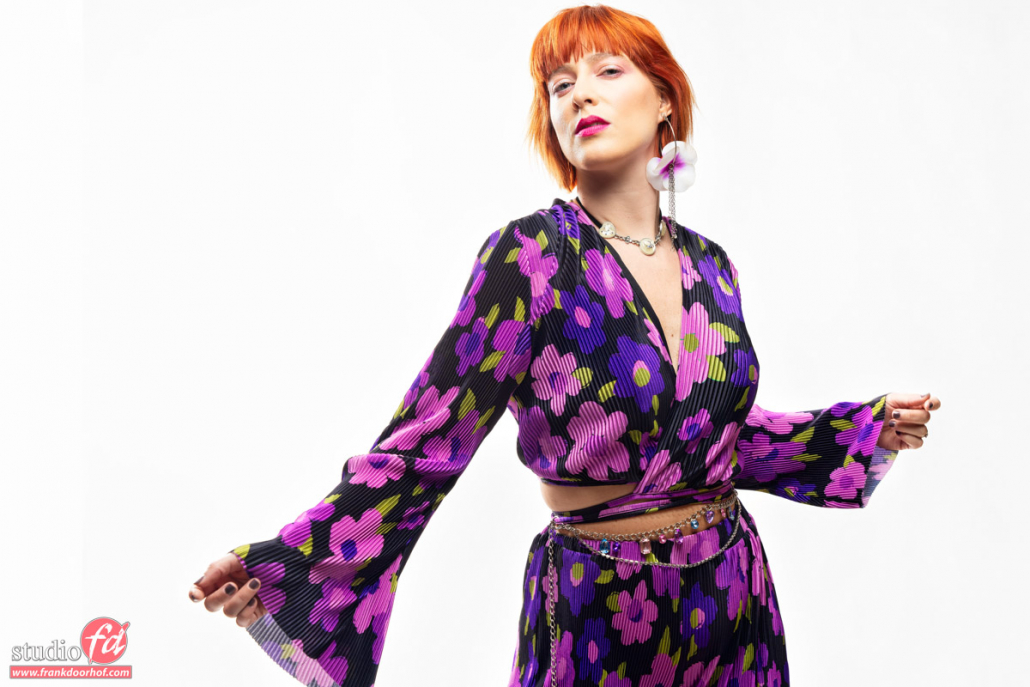
Outside fashion shot for sunglasses with extreme styling and flash Part I

Transform something not so cool to awesome

One of the more challenging workshops is without a doubt “on location in Emmeloord”
During this workshop I take the attendees with me to locations that at first sight might look incredibly boring. However by using the styling of the model and of course the choice of lighting and shooting angle it becomes clear pretty quickly that even locations that are not that interesting can transform into a great location for shoots.

The reason this workshop is very important is because during most workshops you are shooting in already great locations, or nice studio setups.
The thing is that in reality it hardly ever happens you shoot a client or wedding/event in a castle/urbex/etc location and also the light is not always perfect. Most of the time we are shooting in office buildings, outside in a forest/dune/city environment etc. Not really super inspiring locations.

And that’s the whole deal

In this workshop I show how easy it is to create interesting photos in not so interesting locations. Or let me rephrase that locations that look uninteresting at first sight.

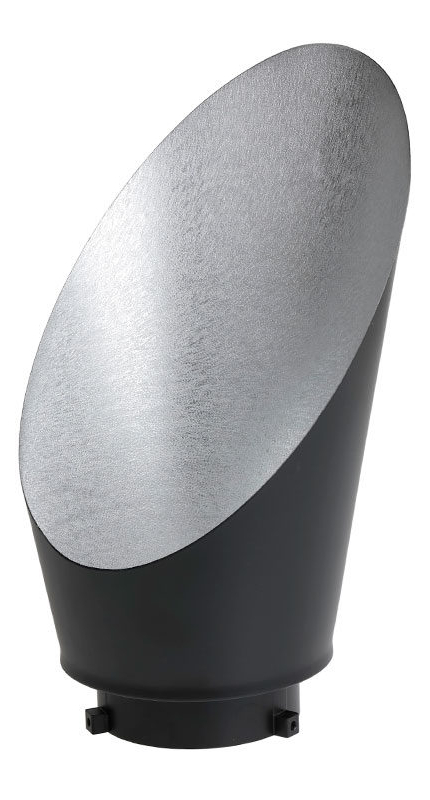
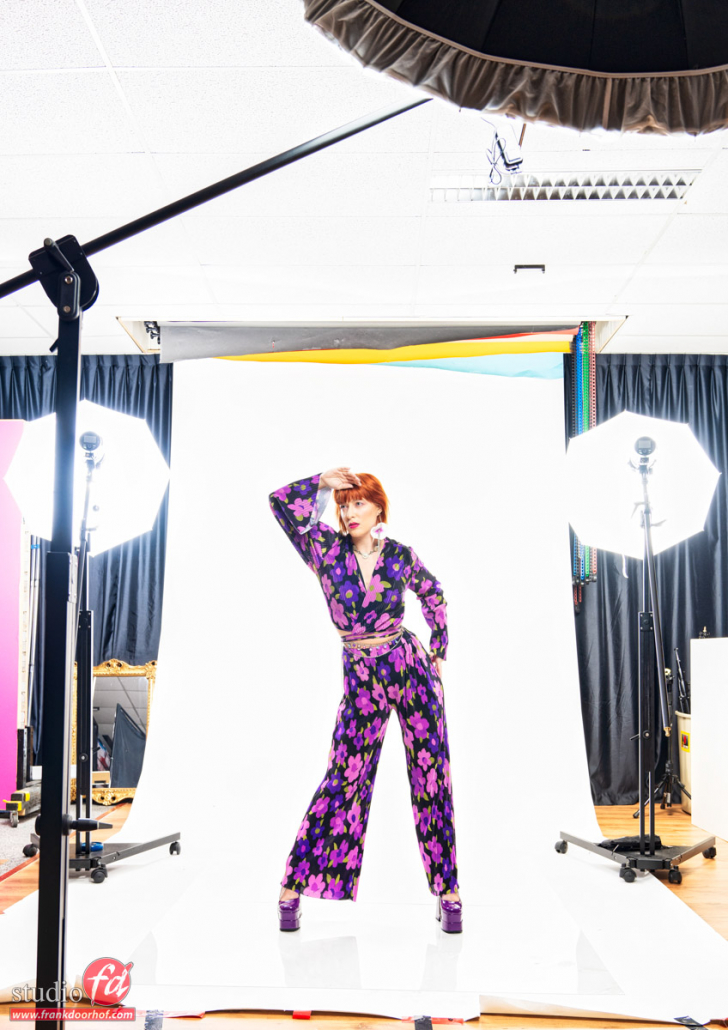
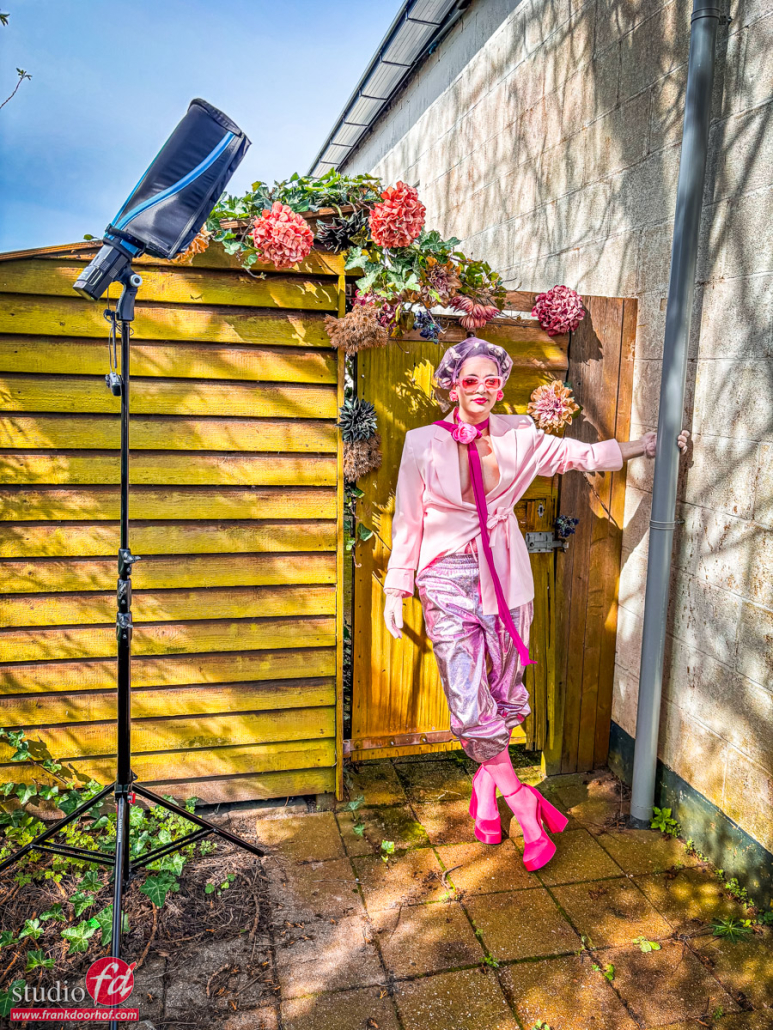
During the workshop I also try to keep the gear as minimalistic as possible, I’m using one of our Geekoto GT200s and a large reflector plus the Rogue Flashbender (Frank Doorhof edition). In the past we had to carry around rather large battery packs and “large” heads and I had to shoot on 1/125 because HSS was not supported. Now we are using so called hybrid strobes which is the perfect marriage between a studio strobe and speedlight. This combination means I can shoot ETTL and HSS on location (or manual of course) with a nice shallow depth of field if I want it, or a deeper depth of field if that fits the photo, and shoot a full day with just one battery.  In fact thanks to the large reflector we had still 10% left in the battery after the whole workshop (5 locations 4 shooters).

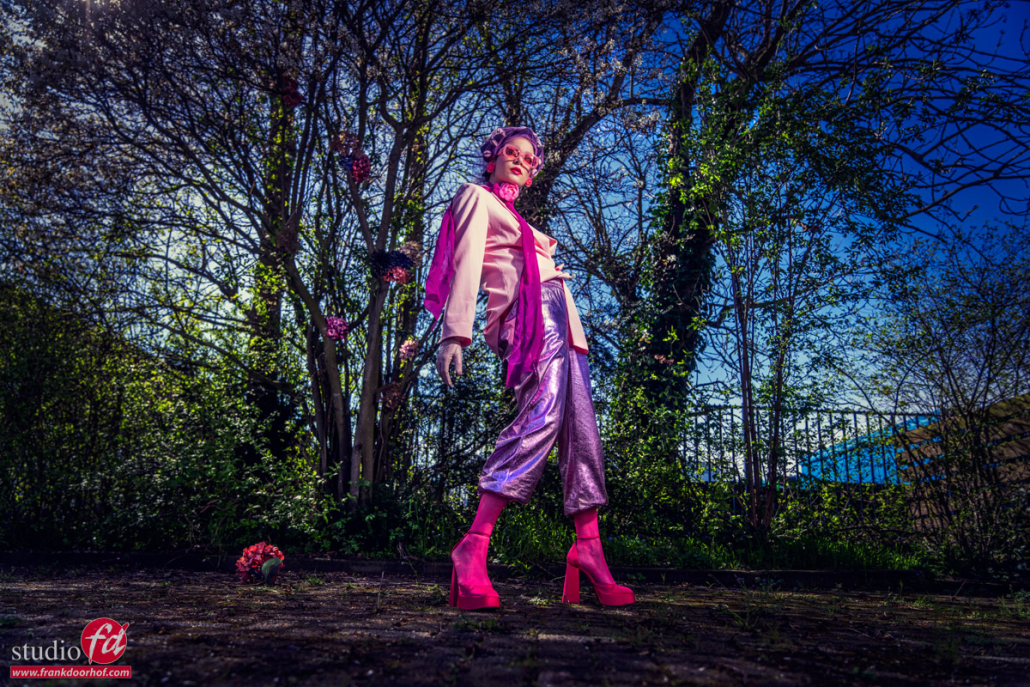
By lowering the ambient light you can really make your model pop out, now lower your shooting angle and you can already get much more interesting shots.

In the next blog post I’ll explain a bit more about the large reflector.
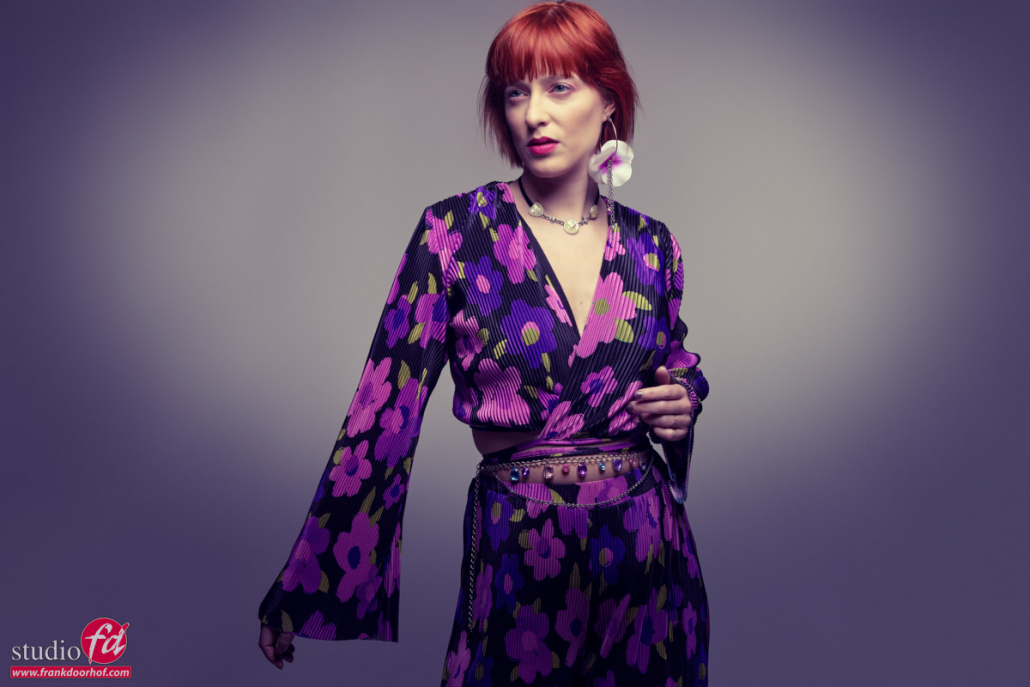
For today let’s take a look at the first setup we did with Nadine. This is just a treeline next to our studio functioning as a border between our studio and the neighbours.


In this setup we also used the Rogue flashbender for a different look.

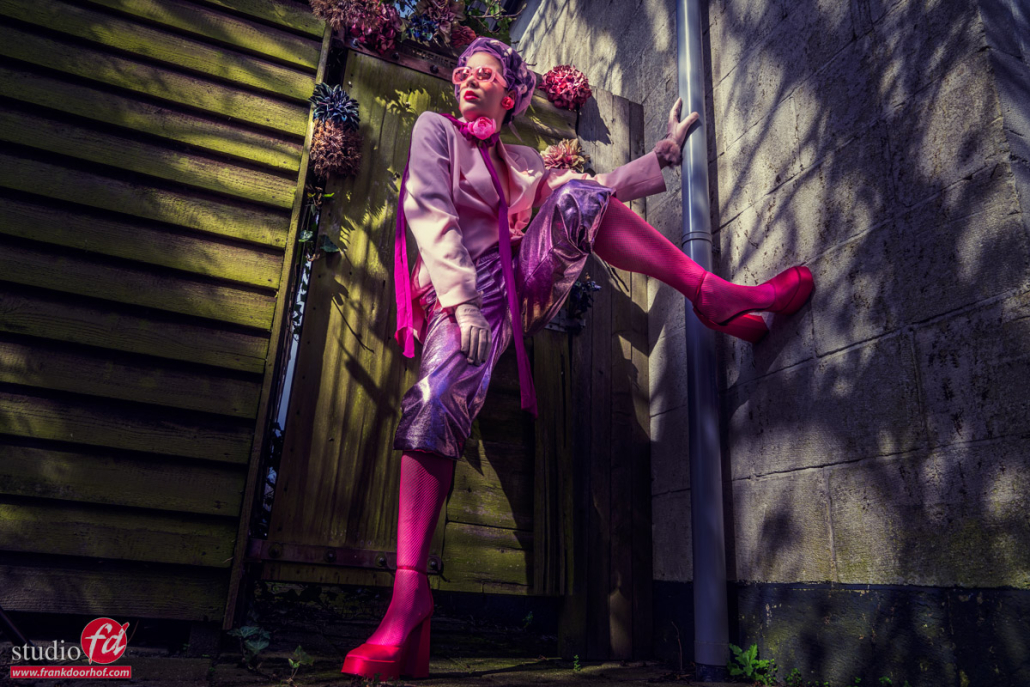
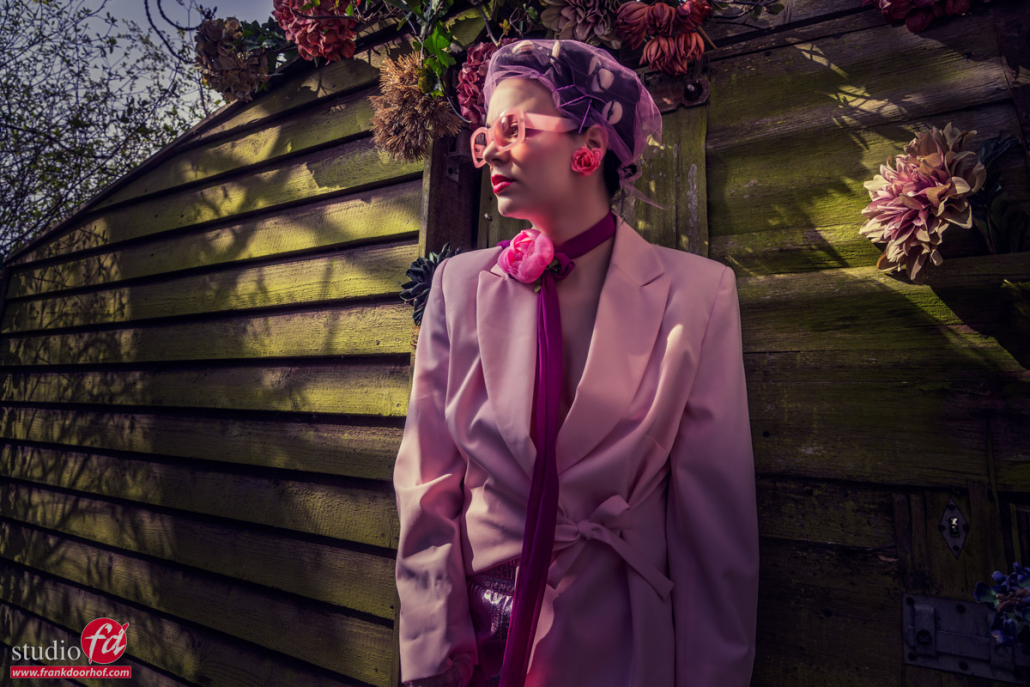
And the setup with the flashbender.
In the next blogpost I’ll show you the large reflector and explain why it’s awesome for location work.

Model/Styling : Nadine
Sunglasses : Sparks

www.fotografie-workshops.nl for the Dutch workshops
www.frankdoorhof.com/shop for my gear

Same background, totally different results

Maximize your results with this simple technique

When you shoot for a client, delivering different options is always interesting and smart.
But different options take time, right? In this blog the same background and totally different results

Well not exactly.

Be smart with your setups.

For this example, I’m using a white background.
In the front, I’m using the Rogue black umbrella with a sleeve aimed straight at our model.
The backdrop is white seamless.

You probably already know about the inverse square law, meaning light falls off over the distance.
A great way to use this is to control your background.

I’m using the white background for my first shot in this setup.
This one was shot with one Rogue umbrella in the background and one Rogue umbrella on the front.

white background but different results You can already see a very slight light fall-off in the background, which can be solved by using a second umbrella on the other side of course as explained in the previous blog posts.

But what if you just take away the umbrella(s)

again the same white background but different result

As you can see the background now turns grey and you can add some extreme vignetting in Lightroom or Photoshop (or your favorite editor) for a completely different look.

Change the distance for total control (different results)

Using the inverse square law you can change the luminance of the background very easily.
You actually have 2 options.

  1. you can change the distance from the main light to your model.
    Move it closer to the model and the background will become darker.
    Move it further away from your model and the background will become lighter.
  2. Move your model forward to get the background darker
    Move your model towards the background and the background will become lighter.

Of course, you have to re-meter the light when you change the distance between your model and your background.

Explained wrong

I just wanted to add an extra note to this blog post.
I’ve seen several videos and articles that claim that the light halves when doubling the distance, this is however wrong.
The name already gives you the answer in fact.

The intensity of the light is inversely proportional to the square of the distance
meaning in simple turns that for every doubling you lose about 75% of your light.

In usable terms.
Place your light really close to your model and the light will fall off incredibly fast. Place it further away from your model and more of the set and model will be lit and the light fall-off will be smoother.


Conclusion using the same background and getting different results

When you have to shoot with certain setups always check if you can also get usable results by turning off/on certain strobes.
You might surprise yourself when you start testing this, it can be done in much more situations than you might think.

Read the post about poses and the white background 

Read more about making the background and floor totally white 

see more pictures Frank made with the Umbrella on the RogueFlash website 

check out the Digital Classroom about Umbrellas

A pure white background and floor, plus accents on your model with just three umbrellas

A white background, floor, and accent on your model with just 3 umbrellas?

Seems impossible… it’s not

Shooting with a white background and floor is far from my favorite setup, but sometimes you have to 😀
When I started with photography the white background was hot. And used all the time (I was always more of a light grey fan). So of course I had to learn how to shoot it.

The first problem I ran into was getting the background completely white.
This is easily solved by moving the model forward and just blasting the background. But when cameras became better and the headroom larger it became more and more problematic due the the enormous amount of light reflecting back from the background. So how to get that pure white background?

Special modifiers to get a white background

The first thing I tried was of course lighting the background with open reflectors, or softboxes. And although it worked ok it never was 100%.
So enter the special background reflectors.
The idea behind these is that they “focus” the light on the background and spread it out evenly.

a modifier which makes it easier to get a white background.

By the way, it’s more easier if you have two of those.

And although it worked a lot better than a standard reflector it’s far from perfect.

The solution(s). How I made a white background and floor

Floor

So let’s not make the blog post too long and immediately jump to the solution.
Let’s start with the floor.

Without a doubt, this one was the most difficult to crack.
You can use extra strobes on the floor. But that also meant the light fall off on the model would look unnatural with loads of light on the feet.
You can use Photoshop of course. But that would mean the model just floats in the air, so you can start adding shadows again. Long story short this is not doable when you need to deliver 50 images to a client. You simply can’t edit every single image in detail unless you have a very large budget.

The solution is actually super simple and gives an awesome effect.
Just put some transparent plexiglass on the floor.
The plexiglass will reflect the light and give you an instant perfect white floor and as a bonus a great reflection.
The added bonus when using transparent plexiglass is that you can also use it on other color backgrounds and get some stunning reflection effects. But for today let’s keep it on white.

Now that we have the floor covered (pun intended) we have the background to light.

Background

For this, the solution is actually much simpler and cheaper than you might think.

white background, white floor and accent on your model


Here you can see the setup we used for the shots with Claudia from the previous blog post.

Umbrellas for a white background and floor

As you can see I’m using two white Rogue umbrellas, on our Geekoto GT400 strobes, at the back. And these are more important than you might think at first sight.
The placement of those two is vital for the end result and also gives you a lot of flexibility.

The first task for the umbrellas in the back is of course lighting the background and floor. So they are placed behind the model aimed at the background with the shoot-through part. However, a white umbrella also reflects so we have a light source that’s pretty unique. It lights both what’s in front but also what’s in the back, and that’s actually the whole secret or trick in this setup.

By choosing the right angle of the back umbrellas it’s possible to light both the background and also give a very accent light on the model.
In loads of setups, you can see 2 strobes on the background and 2 strobes as accent plus your mainlight which means you need 5 strobes for one setup.
By using umbrellas you can bring this back to just 3 strobes, and also the costs are considerably lower than using background reflectors and for example striplights as accents.

For example, we sell the Rogue fiberglass umbrellas in a nice travel kit edition with a black umbrella plus sleeve (here used as main light) and one white umbrella in a travel kit for € 116,00 the extra white umbrella retails for € 23,00

Now if you don’t like the accent lights you can always place two large flags between your model and the umbrellas and take away the accent lights.

And how about just 2 lights?

You might wonder, can we also do this (getting a white background and floor) with 2 strobes and 2 umbrellas?
That’s the nice thing about umbrellas.
The disadvantage is that the light spreads around very easily. But that’s also the advantage if you know how to control it 😀

Now when you use one umbrella on the back the accent light will of course just be on one side. But when you look at the end result it’s absolutely a setup that you can use.

Conclusion of white backgrounds

White backgrounds can always be tricky due to the amount of light that spreads everywhere.
But by using the right light modifiers and placing them correctly in the scene a lot can be done for a very low budget.
And let’s be honest. These images are straight out of the camera with just a little boost in contrast, as you can see the background is almost pure white and the only thing you have to take out are the seams of the plexiglass, which in most cases can be done in seconds.

So the next time you need a pure white background, why choose the expensive and difficult route?
Just use three or two umbrellas and some plexiglass and deliver images almost straight out of the camera.

check out the video about the Rogue Umbrella’s


Or this short, also with model Claudia about the Umbrella 

Having fun with poses. This will get you more dynamic photos and much more fun during the shoot

We all want stunning images

We all want images that jump off the screen! But how do we get free of the “forced” poses? Today I talk about breaking the forced poses and getting more dynamic photos. Like most people when I started with photography I was using the so-called “posing” books. One thing I learned very quickly was that although some worked. It always ended up looking forced, or just plain awkward. And let’s be honest, every person is different so having a posing book in hindsight does sound a bit weird.

Finding the perfect lines in the body of your model

One thing that I learned after the posing books was finding the lines in a pose.
Sometimes it’s a nice flowing S-curve in a pose, and sometimes I love working with triangles.
Now in all honesty I didn’t really look for triangles. It just happened that all the shots I  liked had some triangles in the poses.

Letting go, go with the flow in your shoot

When I started shooting more and more models and also did assignments for brands it became very clear that posing a model wasn’t a thing I liked. Luckily at that moment, I worked with some models on a weekly (and sometimes several times a week) that were always in for experimentation. Also during that period, I watched several videos on the work of LaChapelle, Avedon, Newton, etc. and the thing that really caught my eye was that they most of the time didn’t really pose the model to perfection but also just let the model go.

The moment I let go was the moment my photography changed from “stiff poses” to much more free-looking and natural poses.

The trick is actually incredibly simple.
You pose the model for 50% of what you want, angle, leaning against something, etc.
And after that you…. well just let go and shoot.

So let’s take a look at what happens.

Some examples where I let go and just shoot

During a recent workshop with Claudia, we did exactly that.
I chose the most simple background setup and lighting so the model had to do all the work.
The nice thing about this approach is that you will always get fresh looks. Instead of always seeing the same poses. But it also really loosens up the model and the mood in the studio. Put on some music and just let the model literally flow through the poses and keep shooting.

So let’s take a look at some of the results from a few minutes.

How do you get more dynamic photos? Go with the flow.  How do you get more dynamic photos? Shoot and find angles and curves in your model's body.

Now it might not immediately catch your eyes, but when you work this way you will find that not only the poses look much more natural and “flowing” but also the expressions of your model will be much more relaxed. and that is the start of more dynamic photos.

And of course, don’t forget some close-ups 😀

don't forget te close-ups How do you get more dynamic photos? Go with the flow. Let go. Shoot and find angles and curves in your model's body.

Conclusion on how to get more dynamic photos

Of course, photography is very personal, and what works for one won’t work for everyone.
However, over the years I’ve found out that getting the model at ease and relaxed really boosts your photoshoot and gives much better results than just pushing a model into a pose.

So what is your next move to get more dynamic photos?


Claudia is an amazing multivalent! check out the blog where I used seamless paper as a dress

Fashion shoot? use this is a great backdrop for more impact


Check out this video about using a reflector