Tag Archive for: strobes

Outside fashion shot for sunglasses with extreme styling and flash Part V : let’s talk about something grungy
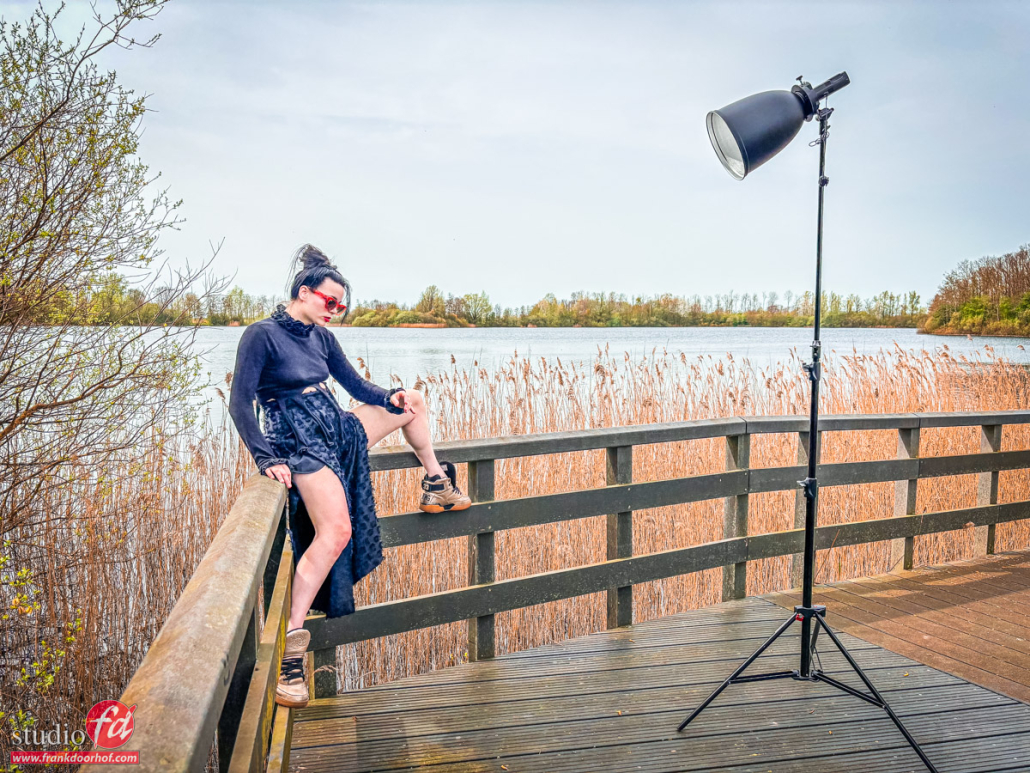
The final setup

Today in the blog the final setup from the workshop “on location in Emmeloord”
In this workshop we use locations close to our studio, that at first sight might look uninteresting, but by using light/poses/angles and of course styling are still suitable to create awesome images.

If you didn’t already I highly recommend reading the previous blogposts.
Let’s talk about the flash
Let’s talk about gear
Let’s talk about storytelling 
Let’s talk about backgrounds and angles

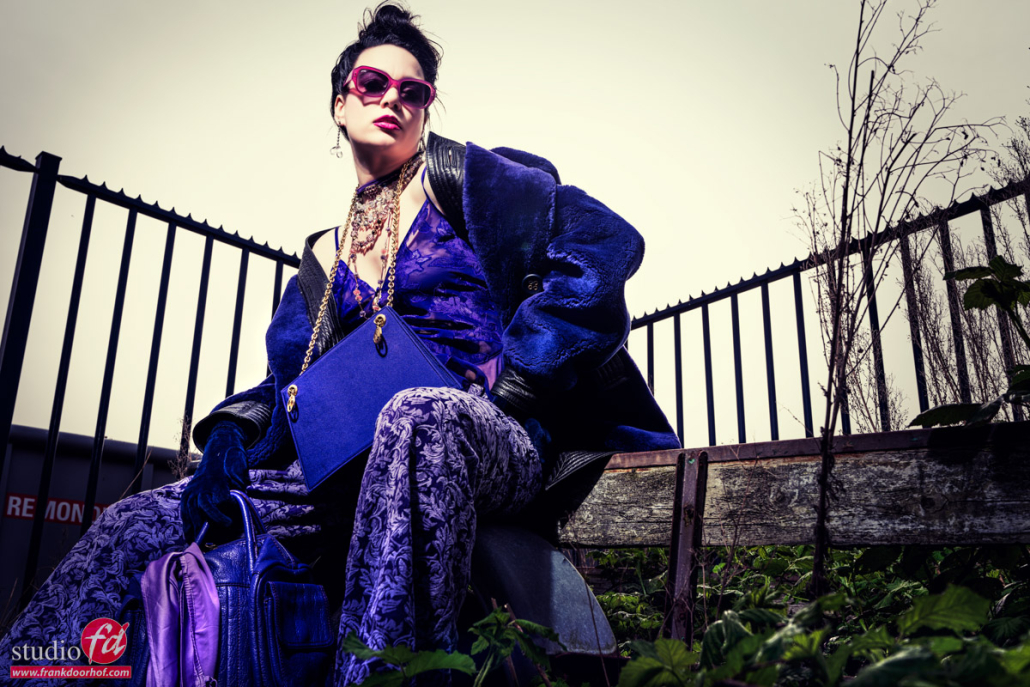
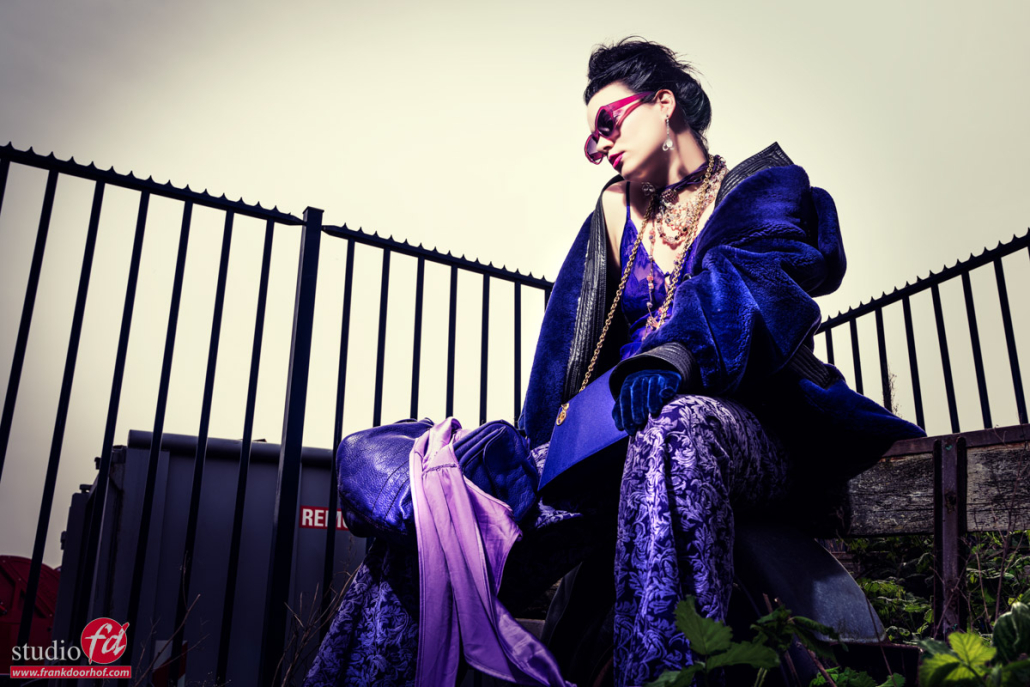
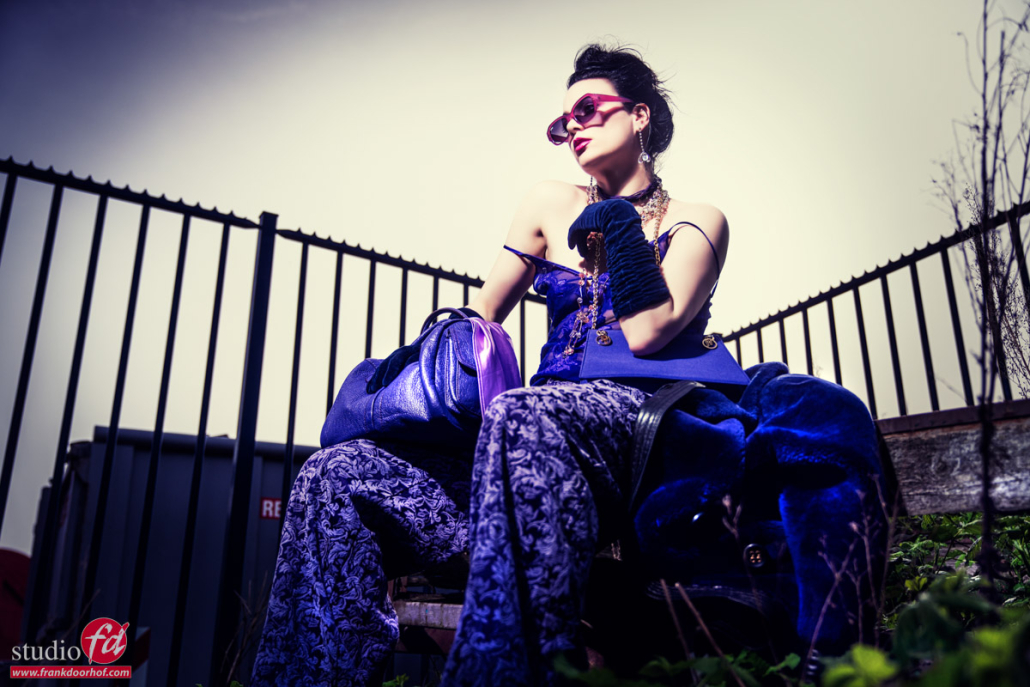
For the final setup we are still using the same lighting setup with the same Geekoto GT200 with a large reflector.
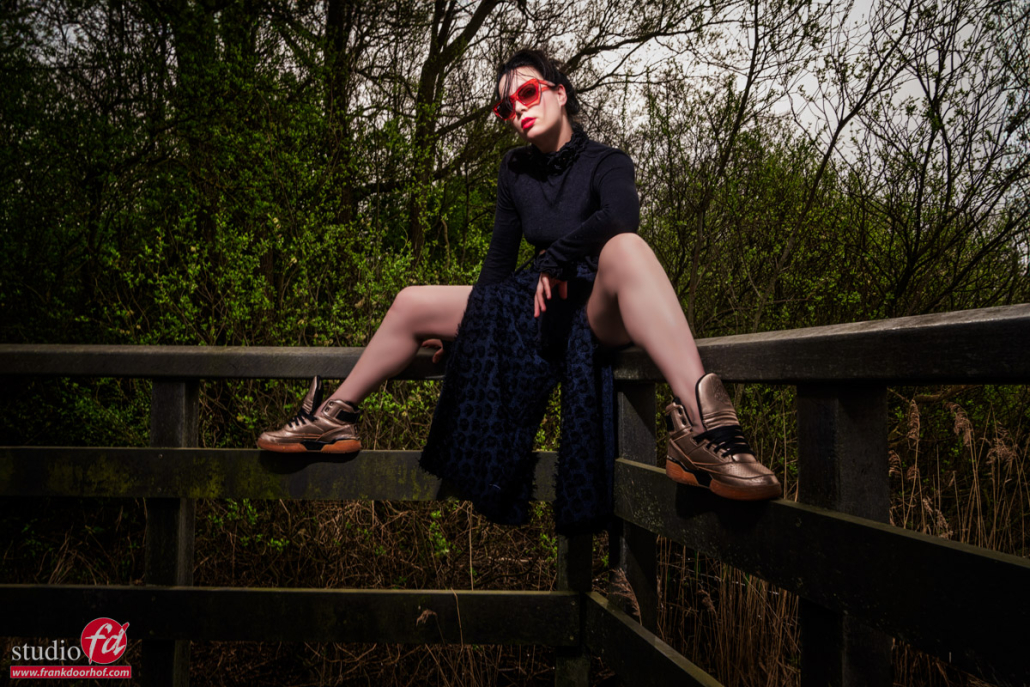
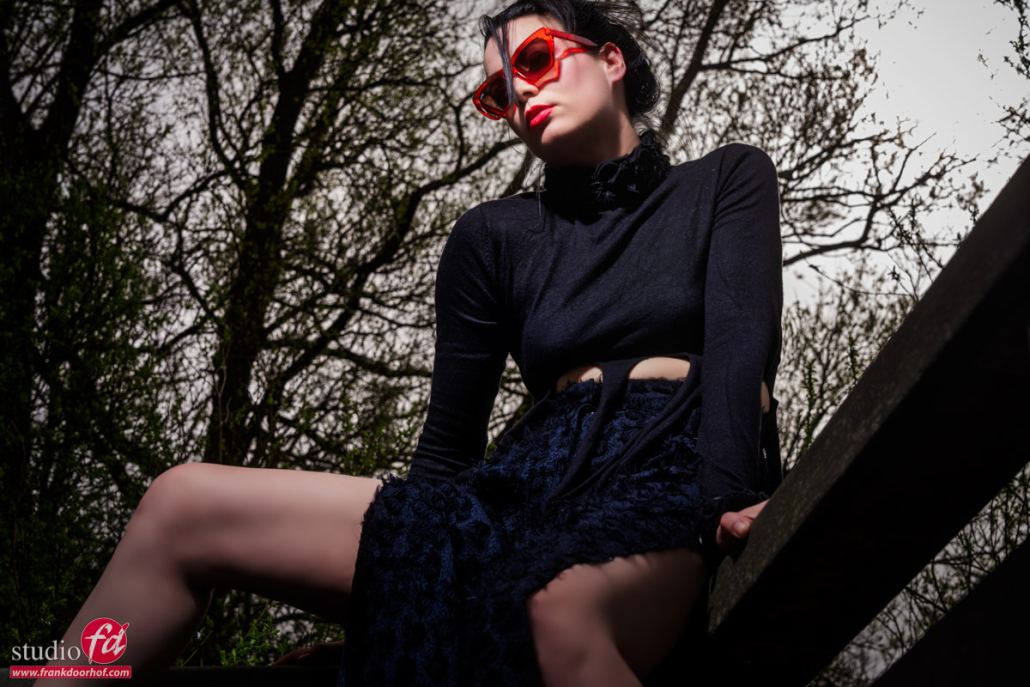
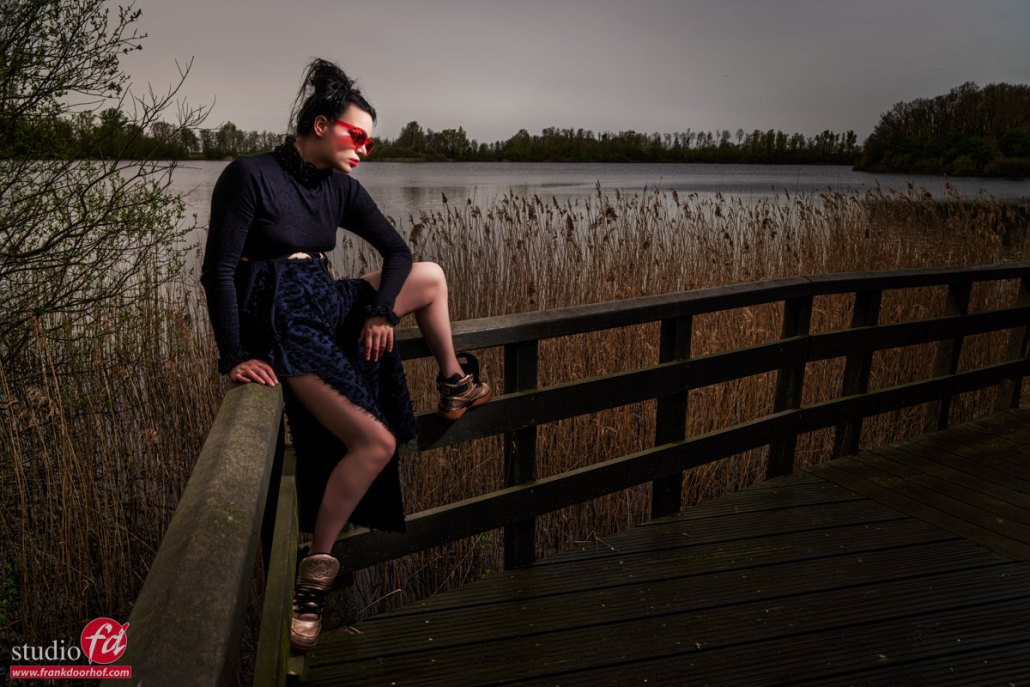
This is what we sometimes call our “outside studio” or in other words a part of our studio (away from the public eye) where we just leave everything (within reason), so it looks very “grungy”/”urbex” this part is based around an old trailer with some bushes and is great as a location, especially when shooting from a low angle the fence in the background and the angle it creates can be very nice.

In this setup I’m also using HSS for the last images.
During the workshop I did not use HSS because when working during a workshop it’s better to shoot with a so called “dumb” trigger, this means I can setup the strobe with my Geekoto Commander  and just let the attendees shoot via their own trigger. HSS and ETTL only work correctly with a commander that fits your system. With Canon, Nikon and Sony we have special commanders, but this workshop we also shot with a Leica so the choice was made to let HSS rest till the end.

The main advantage of shooting HSS is that you can break the 1/125th second limitation of normal cameras/strobes.
By the way, Sony just released the first camera with a global shutter that will make it possible to shoot on much faster shutter speeds with strobes not using HSS. This is a HUGE deal for flash photography on location and will change the way you can work forever. I hope to be able to test one of them in the near future.

With HSS you can break this rule which means you can shoot day2night but still have a very shallow depth of field.
Now don’t just set your camera to 1/8000 and F16 ISO100 because you will be disappointed.
HSS is awesome but it takes a HUGE hit on your output. Where with a large reflector shooting F22 on ISO50 is no problem at all with HSS you will end up with a pitch black image not even seeing the strobe.


HSS Technique

Also with HSS I’m using the same technique.
I set the camera to manual and use the EVF (or lightmeter) to determine the look I like. But I do take into account that I leave the aperture below F4 and I try to keep the shutterspeed sensible, and only at the speed I need. When you are used to setting up for HSS you will find that it really adds a lot more different looks to your arsenal, and… that’s always a good thing 🙂

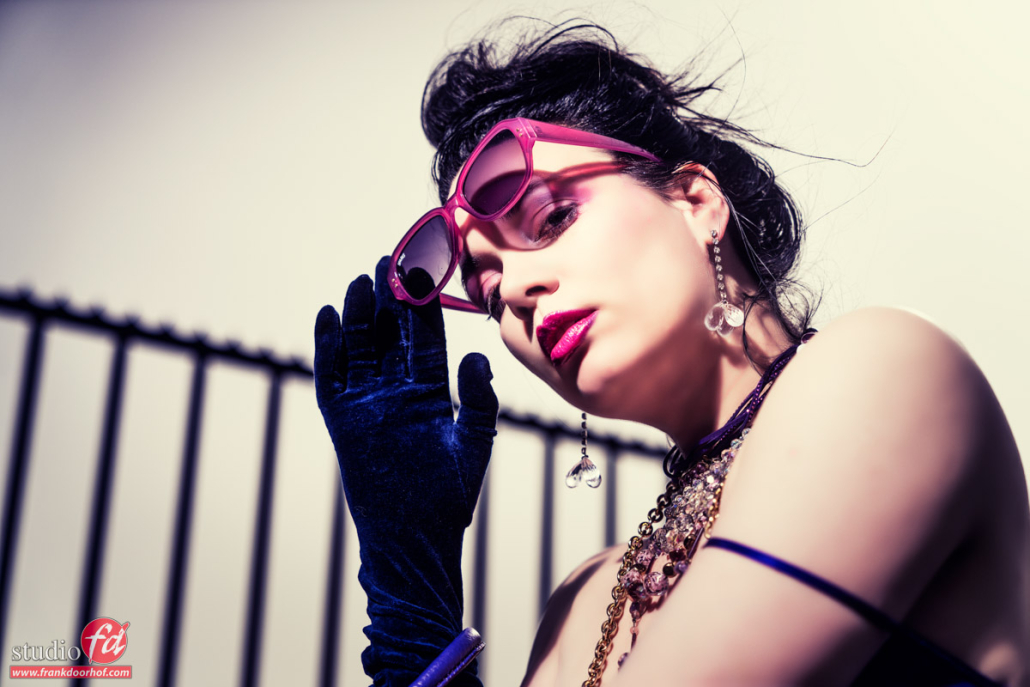
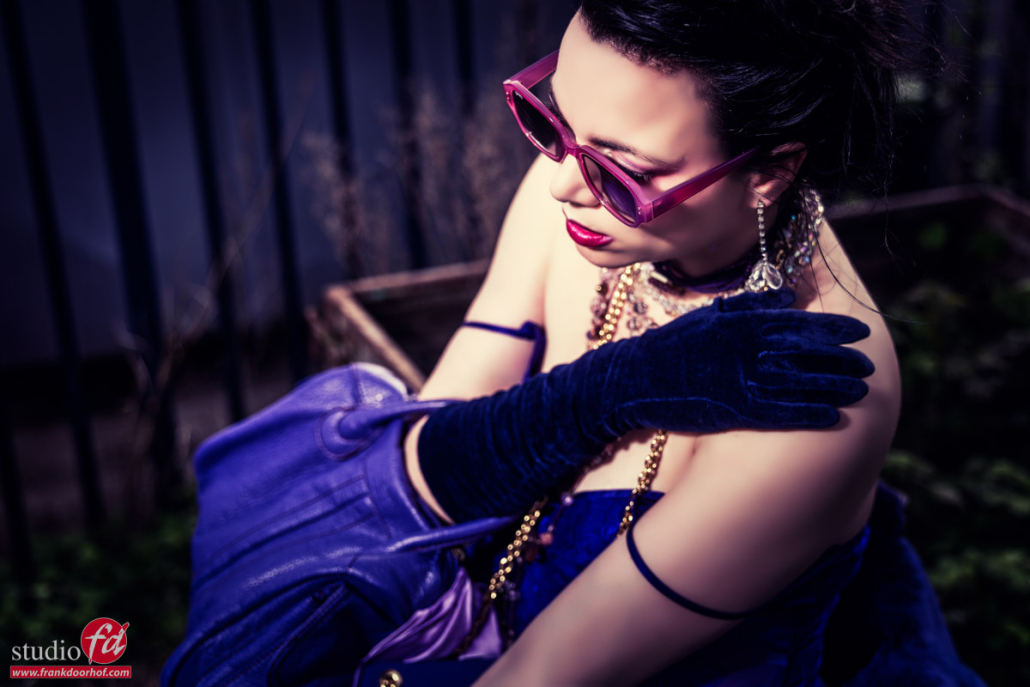
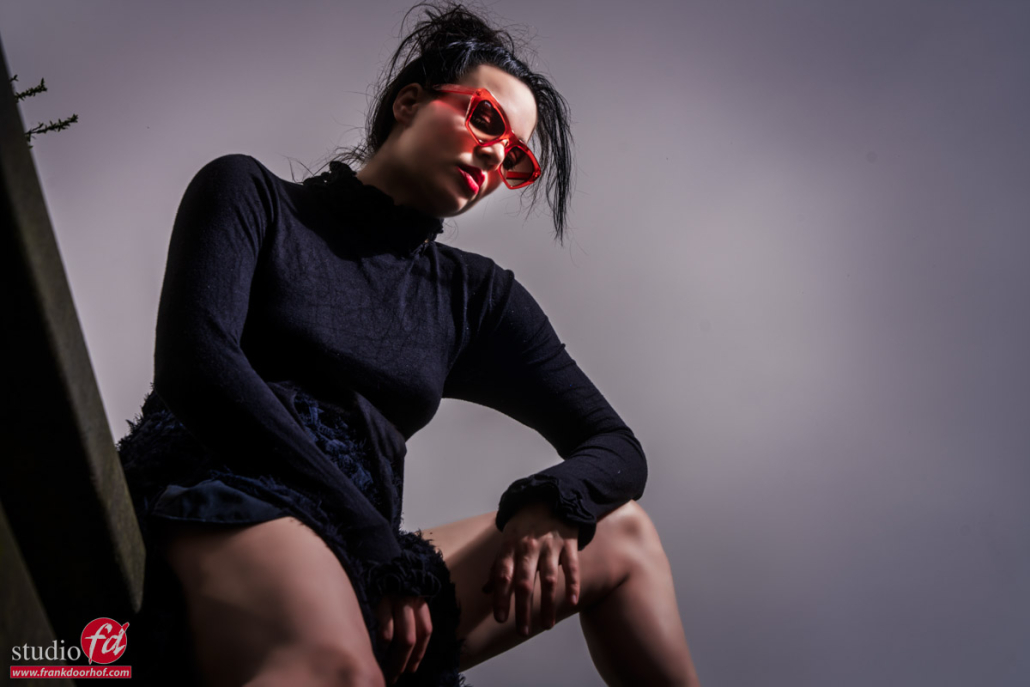
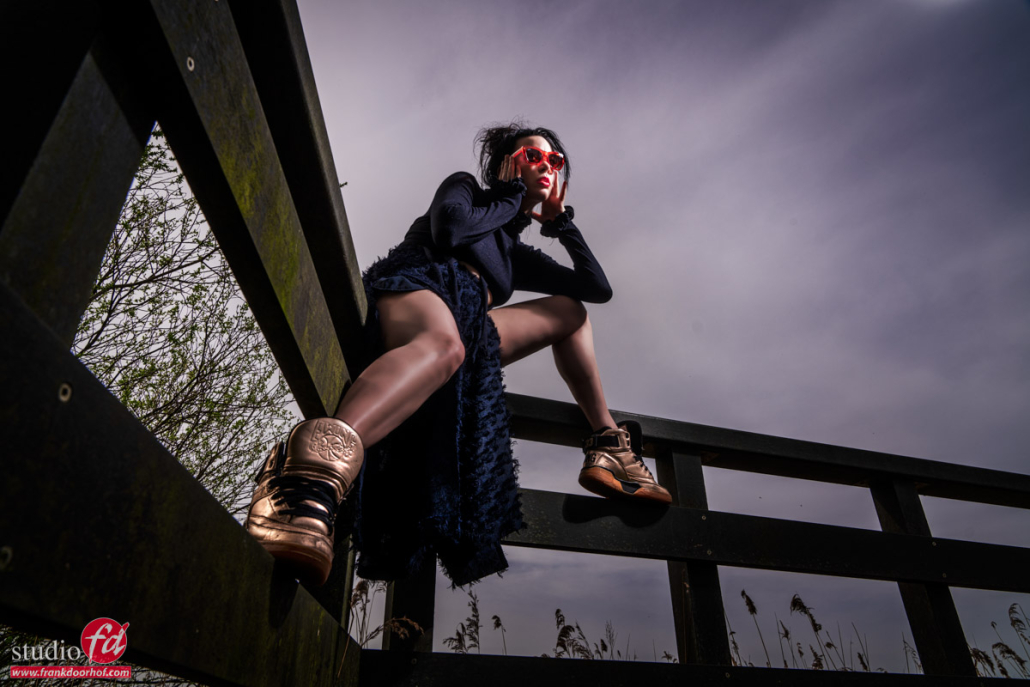
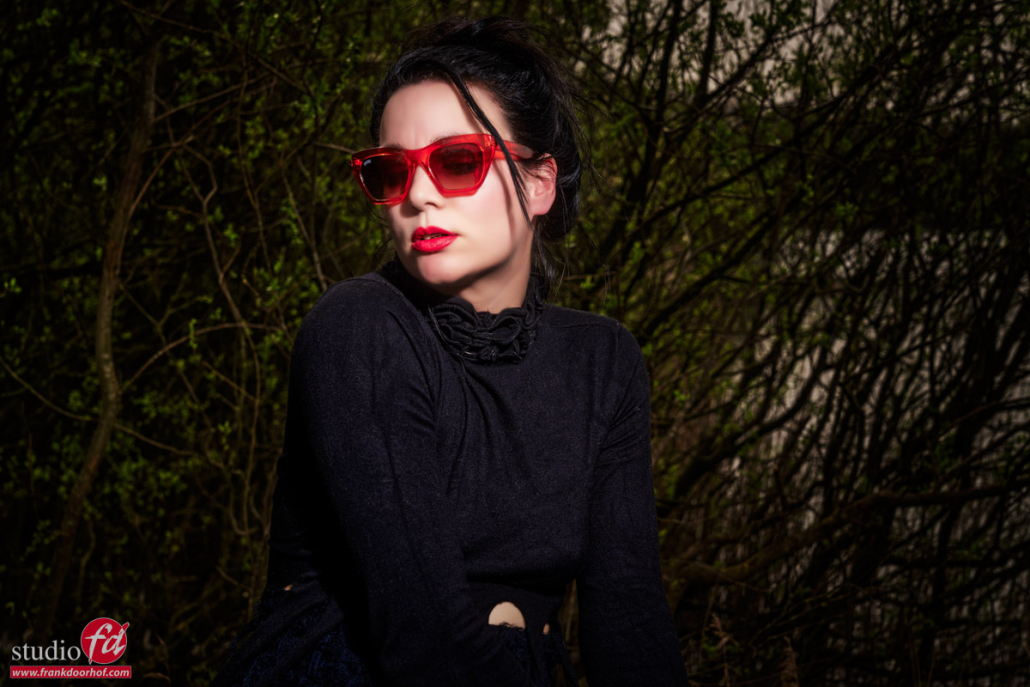
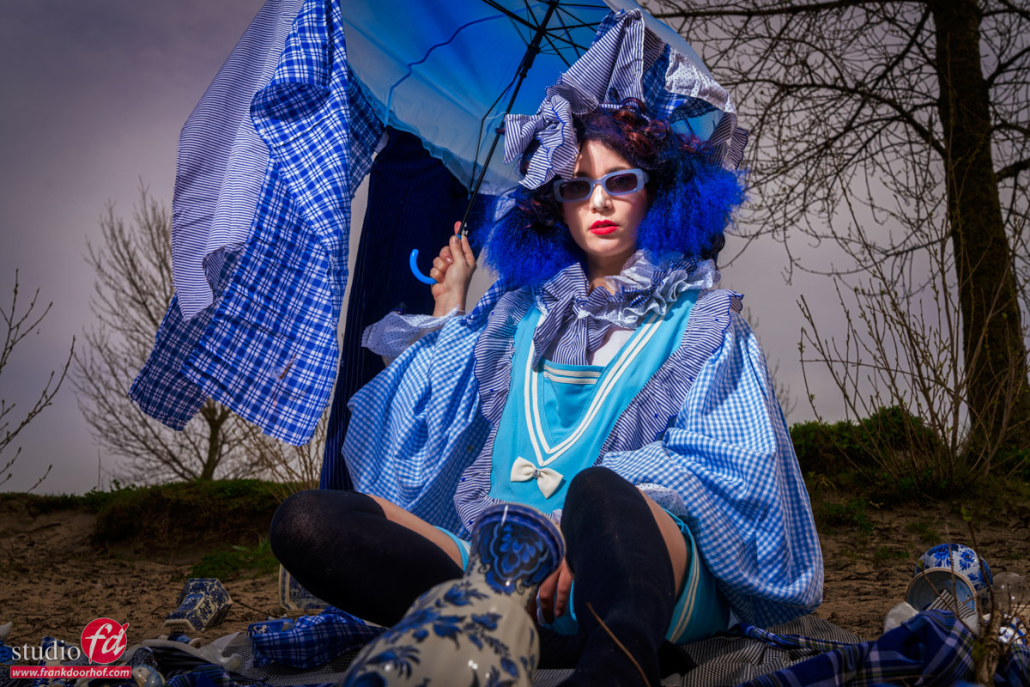
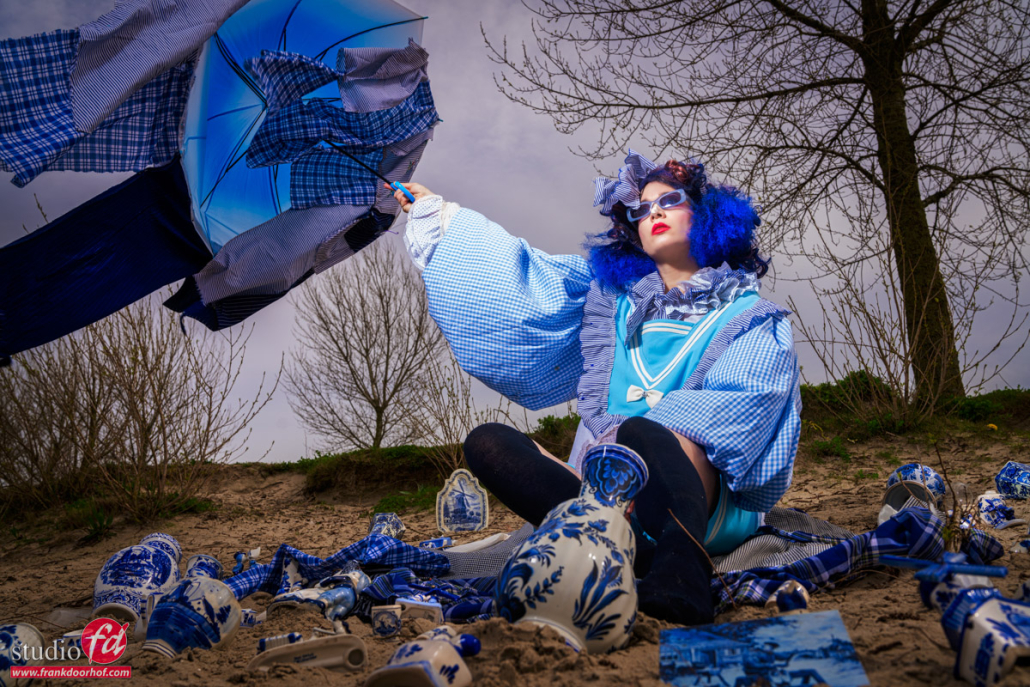
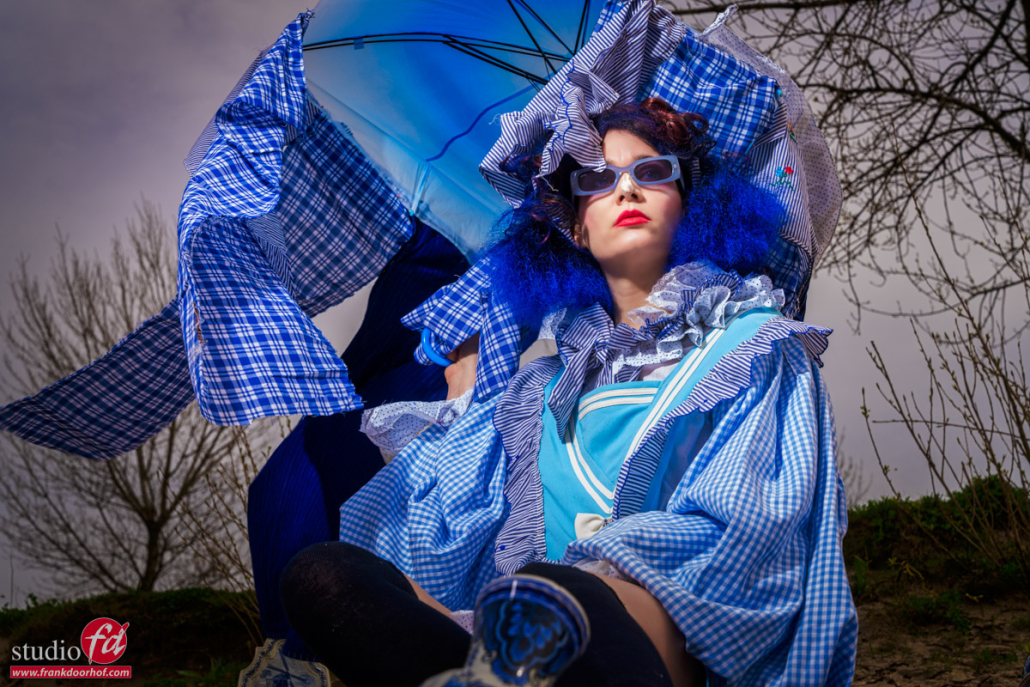
So let’s take a look at the final results… can you spot the images I was shooting with HSS?

Model/Styling : Nadine
Sunglasses : Sparks

www.fotografie-workshops.nl for the Dutch workshops
www.frankdoorhof.com/shop for my gear

Outside fashion shot for sunglasses with extreme styling and flash Part IV : let’s talk backgrounds and angles

Wow that’s a different…

This is one of the most heard comments when we use extreme differences in the background, especially when the model wears something more eye-catching, or dark/bright.

Chasing the perfect background on location is one of my favourite things. And it’s not always that the most interesting looking background is also the best. It’s great to have a cool background but we don’t always want them to compete with each other. I always try to choose a background that will help my model to pop-out, or disappear into.

This is the 4th part of this blog series and I highly recommend first reading the previous ones.
Let’s talk about the flash
Let’s talk about gear
Let’s talk about storytelling

The forest/beach

One of the things I love about the area we live is the diversity for photography.
Although you see totally different images in this series they are all shot in walking distance from each other, or right next to our studio. And trust me, I’m pretty sure you will have loads of interesting locations near your home, you just have to look with your “photographers-eyes” 🙂

In this case Nadine was wearing a non reflective black outfit (thank you very much) and some cool Sparks red sunglasses.
I didn’t tell you this yet, but during this workshop we also shot some images for our friends from Sparks sunglasses, a cool trendy brand of sunglasses for which we also did the introduction shoot for their new collection. Most of the time I also ask some sample to use during workshops and give our client some extra material which can promote their brand, my work but also the models. A win-win situation.

Anyway.
Because Nadine was wearing black it made it a challenge to shoot against the overcast sky, or against the dark forest.
One could say it’s impossible because you will blow out the sky, or block up the shadows, and with a dark forest the model will disappear.
yes, that could be one way to look at it.
OR….
You use exactly that “problem” and use it to your advantage.


The shoot

Here is the setup of the shoot.
I’m using the same Geekoto GT200 with a large reflector.
I love this location for the strong leading lines and the way the model can pose with the bridge parts. Also the two totally different backgrounds by just changing your angle makes this one of my favourite locations to use for workshops and shoots.

I love to shoot from more extreme angles on this location and using a more wider angle gives that really nice “distortion” in the image that draws the viewer towards our models face. I also use this a lot in the studio. Wide angles can be terrible for portraits or even full body shots, but if you use them carefully they can be awesome.

Because the clothing was so dark, Nadine’s legs were getting a lot of light/attention, so when you find yourself in a situation like this, use a grid on your strobe or make the model cover part of the legs, you do want to see some, but not too much light areas in the darker areas of the shot. hope that makes sense.

I decided to actually embrace the dark clothing and use it create some really nice edgy contrast in the shots, add the red sunglasses and some cool poses, and you have a very simple lightsetup, an ok location but some killer shots.

Model/Styling : Nadine
Sunglasses : Sparks

www.fotografie-workshops.nl for the Dutch workshops
www.frankdoorhof.com/shop for my gear


Outside fashion shot for sunglasses with extreme styling and flash Part III : let’s talk storytelling

This is it

I think we can all agree that gear, lighting, styling, location etc. are all important for a successful shoot. Although during this workshop series we already saw that the location can be transformed quite easily from ok to wow by choosing the right angles and lighting/styling etc.

If you missed the previous ones you can read them here (highly recommended)
Let’s talk about the flash
Let’s talk about gear

Ok so now it’s about story telling, and what do I mean with story telling.

When we look back into history, even as far as the cavemen, the main reason to create “art” was to tell stories. Ranging from one man killing a Bison in the caves to whole paintings containing scenes from the Bible, and everything in between. Now of course there are also still lives and landscapes but I hope you know what I mean 🙂

When we look at what we see online today it’s a boatload of selfies, photos of food or things I can’t mention here. We are bombarded with a huge amount of images every single day. But when is the last time you really stopped to look at something? or when was the last time you were really impressed with an image?

Most of them probably have have the same element

And that’s story telling.
Now story telling can be done in just one image, but also in a series.

During the workshop on location in Emmeloord we find locations that are not immediately awesome, but I show the attendees how, together with an awesome model and styling in this case, you can transform those locations to something great with choosing the right lighting and shooting angles.

This is the second set of that workshop.
For this setup we went to the local beach, we chose a location with some trees behind Nadine and a slight rise.
Nadine brought a lot of Delfts blue we used as props spread around her.
Now the styling on it’s own already did a lot but when I saw that the umbrella was breaking down I decided to also use something else.

Manipulate the sun/ambient light

We talked about this technique a few times in the blog and during digital classroom episodes.
Dragging the shutter.
What I do outside to get the look I like :

  1. First I make sure my cameras EVF is in emulation mode
  2. I will set my camera to “manual” mode and the shutterspeed to 1/125 (when shooting without HSS) and the lowest ISO.
  3. Now I will look through the display and adjust the aperture till I think the scene looks like I want.
  4. Now I will set it ONE stop darker.
  5. Take the Aperture you see in camera for the look you like
  6. Use a lightmeter to meter the strobe at the aperture you liked
  7. start shooting with a shutter speed of 1/60 but with the set aperture

You might wonder why I shoot at 1/60
It’s very easy to explain luckily.
When shooting without HSS I can not shoot faster than 1/125 (sometimes 1/200) this means when I shoot with strobes and I think the background should be darker I have to adjust my strobes, or when I want to experiment I end up with different apertures, meaning different looks due to depth of field. This breaks the total look of a series and can sometimes work and sometimes not.

By adjusting the strobes one stop higher than I thought was perfect and lowering the shutter speed by 1 stop I’m getting the exact result I liked at the start with an added bonus. When I want the background darker I can raise my shutter speed to 1/125 or sometimes 1/200 and get a much darker background, but because I’m shooting with strobes I can also go as a low as 1/30 and sometimes even 1/15th this gives me a nice dynamic range to work with without breaking the look of the shot.


The weather

I’m nog just using this technique to adjust the look of the shot, but also to be able to react to changing lighting on location.
And in this case for story telling.
The following series was shot within 5 minutes, so the lighting didn’t really change, however because the umbrella was breaking down I decided to raise the shutter speed and make the whole scene look darker the more the umbrella broke down.

As you can see in the next series, changing the look of a scene by the shutter speed is fast and easy and has a huge impact on the photo. I love to use it.

Let’s first take a look at the gear used :

Annewiek is holding the lightstand on which the Geekoto GT200 is mounted with a large reflector aimed at the model.

And that’s all actually.
So let’s take a look at the results.

Model/Styling : Nadine
Sunglasses : Sparks

www.fotografie-workshops.nl for the Dutch workshops
www.frankdoorhof.com/shop for my gear

Same background, totally different results

Maximize your results with this simple technique

When you shoot for a client, delivering different options is always interesting and smart.
But different options take time, right? In this blog the same background and totally different results

Well not exactly.

Be smart with your setups.

For this example, I’m using a white background.
In the front, I’m using the Rogue black umbrella with a sleeve aimed straight at our model.
The backdrop is white seamless.

You probably already know about the inverse square law, meaning light falls off over the distance.
A great way to use this is to control your background.

I’m using the white background for my first shot in this setup.
This one was shot with one Rogue umbrella in the background and one Rogue umbrella on the front.

white background but different results 
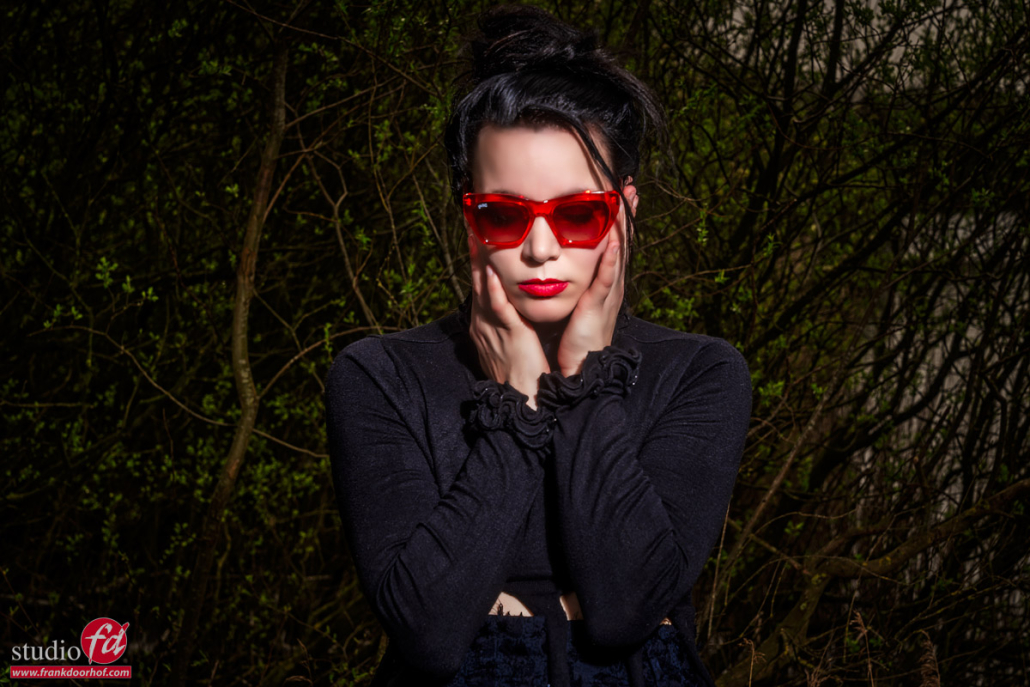
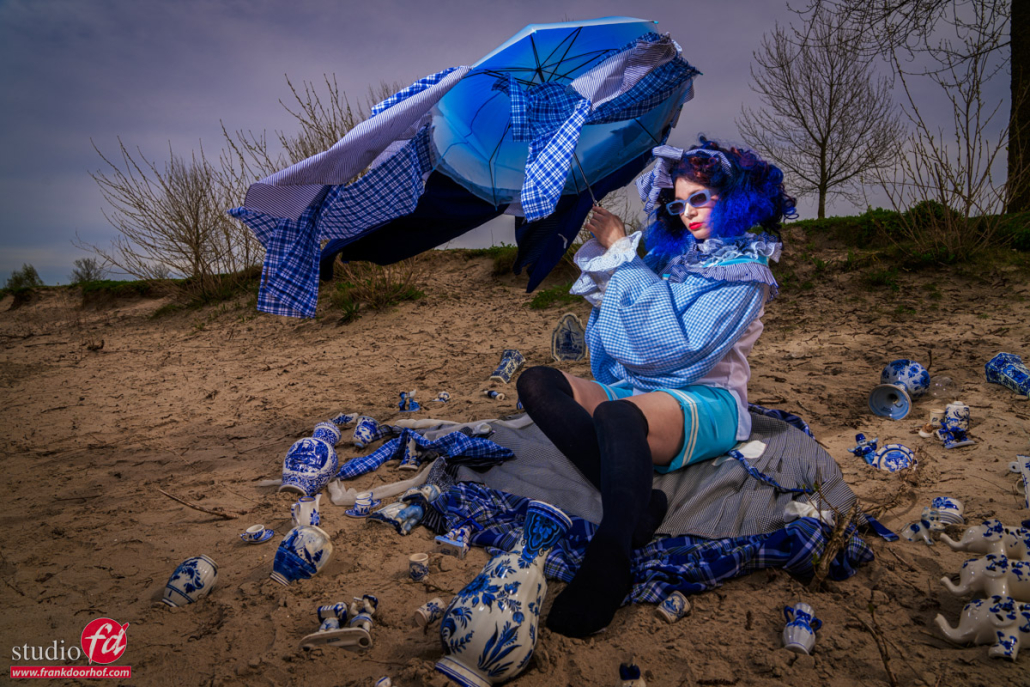
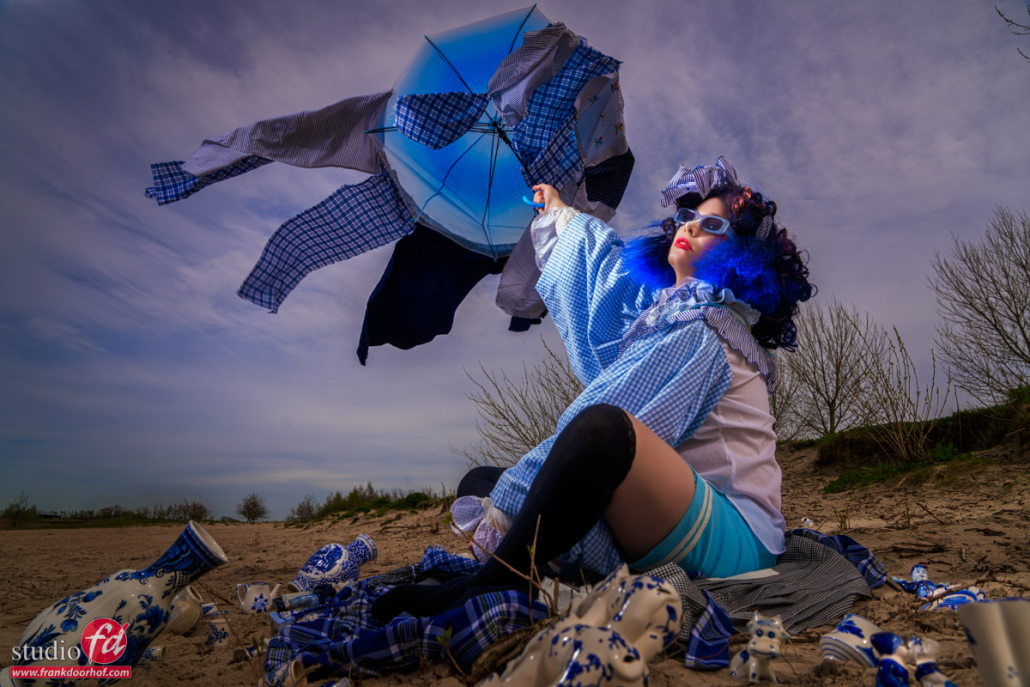
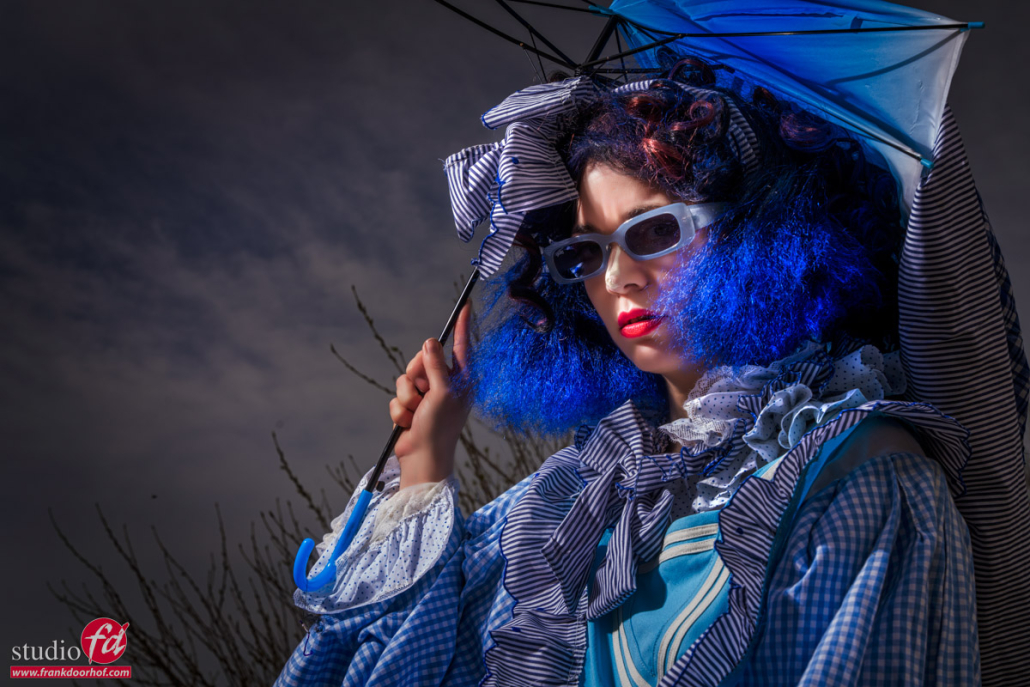
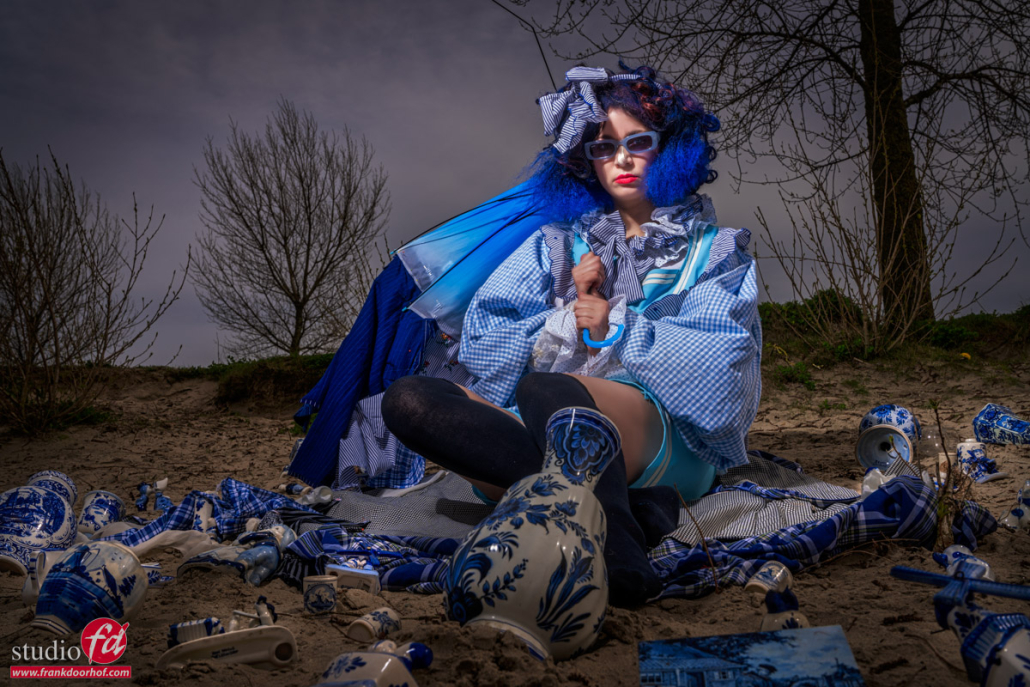
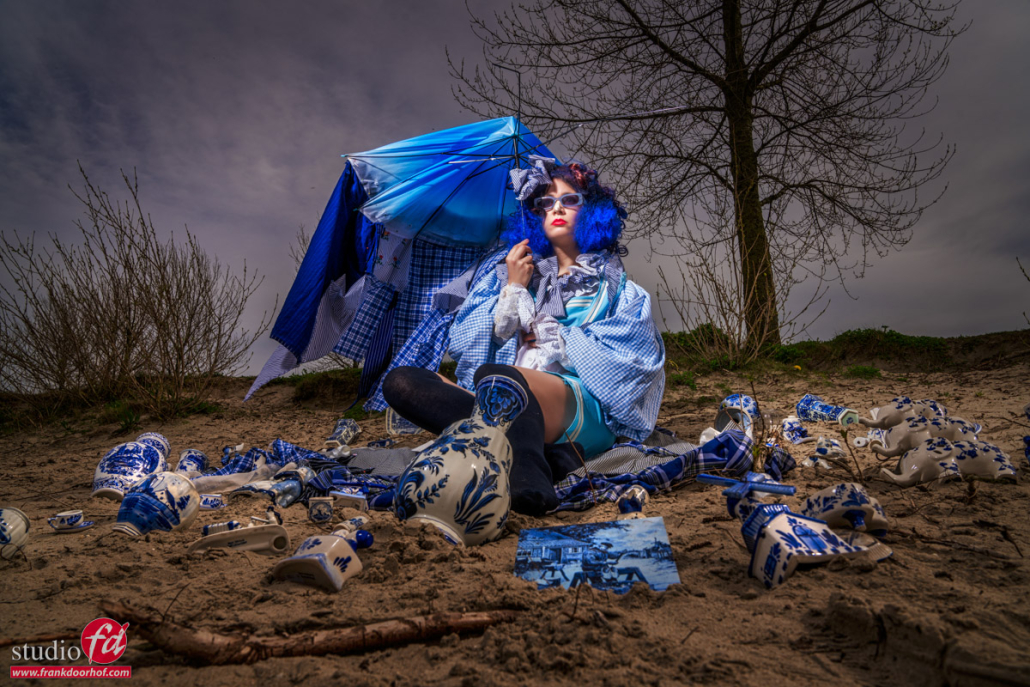
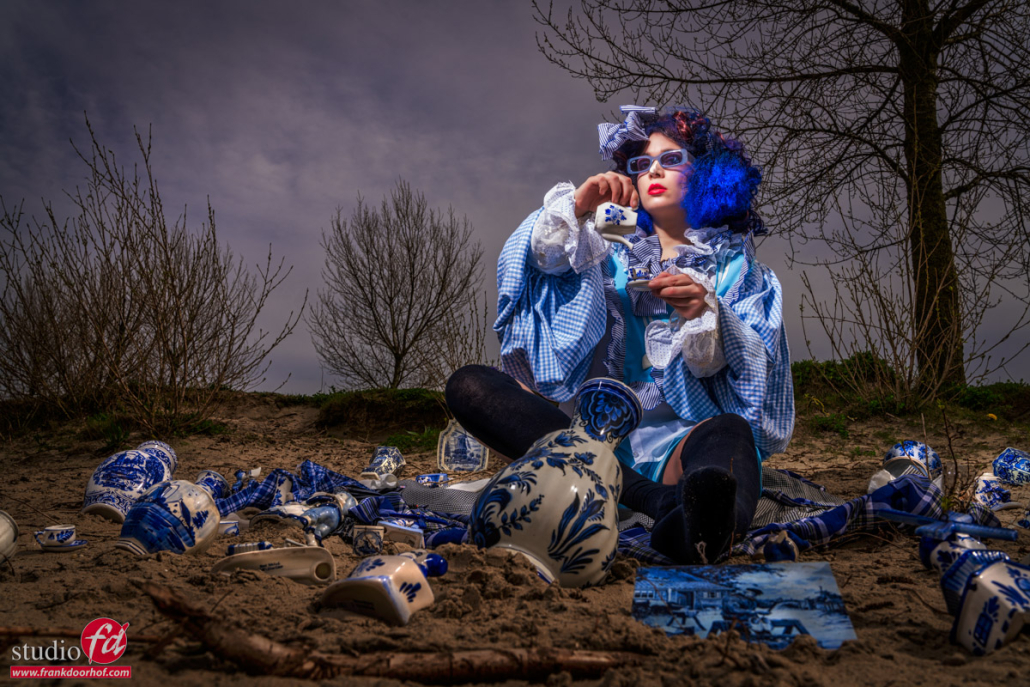
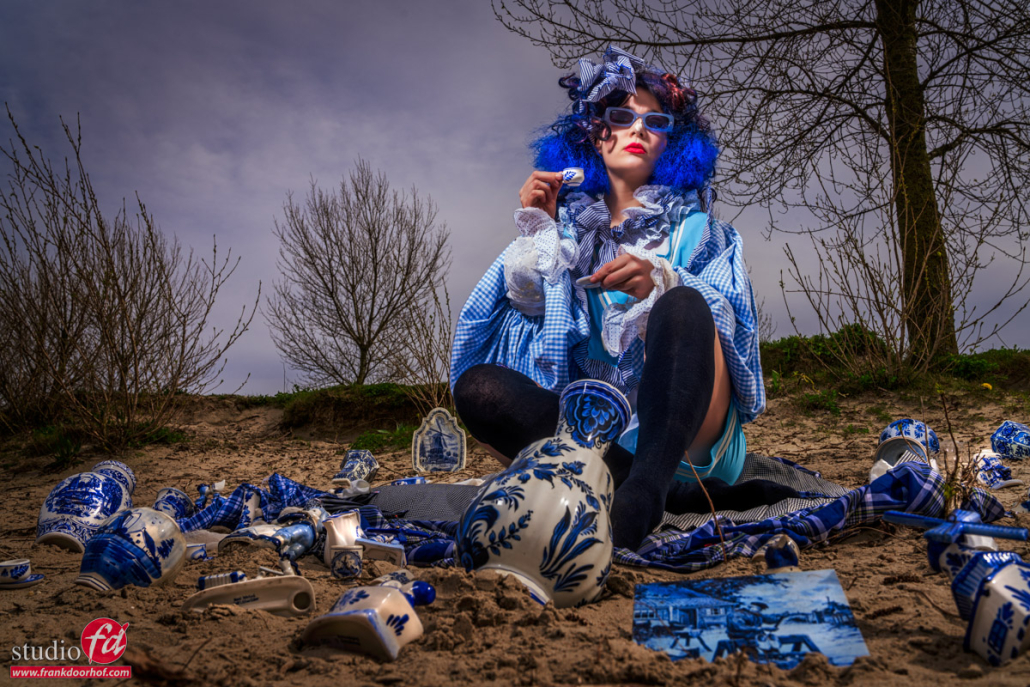
You can already see a very slight light fall-off in the background, which can be solved by using a second umbrella on the other side of course as explained in the previous blog posts.

But what if you just take away the umbrella(s)

again the same white background but different result

As you can see the background now turns grey and you can add some extreme vignetting in Lightroom or Photoshop (or your favorite editor) for a completely different look.

Change the distance for total control (different results)

Using the inverse square law you can change the luminance of the background very easily.
You actually have 2 options.

  1. you can change the distance from the main light to your model.
    Move it closer to the model and the background will become darker.
    Move it further away from your model and the background will become lighter.
  2. Move your model forward to get the background darker
    Move your model towards the background and the background will become lighter.

Of course, you have to re-meter the light when you change the distance between your model and your background.

Explained wrong

I just wanted to add an extra note to this blog post.
I’ve seen several videos and articles that claim that the light halves when doubling the distance, this is however wrong.
The name already gives you the answer in fact.

The intensity of the light is inversely proportional to the square of the distance
meaning in simple turns that for every doubling you lose about 75% of your light.

In usable terms.
Place your light really close to your model and the light will fall off incredibly fast. Place it further away from your model and more of the set and model will be lit and the light fall-off will be smoother.


Conclusion using the same background and getting different results

When you have to shoot with certain setups always check if you can also get usable results by turning off/on certain strobes.
You might surprise yourself when you start testing this, it can be done in much more situations than you might think.

Read the post about poses and the white background 

Read more about making the background and floor totally white 

see more pictures Frank made with the Umbrella on the RogueFlash website 

check out the Digital Classroom about Umbrellas