Tag Archive for: shoot

The perfect lens……

Let’s talk a bit about lenses and looks.
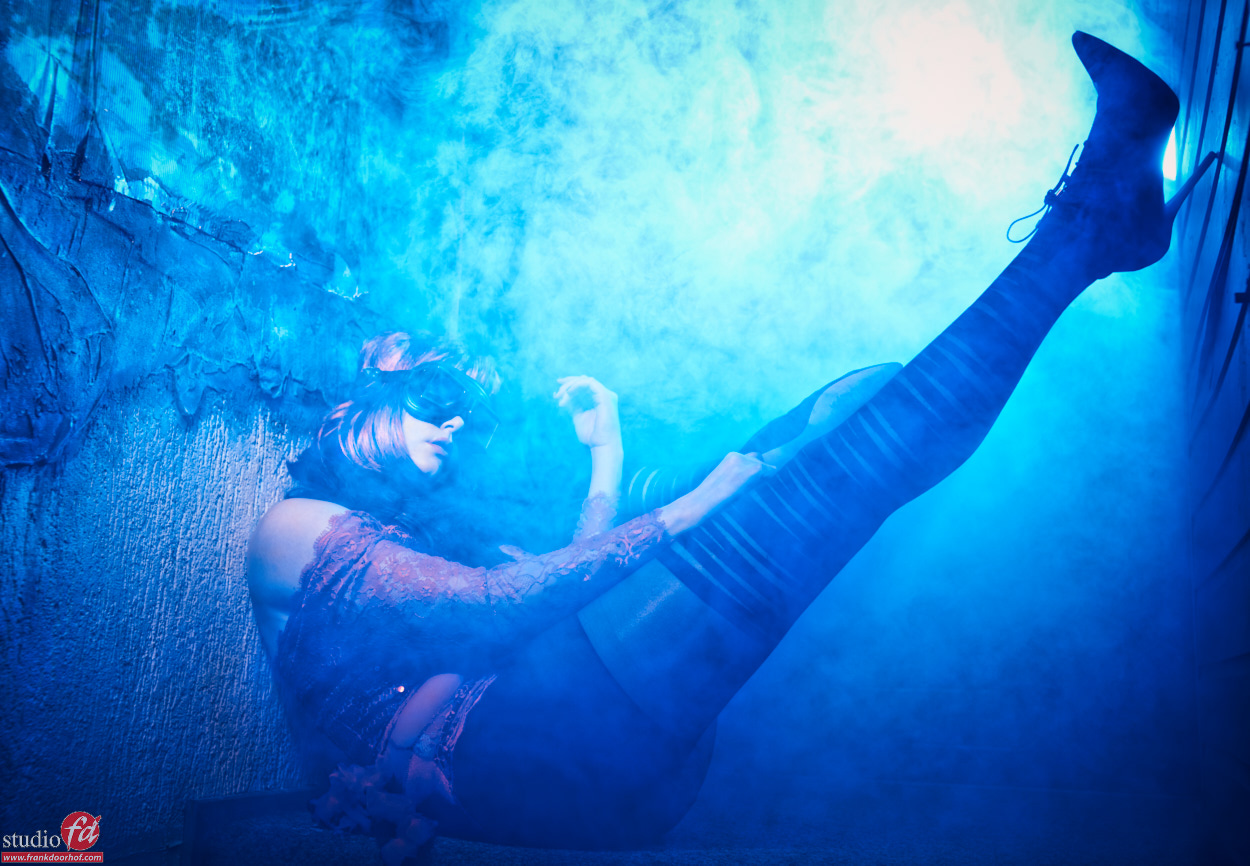
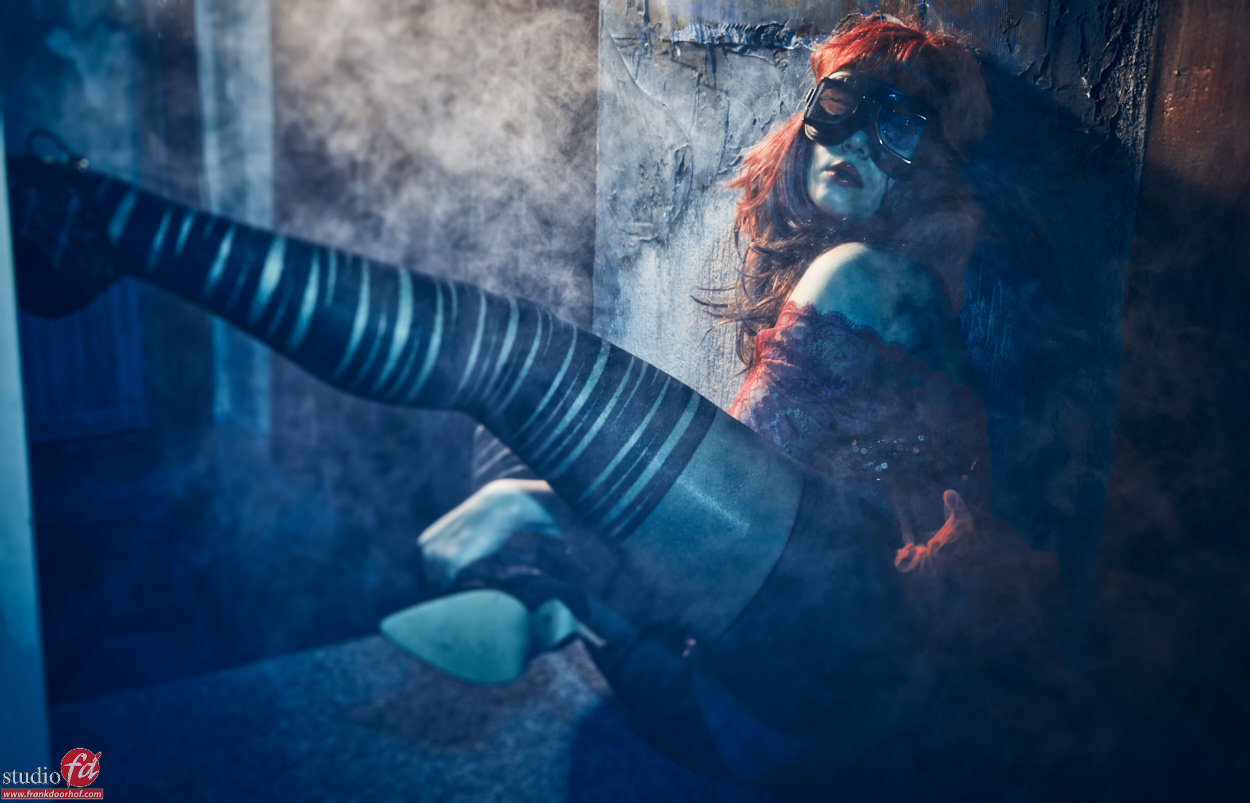
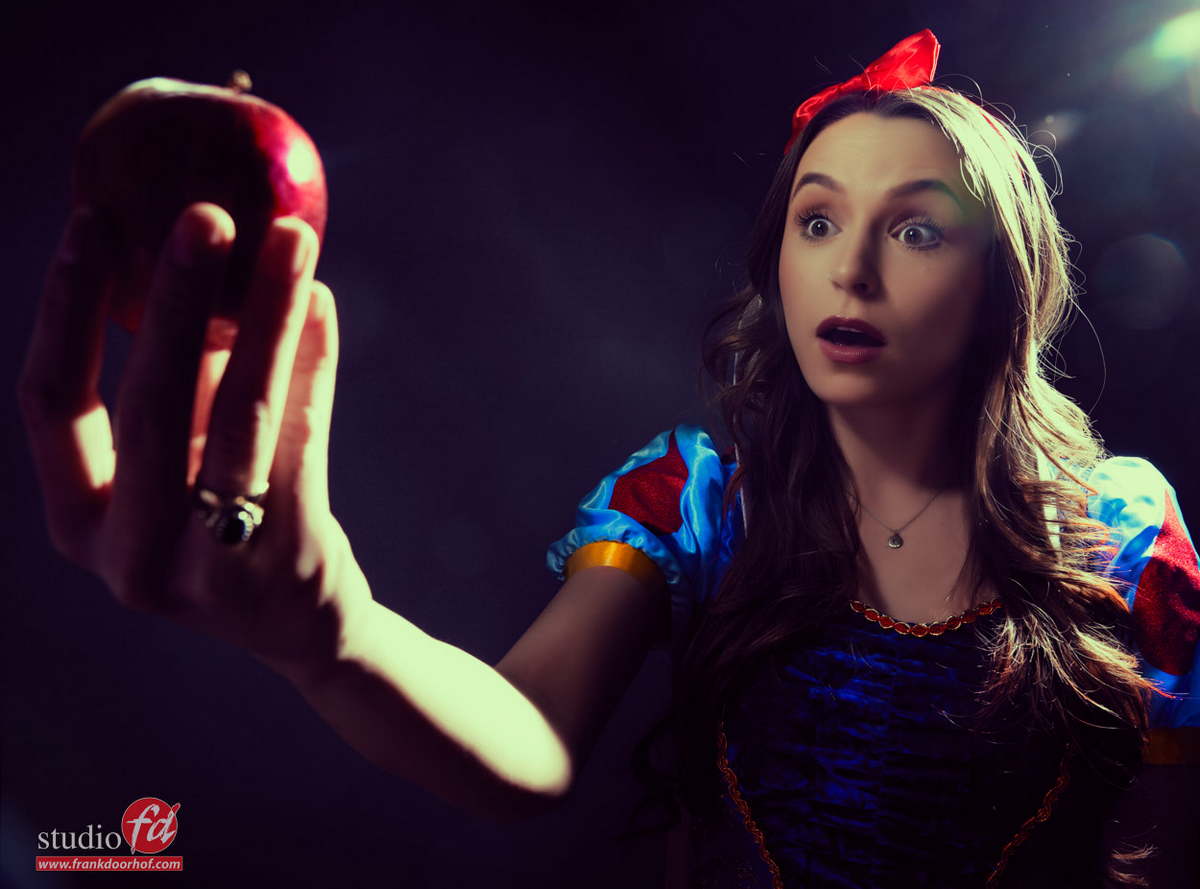
The image we open with was shot during a workshop with a 70mm setting on a 24-70 lens. Is this the perfect/best way to shoot this scene?….. well let’s see.


“Frank what is the perfect lens for…..”
I don’t know how often I get this question, but let me put it this way…. it’s a lot

Now let’s start by saying that the perfect lens/camera is the one that you have with you… but… well that’s a bit of a cliche, so let’s give you a real tip in todays blog.

EVERY lens has it’s own character.
What I mean with this is that even between let’s say 2 50mm lenses you can see a difference. For example I sometimes love to shoot with older M42 lenses which via an adapter are connected to my Sony camera. Thanks to the peaking (focus assist) focusing is easy and fast with manual lenses. The cool thing about these lenses is that they give your images a distinct look which I personally really like. I also have some Leica lenses from the R series and those lenses are almost pure magic.. but that’s for another post (if you guys are interested in that just let me know in the comments below).

Back to todays tip.
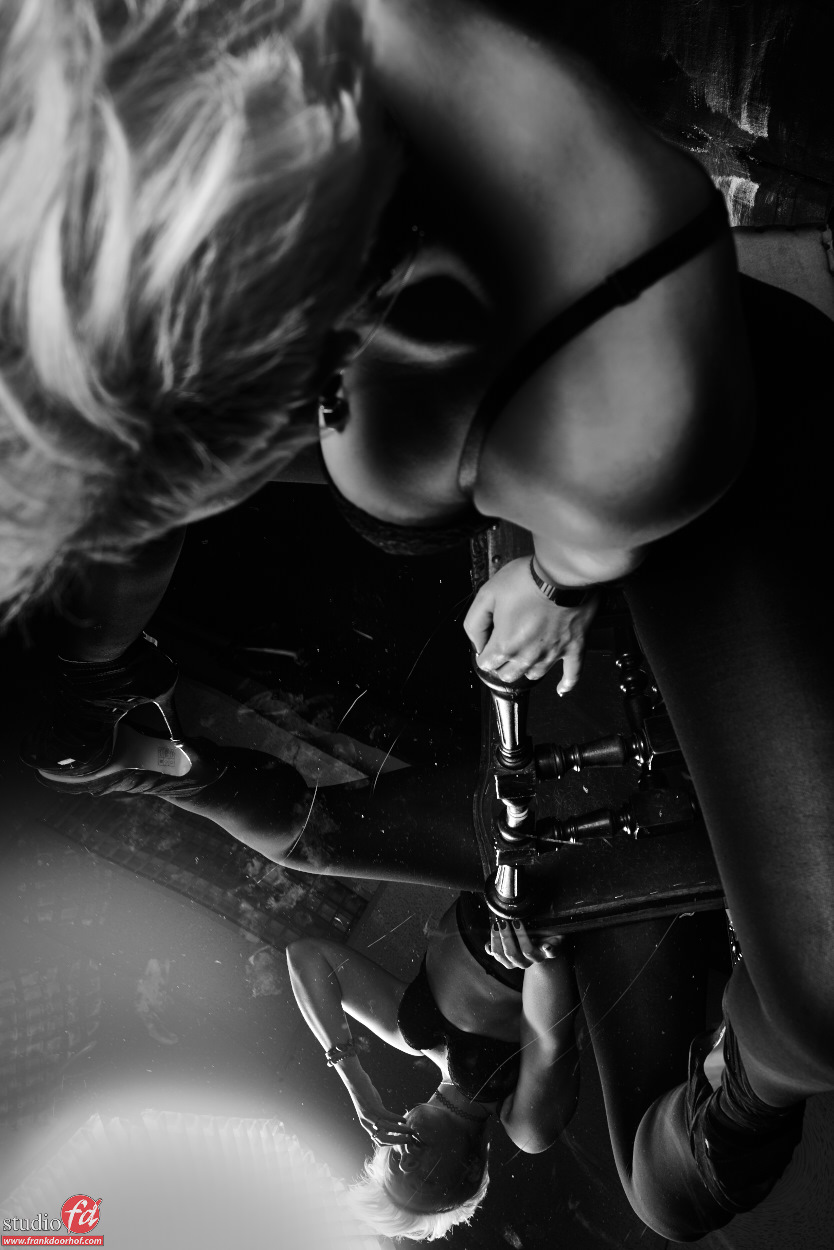
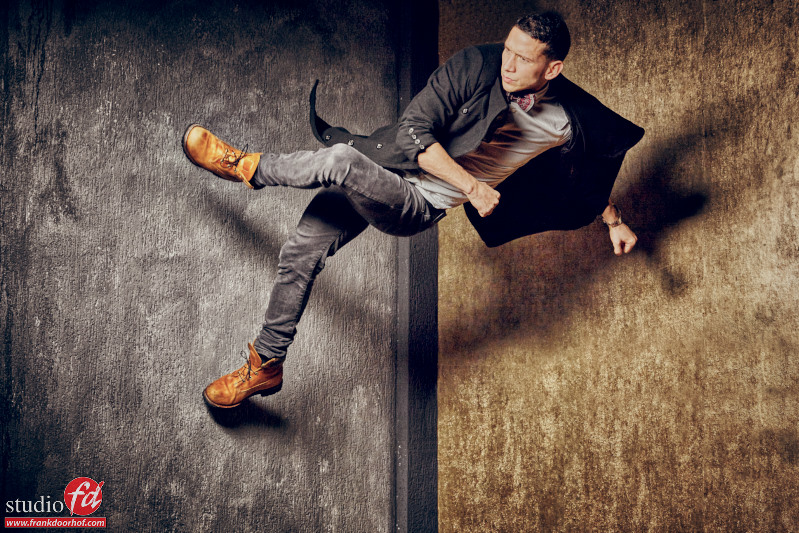
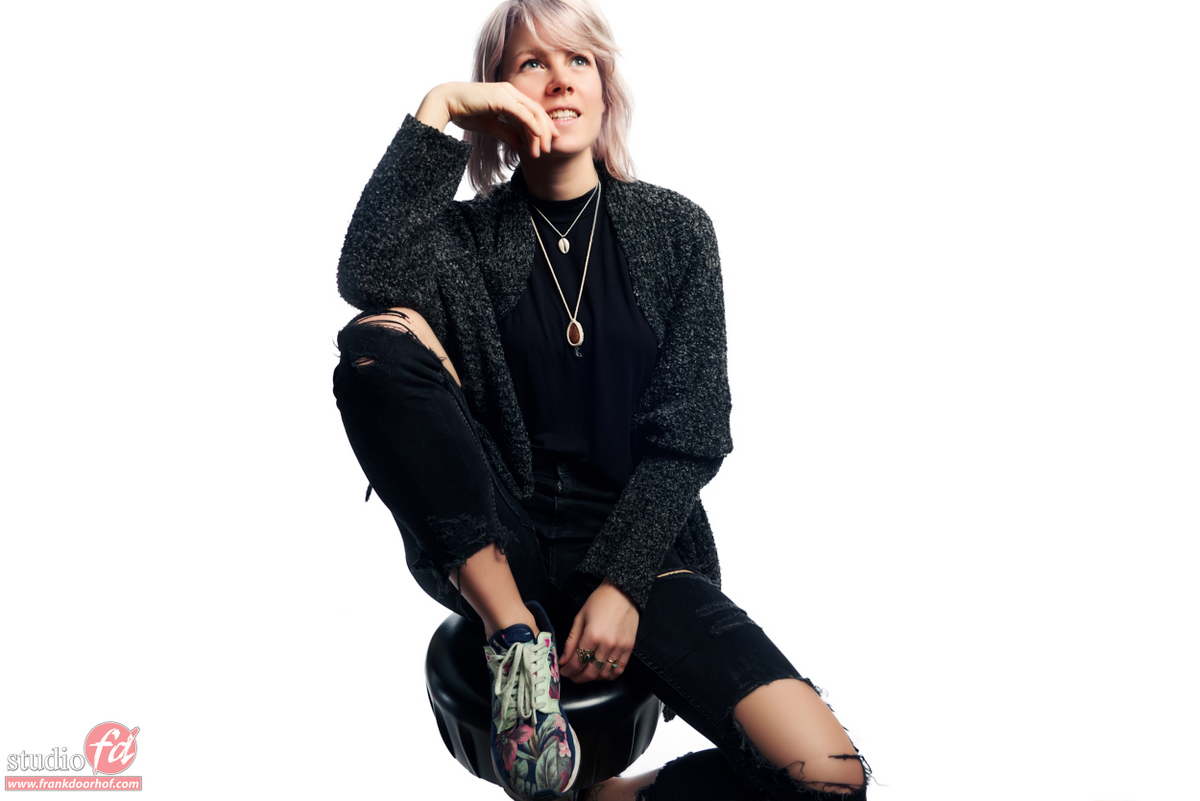
Often it’s regarded that wide angles are “less” good for portraits or model photography than longer lenses. However I would like to point out that this is not entirely true. The main difference between a longer and wider lens is “distortion” now don’t take this too literally, but there is a totally different look to a wide angle which would indeed make it less “flattering” to shoot a portrait with from close by. On the other hand….. if you use that distortion to your advantage you can do some cool stuff like for example this.

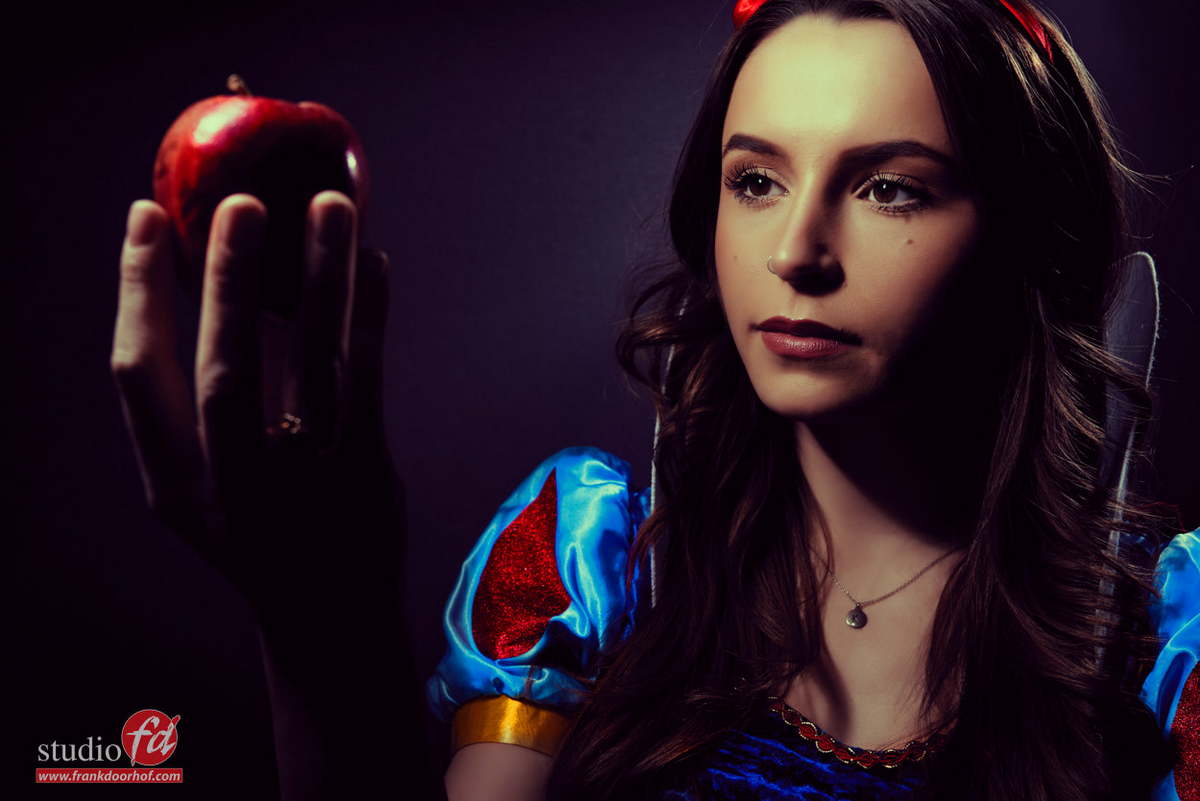
If I shoot this with a longer lens the effect is much less prominent.

In essence you always have to remember that a camera doesn’t see depth.
The only thing it does is render objects that are close larger and objects that are further away smaller. When you shoot with a wide angle you are actually (in this case) closer to the apple and the model is much further away compared to the distance to the apple. Meaning you get this “distortion”.

Now if you make use of it, like in this example you can actually make it work for you.
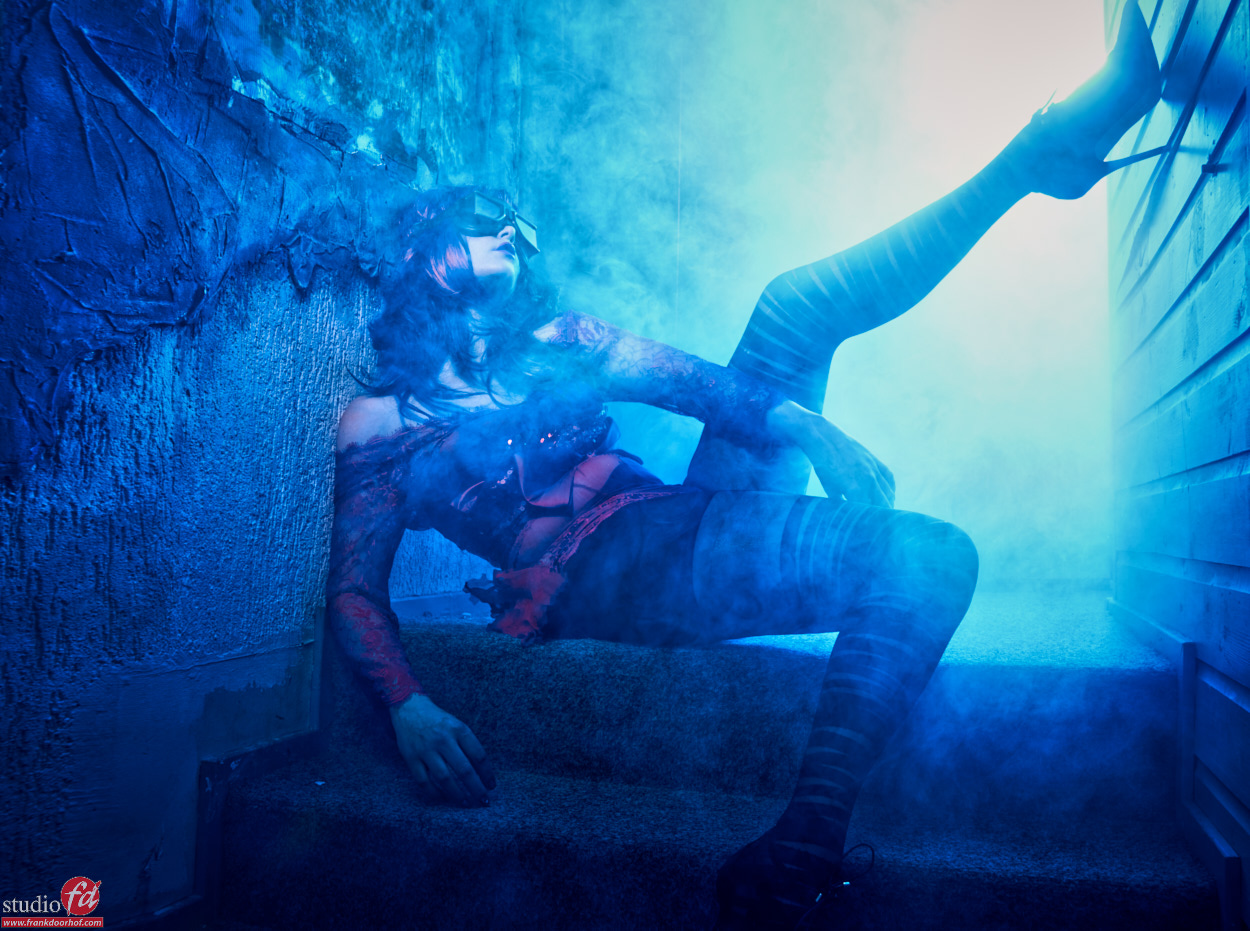
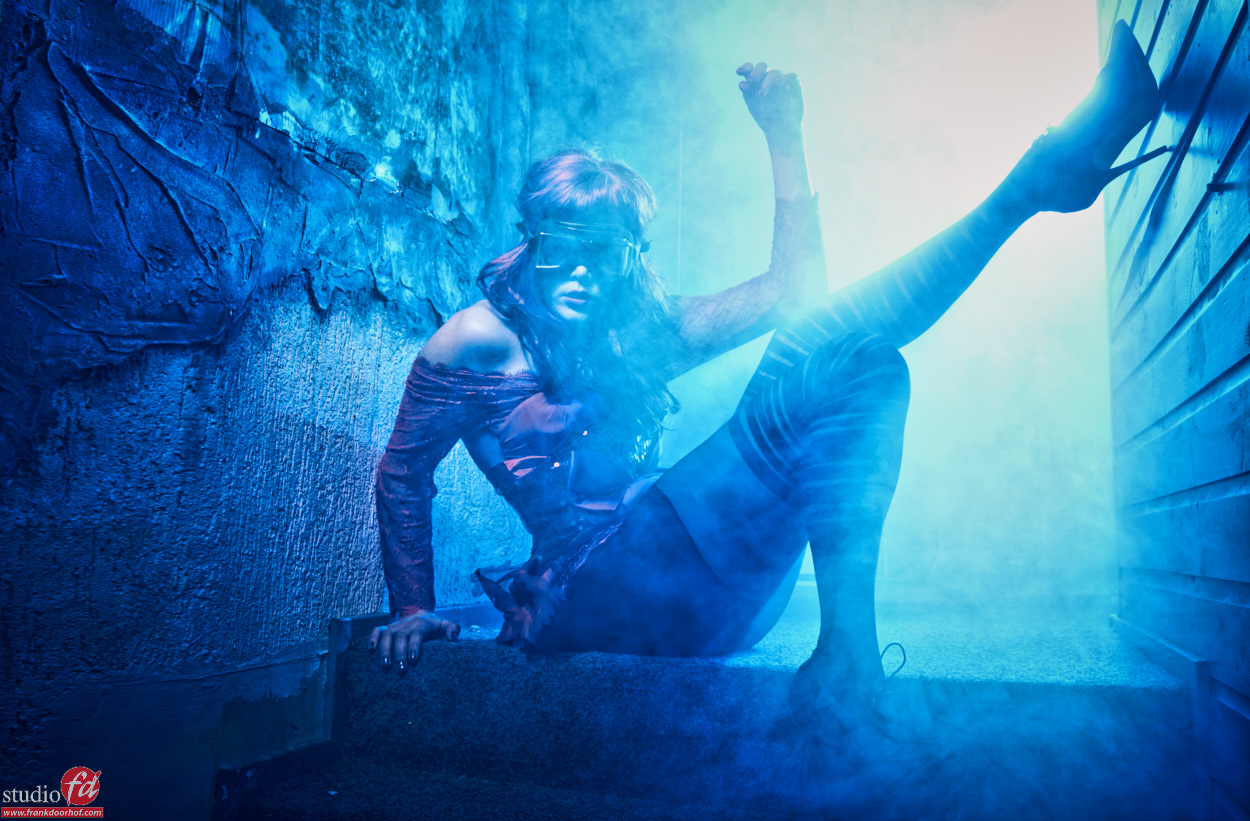
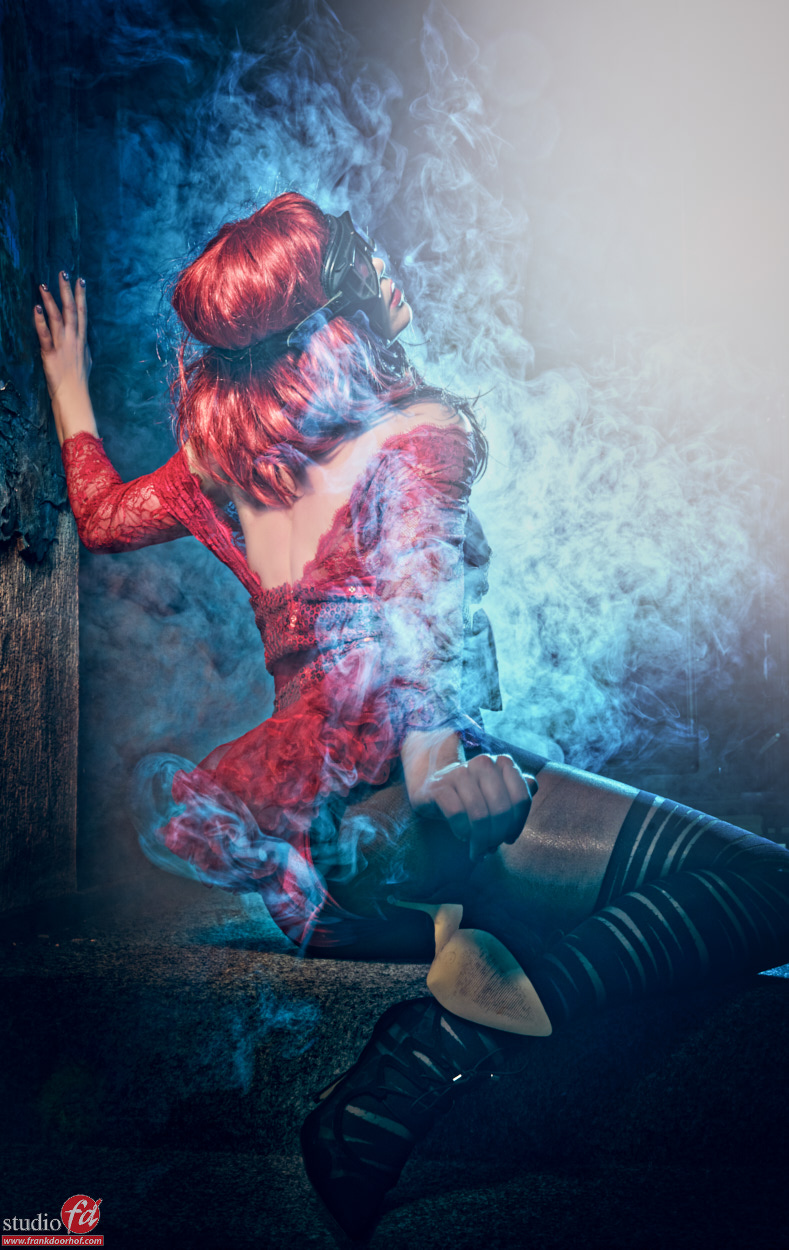
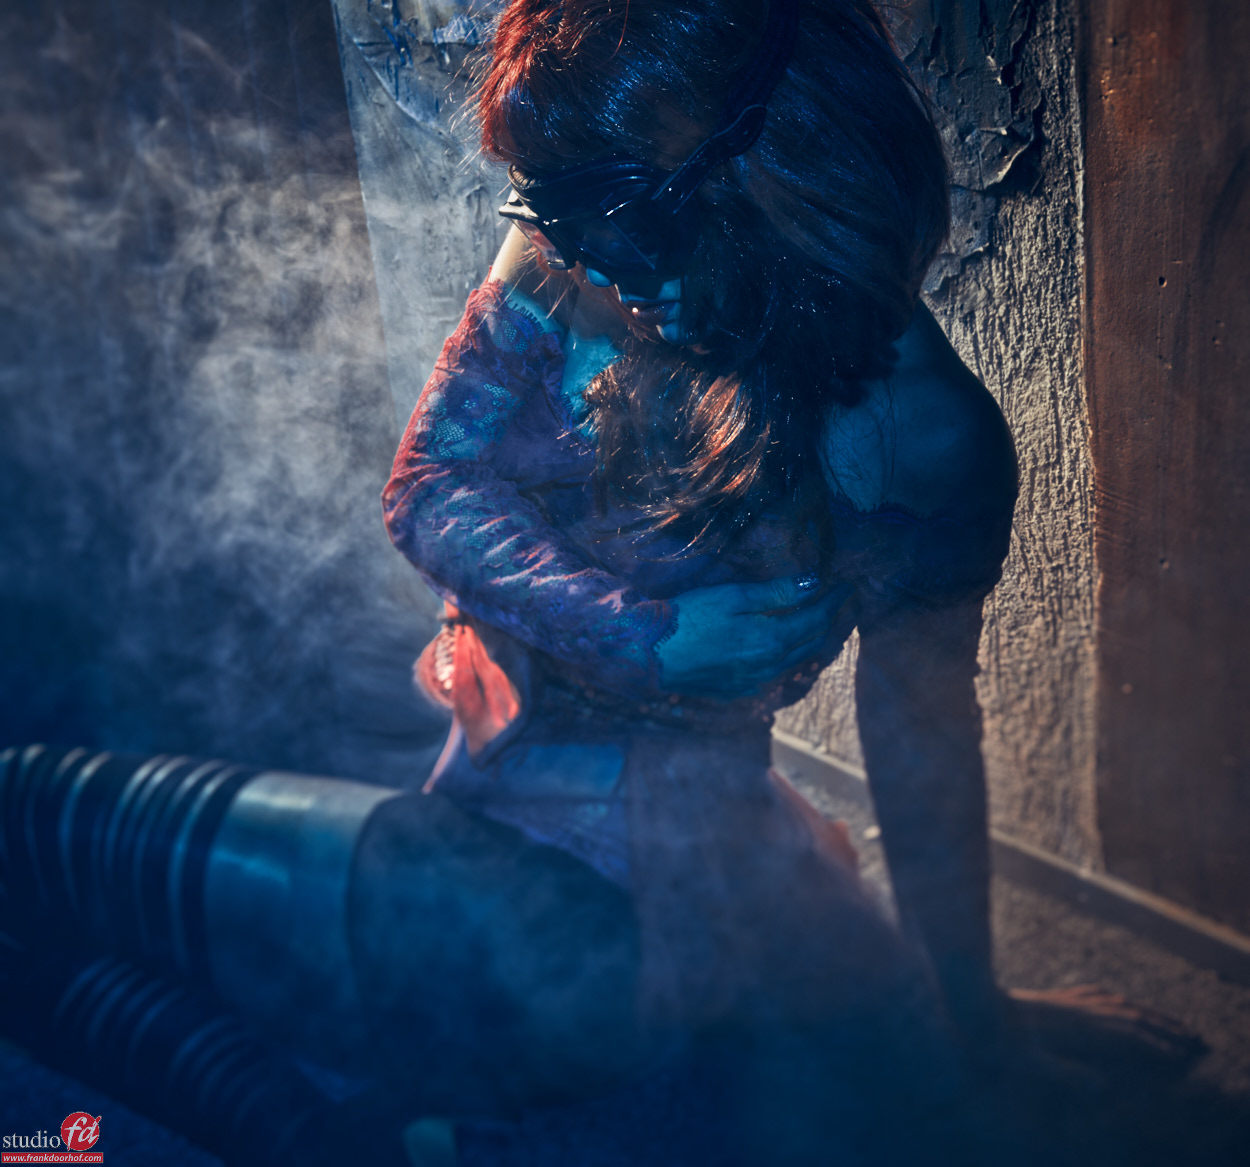
Remember the image we opened with?
That’s how you would normally shoot it in the studio, but if you shoot it more wide, in my opinion the shots comes way more alive.

Now I do have to add a side note.
I really don’t like images that are shot with wideangles without being “shot” with a wide angle. In other words if you shoot a portrait like you would normally shoot a portrait with a sub 30mm lens (Full Frame) I often find the distorting taking me away from the shot. However when you use that “distortion” to work with the shot like in the sample with Anouk on the stool I really feel that the wider angle shot gives me a much more flowing image (if that makes sense). It has less compression so to say. (a term often used for longer lenses by the way).


Feel free to show your images with wide angles.

For much more tips visit www.frankdoorhof.com/videos and download our instructional videos
Or subscribe to www.youtube.com/frankdoorhof for free instructional material
And of course get my book “Mastering the modelshoot” via your favorite bookstore or amazon 

Small spaces are limiting? … nah

One of the most heard excuses is “my space is too small for a good shot”.
Well you might not be able to shoot a model in front of a white seamless, or fit in a whole family, or make a model jump (although that could be funny… for the photographer, not the model,….. nah don’t do it), but in essence EVERY location has potential as long as you use it to the max.


In this case we used a small staircase that is located at the back end of our studio and leads up to the “stage”. Our building is actually and old “church” and this was where the preacher was standing, it’s a tight space but for me it’s always fun to shoot there.


As you can see in the following shots I used some smoke to give the scene a bit more of an edge, but I also used my lighting to the max by moving around my model. Now always remember that smoke acts as both a diffuser and reflector so the more smoke you get… well let me put it this way, it’s always different. Also remember that as soon as the smoke gets in between the model and the front light source “all bets are off” smoke will start to act as a reflector and it will be one big white out.


We used one Elinchrom beauty dish with grid from the front and one gridded (and later open) reflector from the back with a blue gel.
Styling and model : Nadine

Nadine Januari 2 2016 0811

Nadine Januari 2 2016 0846

Nadine Januari 2 2016 0848

Nadine Januari 2 2016 0851

For the next one I left in a bit more red.

Nadine Januari 2 2016 0817

But you don’t always have to use the same pose of course…..
Why not shoot one from the back for example.

Nadine Januari 2 2016 0867

And while you’re at it. Why not move around your model and get a completely different look?

Nadine Januari 2 2016 0894

Nadine Januari 2 2016 0900

As you can see with the same light setup and the same very tight space you can create something really cool… just think outside the box… or in these kind of cases probably inside the box 😀


Good luck.

Finding the right angles

Making a photo work is part of many many elements, light, storytelling, poses, composition, tinting, “retouch” and so much more.
But one of the key elements is also finding the right angles.


There are always books/videos/sites that will tell you HOW to shoot something or how NOT to shoot something, if you would follow ALL the NOTs you would probably not make a picture anymore and if you follow all the HOWs you will probably shoot images that don’t work. I strongly believe that making a good shot is very personal, not only depending on the photographer but most of all the situation, model etc.
Today some attention to finding the right angles.
According to some a wide angle is not really used in model photography (and according to some it’s cool, I’m in that category) so today some images and tips for shooting images a bit differently.


In this shot we used a mirror on the floor and I shot it with a 24 from slightly above the model (It helps to be tall, or a ladder also).
Twiga May 2 2015 0141

Read more

Don’t you just love motion

One of the things I absolutely LOVE to do is adding motion to a shot, especially freezing it.
For my classic portraiture series I’m working with some artists and actors to build a small series and one of the people on my list was Lorenzo.
Now maybe you know Lorenzo from “So you think you can dance” and the movie “Body Language” and if you do, you know this boy can move….


Lorenzo was more than willing to pose for the classic portraits (which I show later in the week), but he also had some cool ideas himself, and when a dancer has some ideas… well just go with it.


Today some of the results from that session.

Lorenzo  November 11 2014 0016

Read more