Combining/mixing light sources
One of the questions I hear a lot during workshops is the problem of combining/mixing light sources
Now let’s first do the easy stuff.
Combining/mixing light sources: strobes and speedlights
This is one of the things that happens quite often, and in all honesty, it’s a bit of figuring out stuff but when you get it, it’s pretty easy.
There are some different solutions, so let’s quickly go through them.
- the first one is the easiest
Use a system that uses the same trigger for their speedlights and strobes. And nowadays with brands like Geekoto and Godox the line between studio use and portable is getting smaller by the minute. - Use a cable trigger
Very old-fashioned but it still works, get a cold shoe with a cable connector and use the trigger for your studio strobes and the cable for the speedlights, or the other way around. - Use a system that can learn the pre-flash
Most speedlights have a small flash before the main flash and sometimes you can disable this, but often it’s not possible some strobes, like the Elinchrom system, have the option to learn the pre-flash, and now you can use your speedlights to trigger the studio strobes via the optical slave.
Of course, there are more solutions, like optical slaves, IR, etc. but today I want to talk about something that is a bit more tricky.
Combining/mixing light sources: continuous lighting with strobes
To get a proper understanding of what’s going on I always joke that this is as close to HDR (not Highly Destructive Retouching) as you can get with one exposure. So what’s going on.
When we look at the way continuous lighting is captured it’s a matter of the longer you keep the shutter open, the more light enters. But when we do the same thing for flash/strobes it doesn’t really matter how fast the shutter speed is, as long as it’s within the so-called X-sync (often 1/125) it will render properly.
So when we want to mix strobes with continuous lighting we actually already know what to do, but it’s still important to talk about some issues that can/will go wrong 🙂
Output
The first thing is of course output.
Our Hensel studio strobes are much more powerful than a lightbulb.
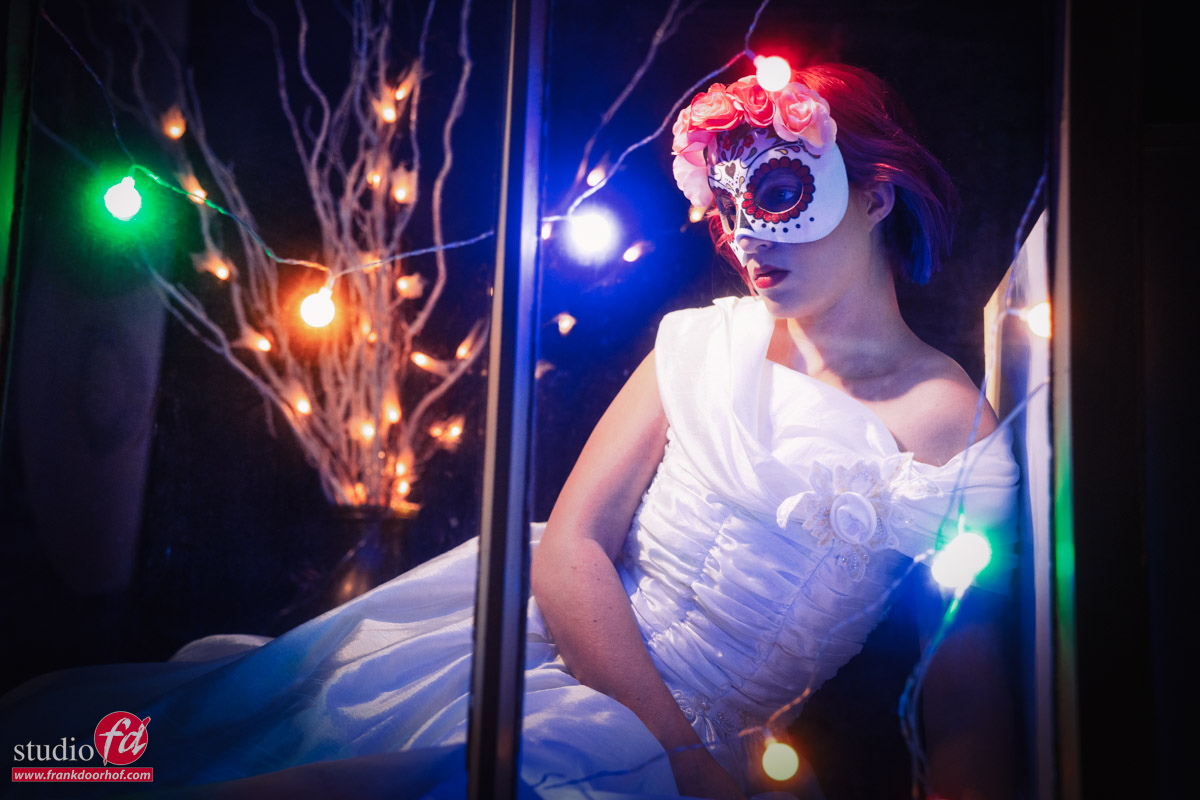
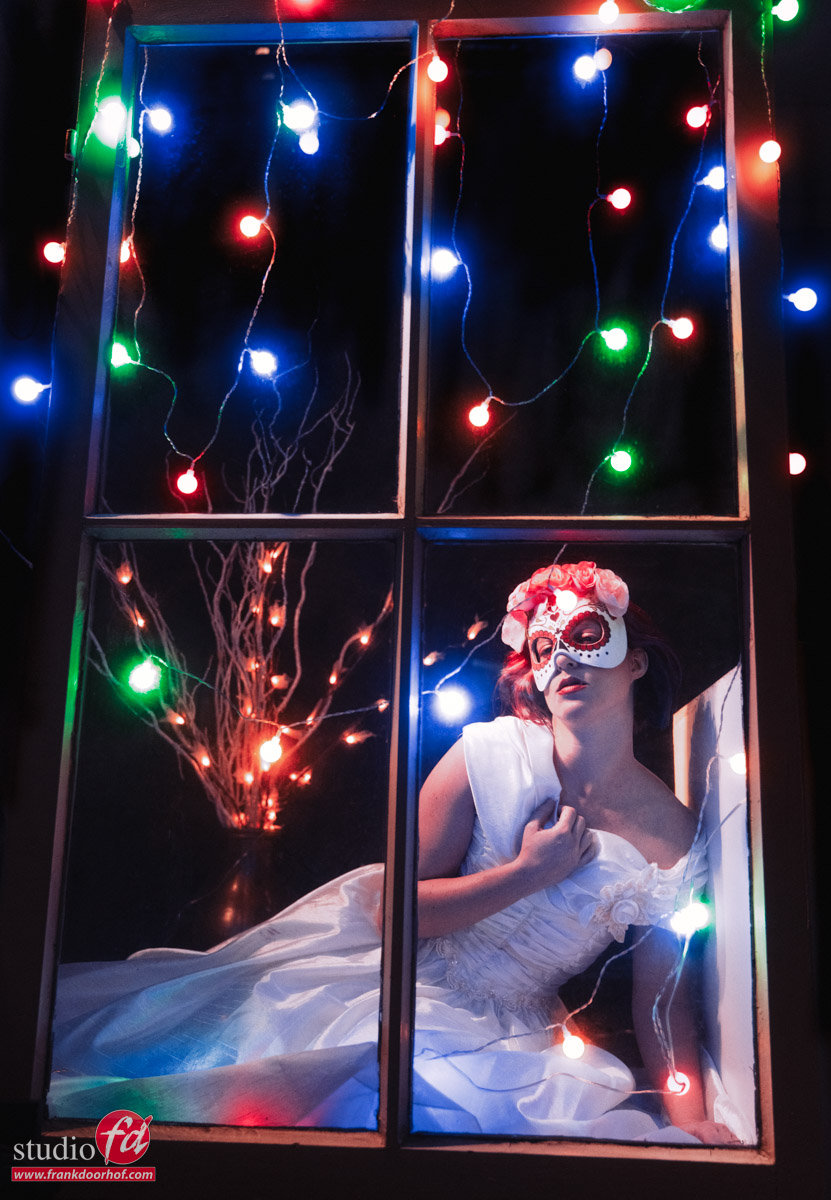
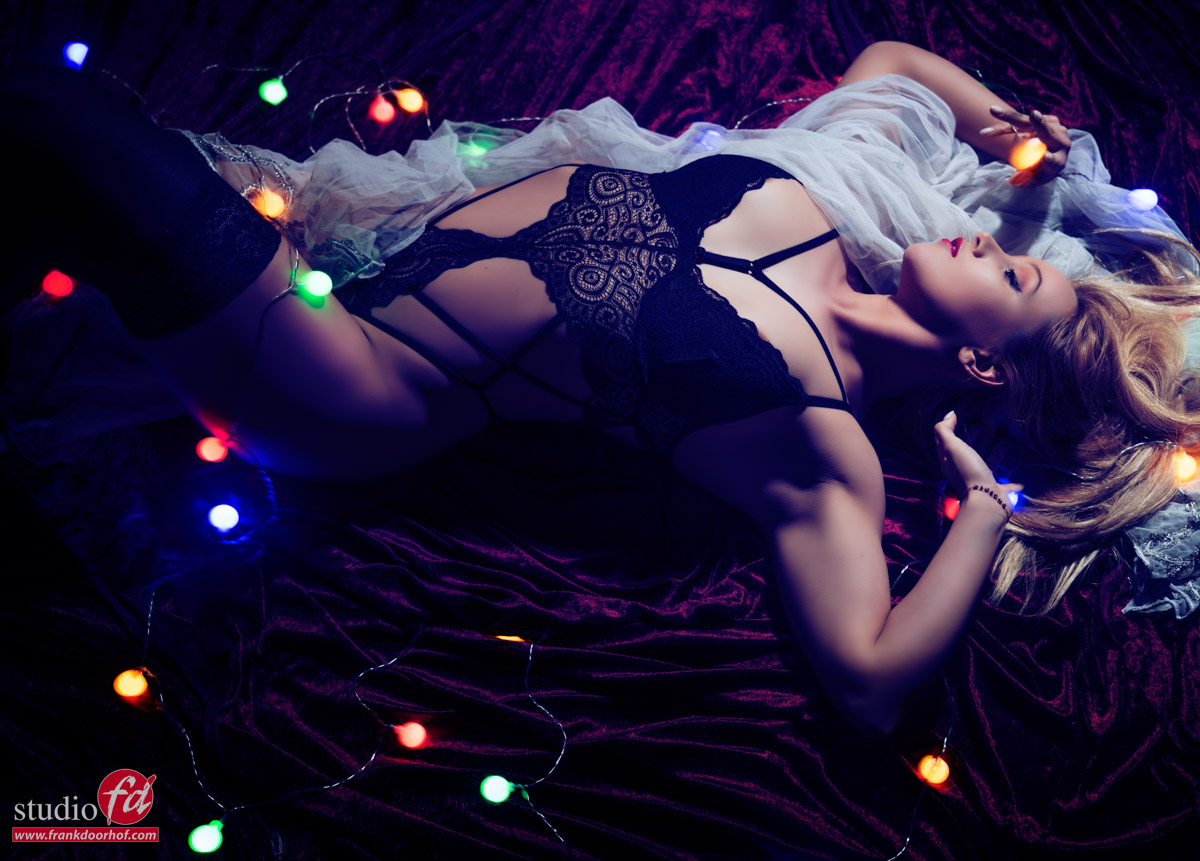
So we have to make sure that we keep the output of our strobes as low as possible when we want to mix them with for example Christmas lights. But how do we do that ?
- Buy the right strobes
When buying strobes it doesn’t make sense to get 1000W strobes with 3 stops of range. You will get a lot of light but 1000W is really a lot and 3 stops range is not that much. A much wiser investment is anything between 100 and 400W for studio use with loads of stops, for example a 400W strobe with 6 stops of adjustments will give you more than enough output but it also makes the lowest setting ideal for mixing it with continuous lighting. - Use the right light shaper
When you use a Hensel 14″ reflector you already know you can never mix this with continuous lighting (as is) simply put, because the 14″ reflector gives you so much light output it’s hardly usable in the studio (perfect for outside to kill the sun).
But for example, a striplight with a middle diffuser and grid literally eats light so this is perfect for lowering your strobe. - Be smart
if you don’t have the options I just mentioned always remember that a white T-shirt also does wonders to tame your light output, do make sure you don’t create a fire hazard 😀
Now that we understand that we have to lower the strobe output the rest is easy.
What I always do…
I choose the lens with the fastest aperture and the DOF I like (in most cases just f2.8)
Now with the new EVF cameras, there is an awesome way to set up your lights.
In the past I would use the light meter and try to meter the output of the Christmas lights, which sounds easier than it actually is, because you don’t want the lights to blow out (not seeing the colours) but you also want a modest output, it’s a fine balance.
With the EVF you just choose the option WYSIWYG (what you see is what you get) and dial in the way you like the continuous lighting. I always keep my camera on Manual mode for this (using strobes) and set the aperture on a setting I like (often f2.8 or faster), lock the shutter speed to something I know I can keep steady (often 1/30) and now I use the ISO to dial in the effect I like. And because of the EVF you literally see the end result getting closer in front of your eyes in real-time. I can’t stress how much this setting on EVFs has changed how you can accurately set up complex lighting situations.
Now that we know for example that we need ISO400 f2.8 1/30 of a second to get the result I like, it’s a simple matter of grabbing the light meter and adjusting the strobe until it hits f2.8 at ISO400… and …. well that’s all folks 😀
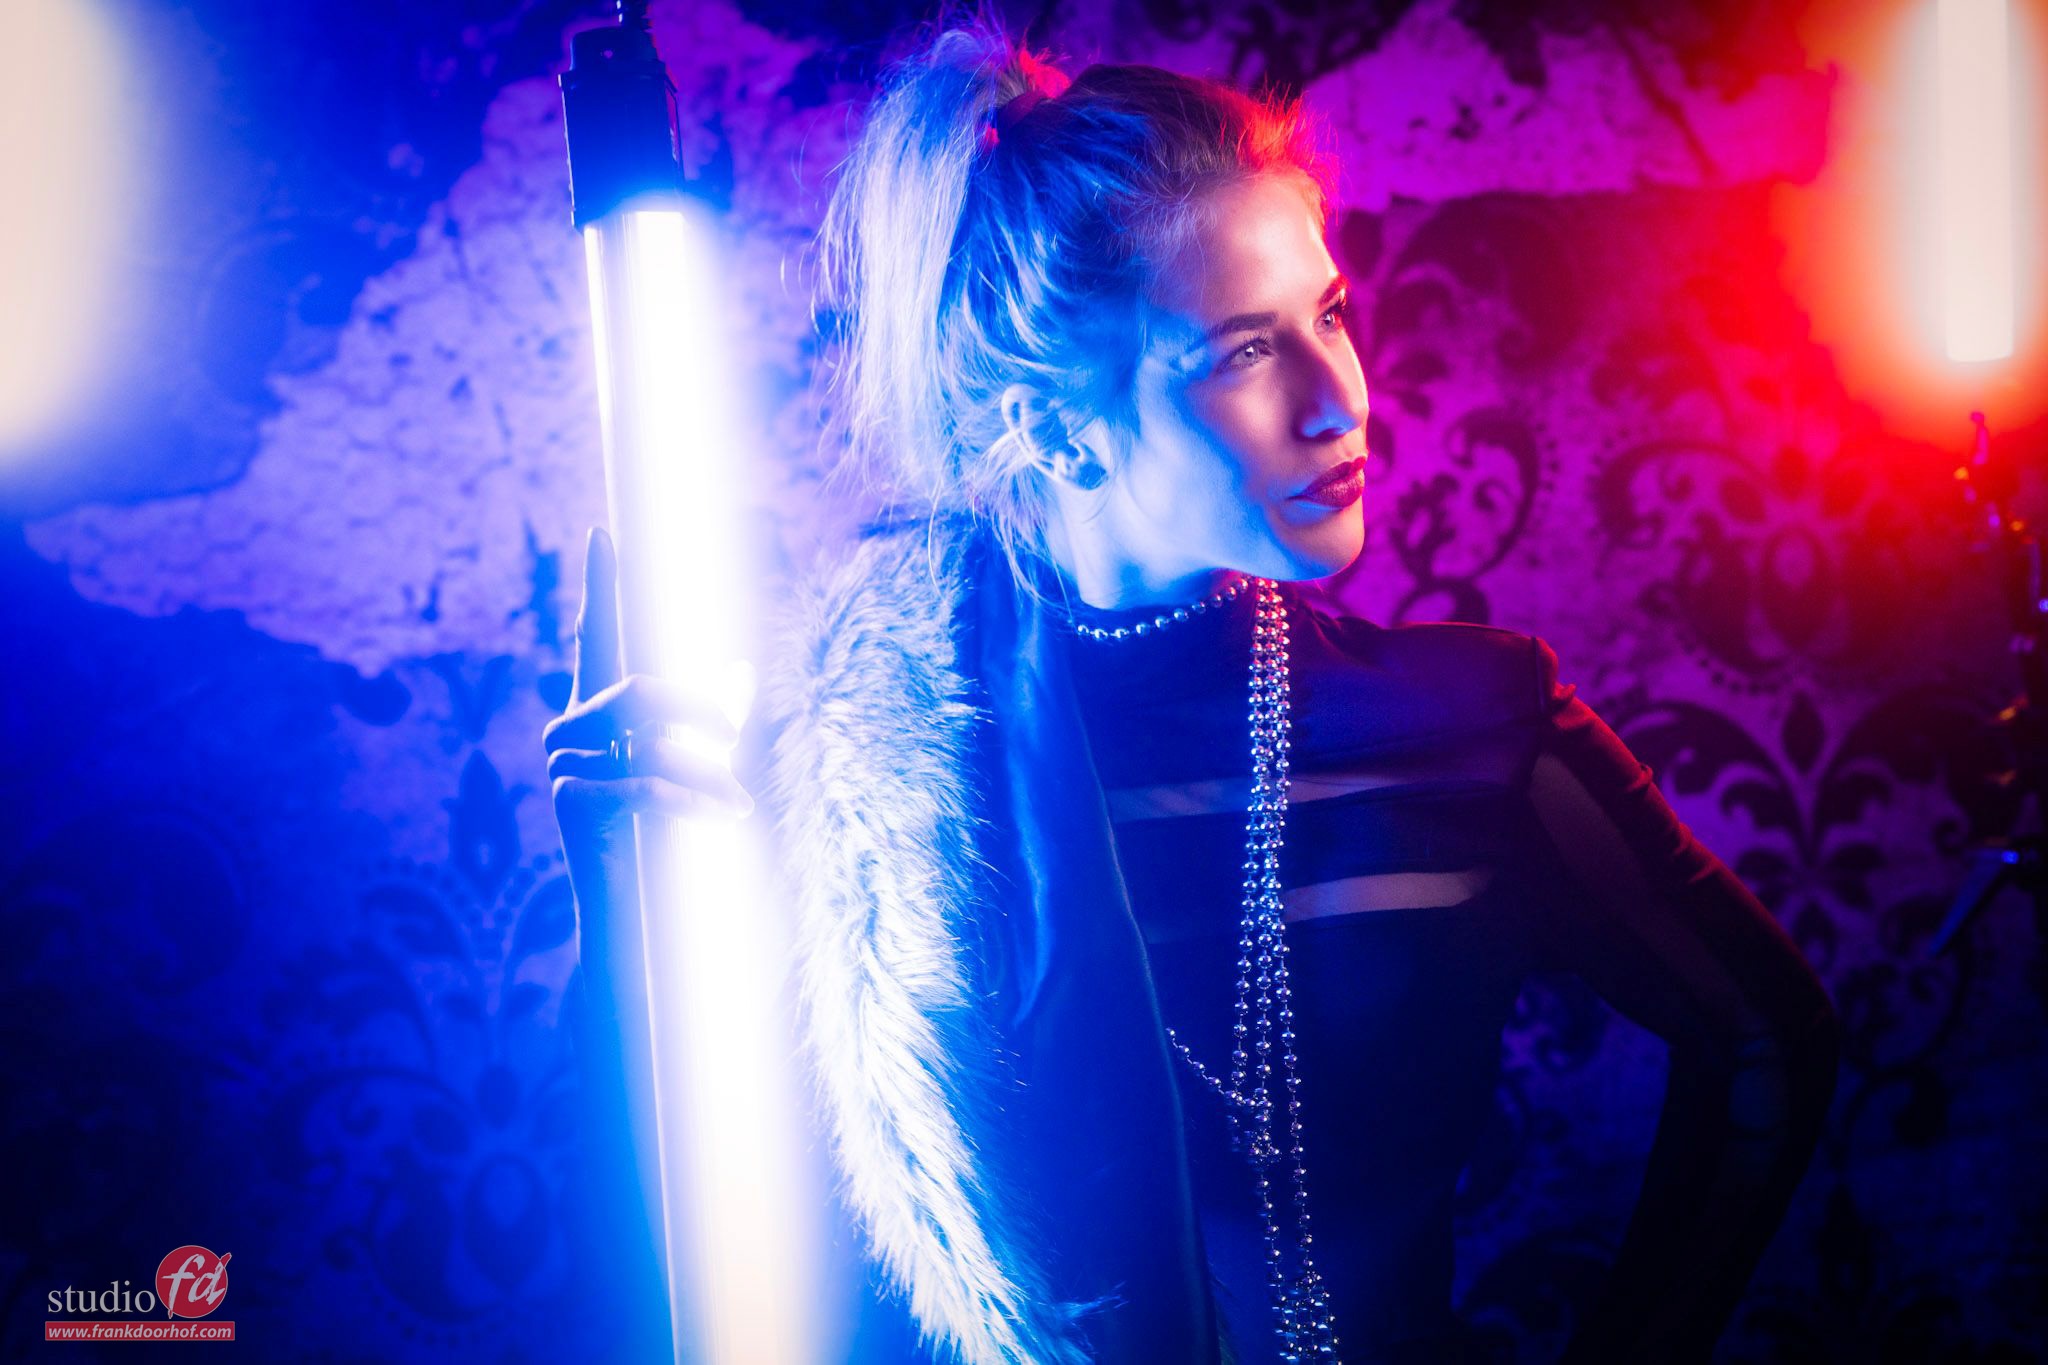
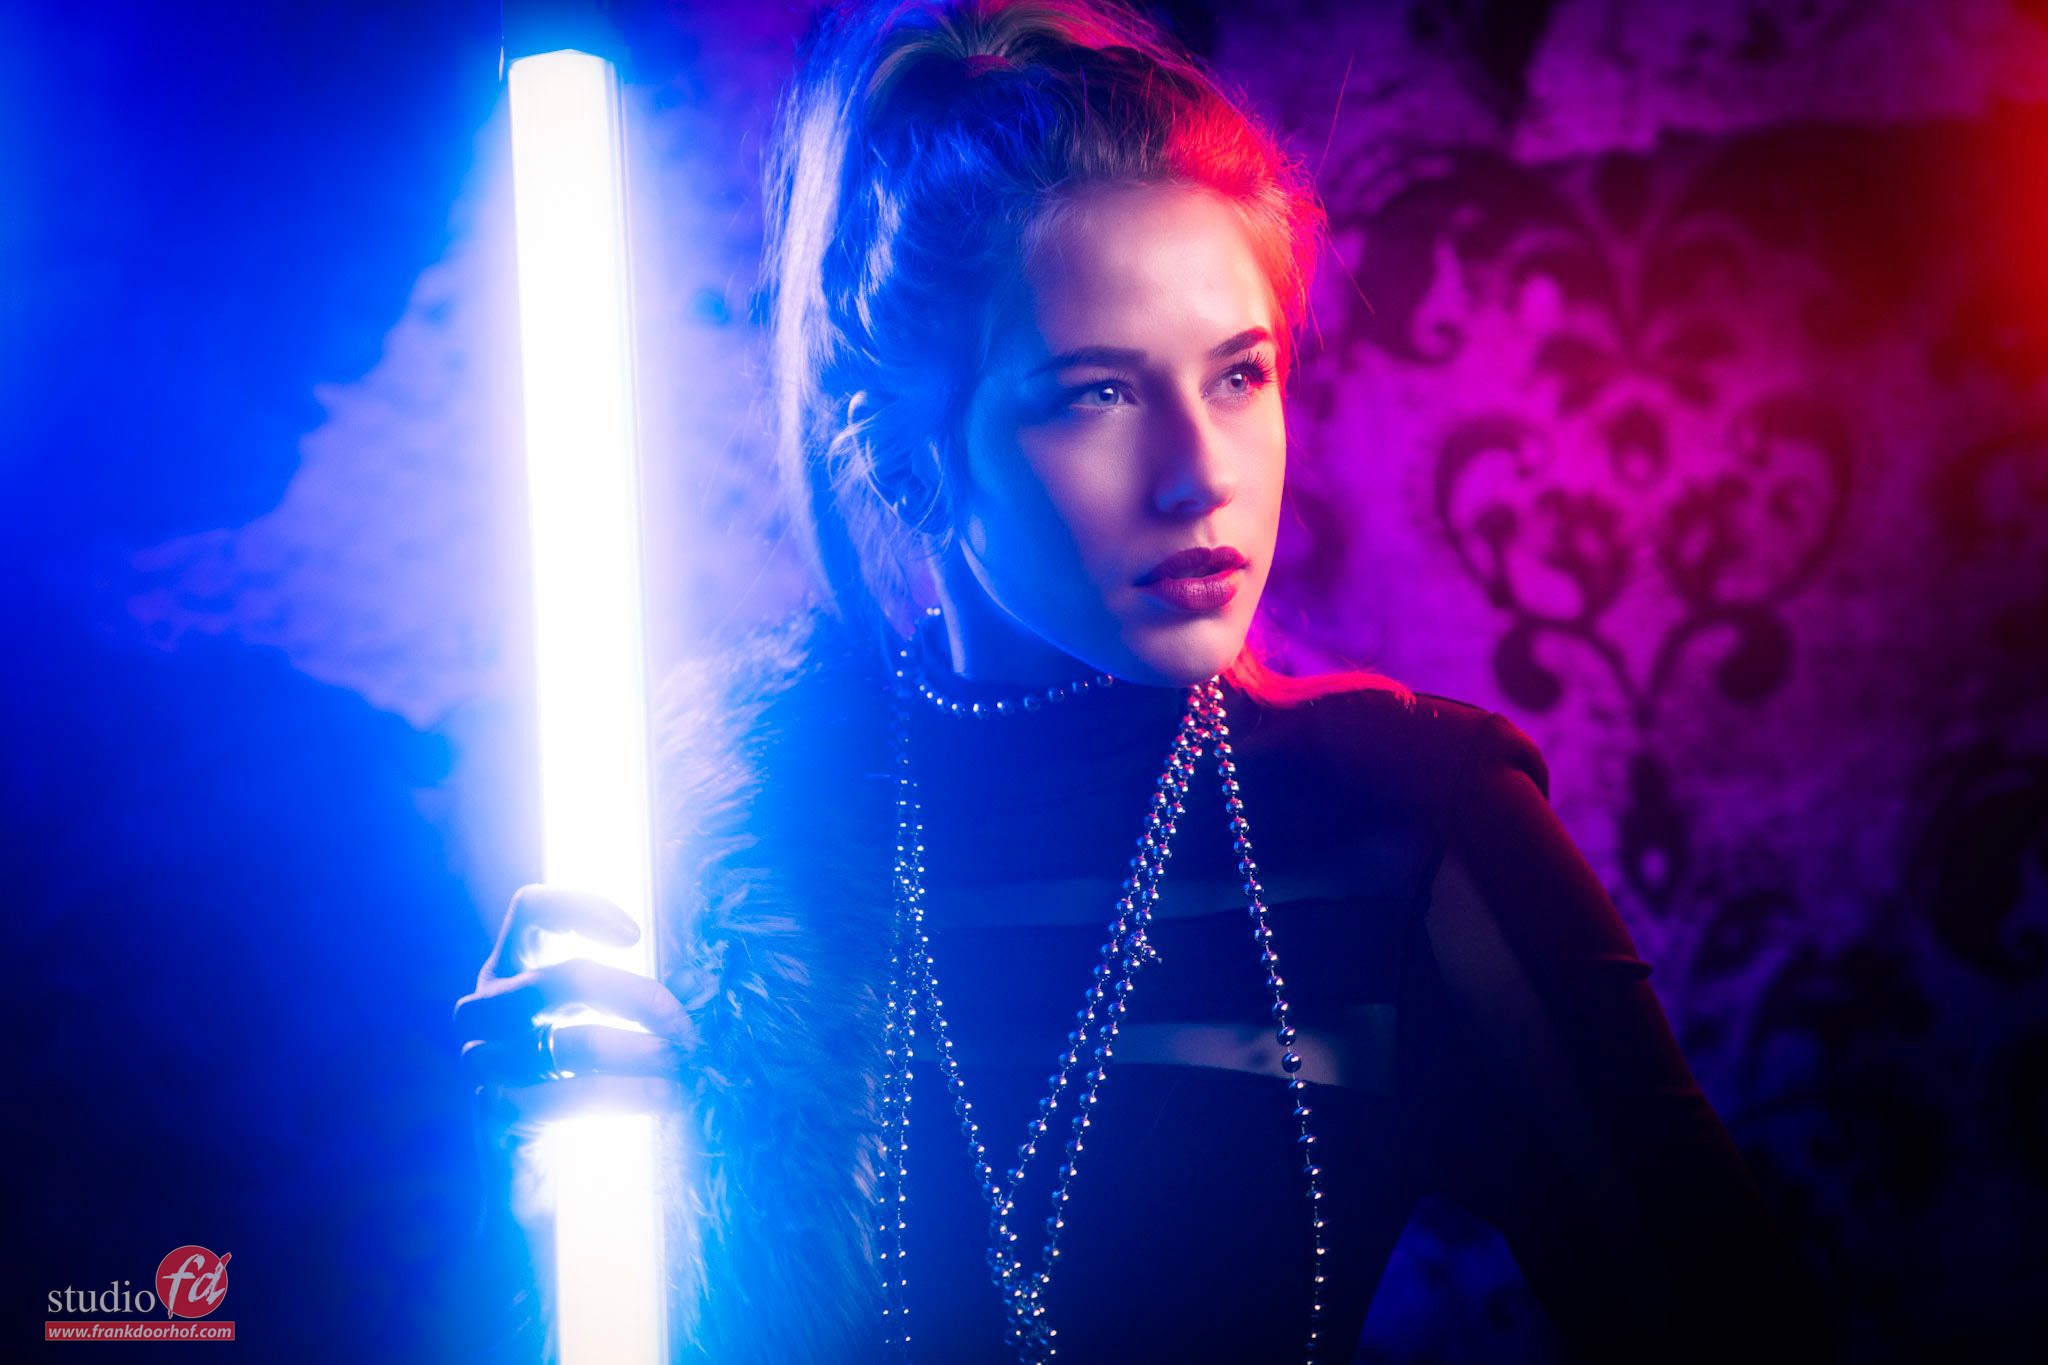
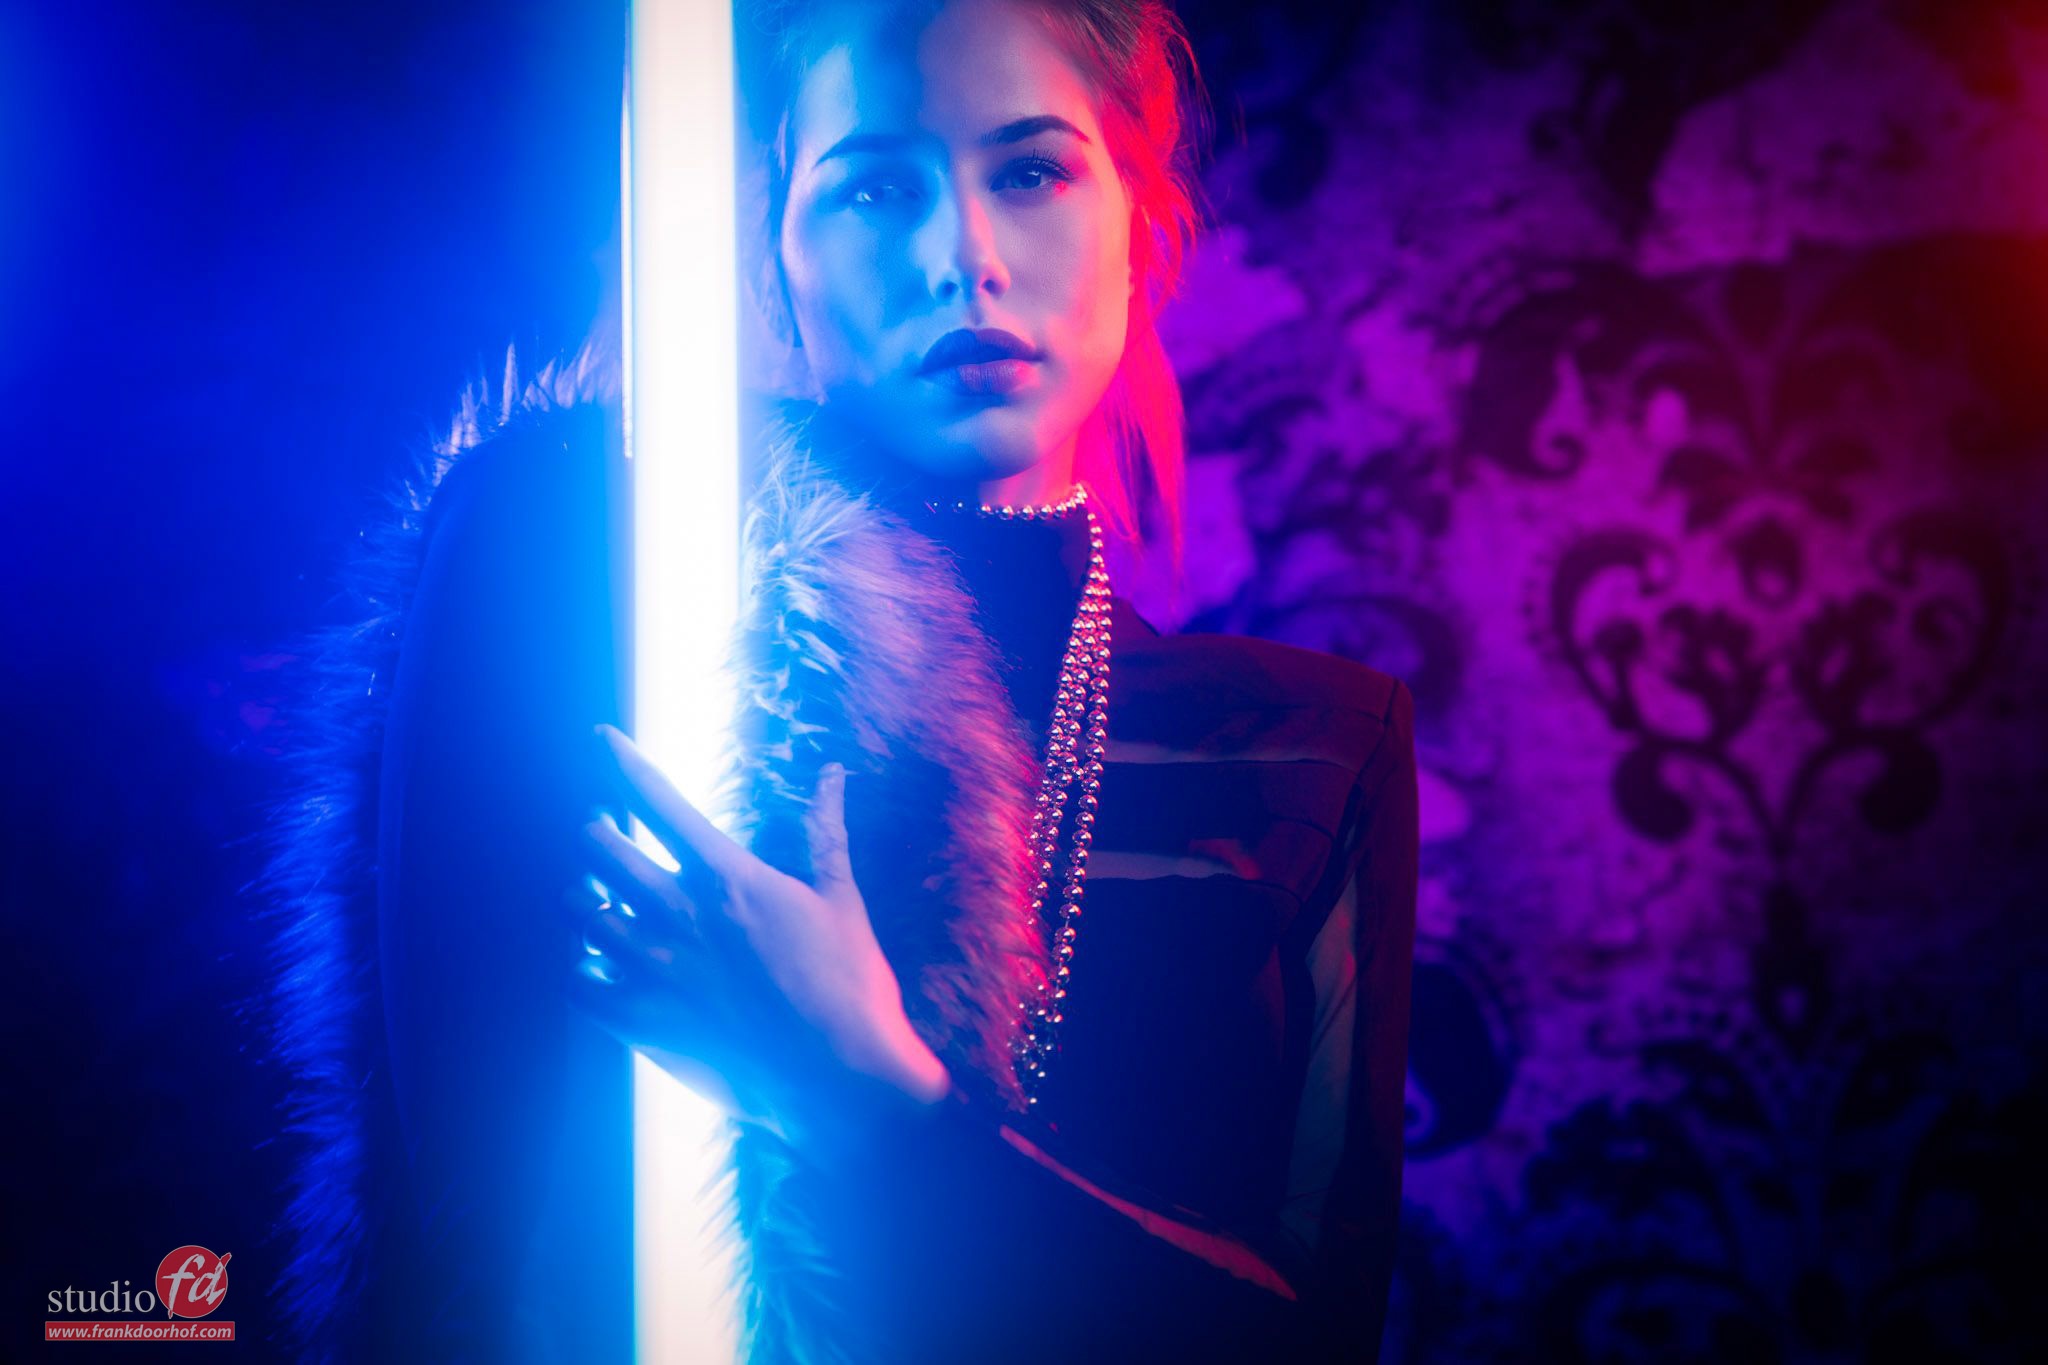
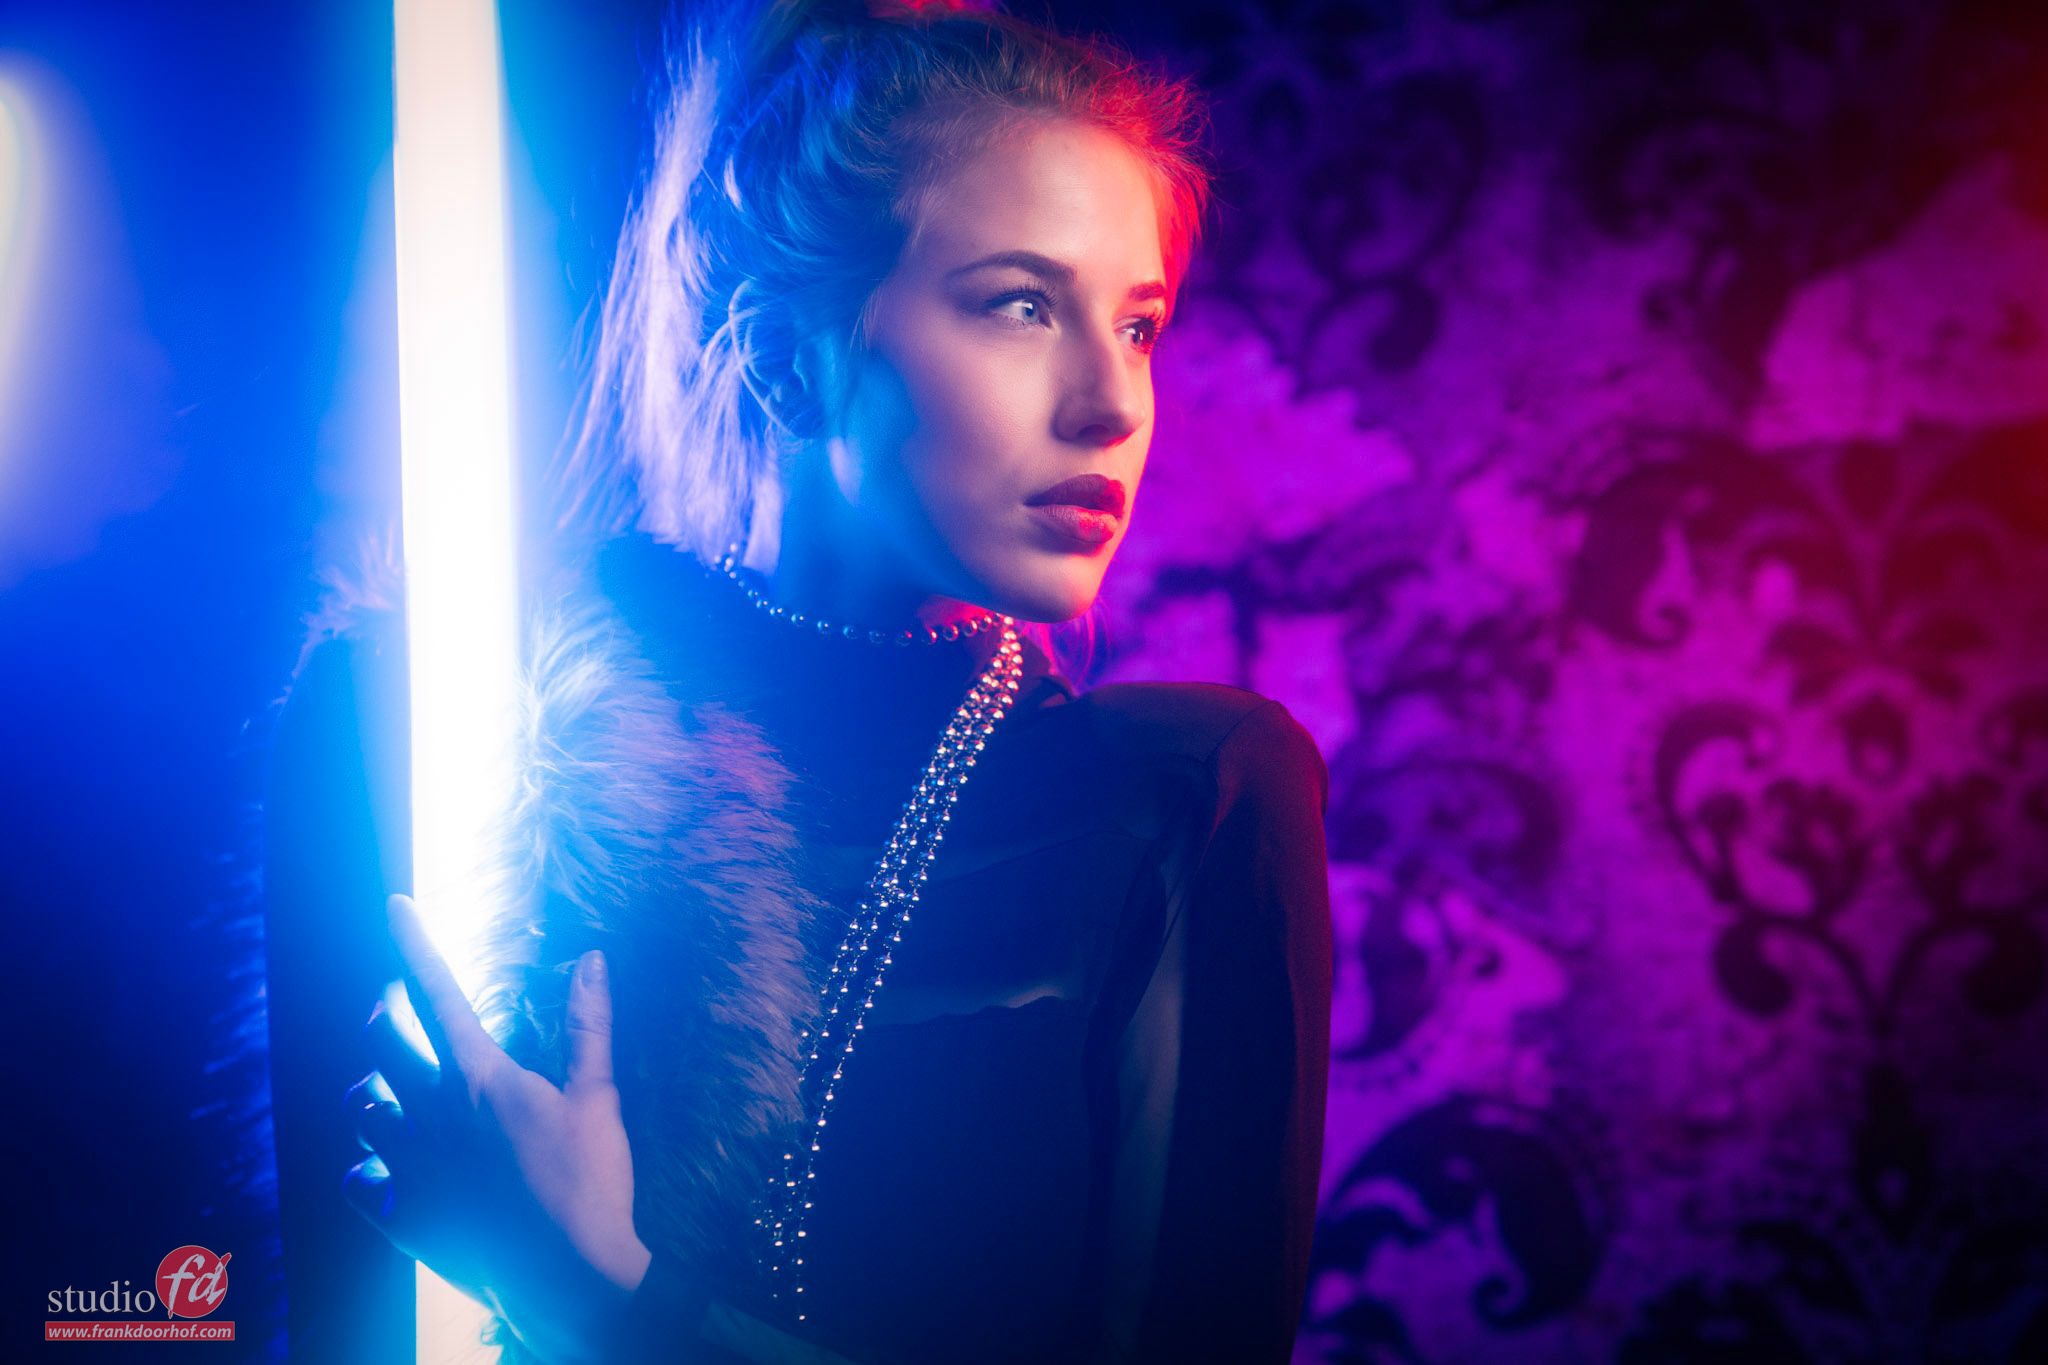
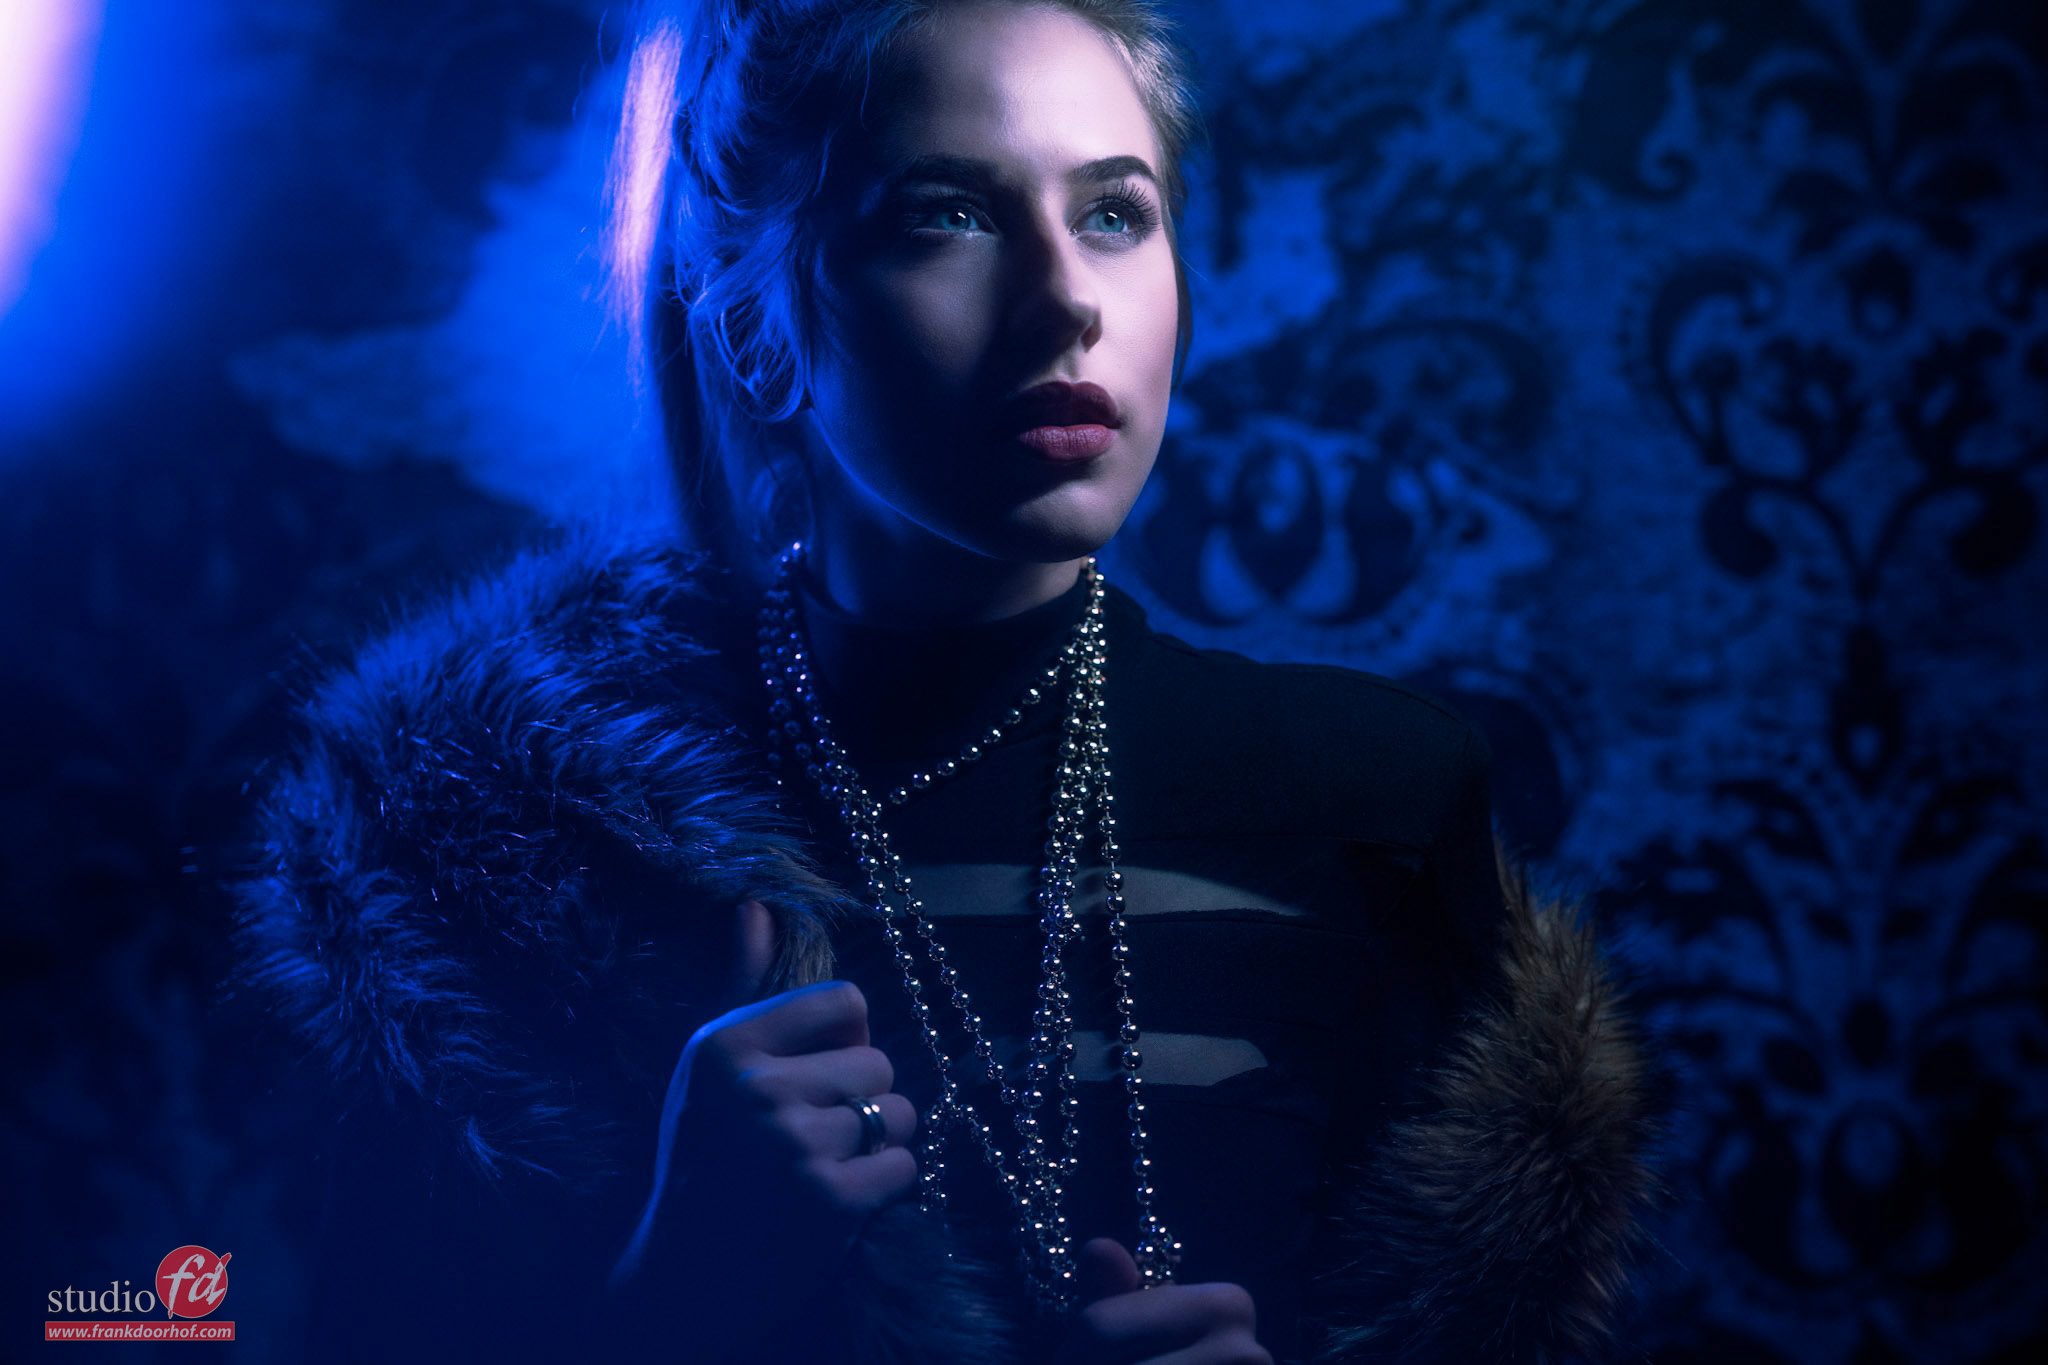
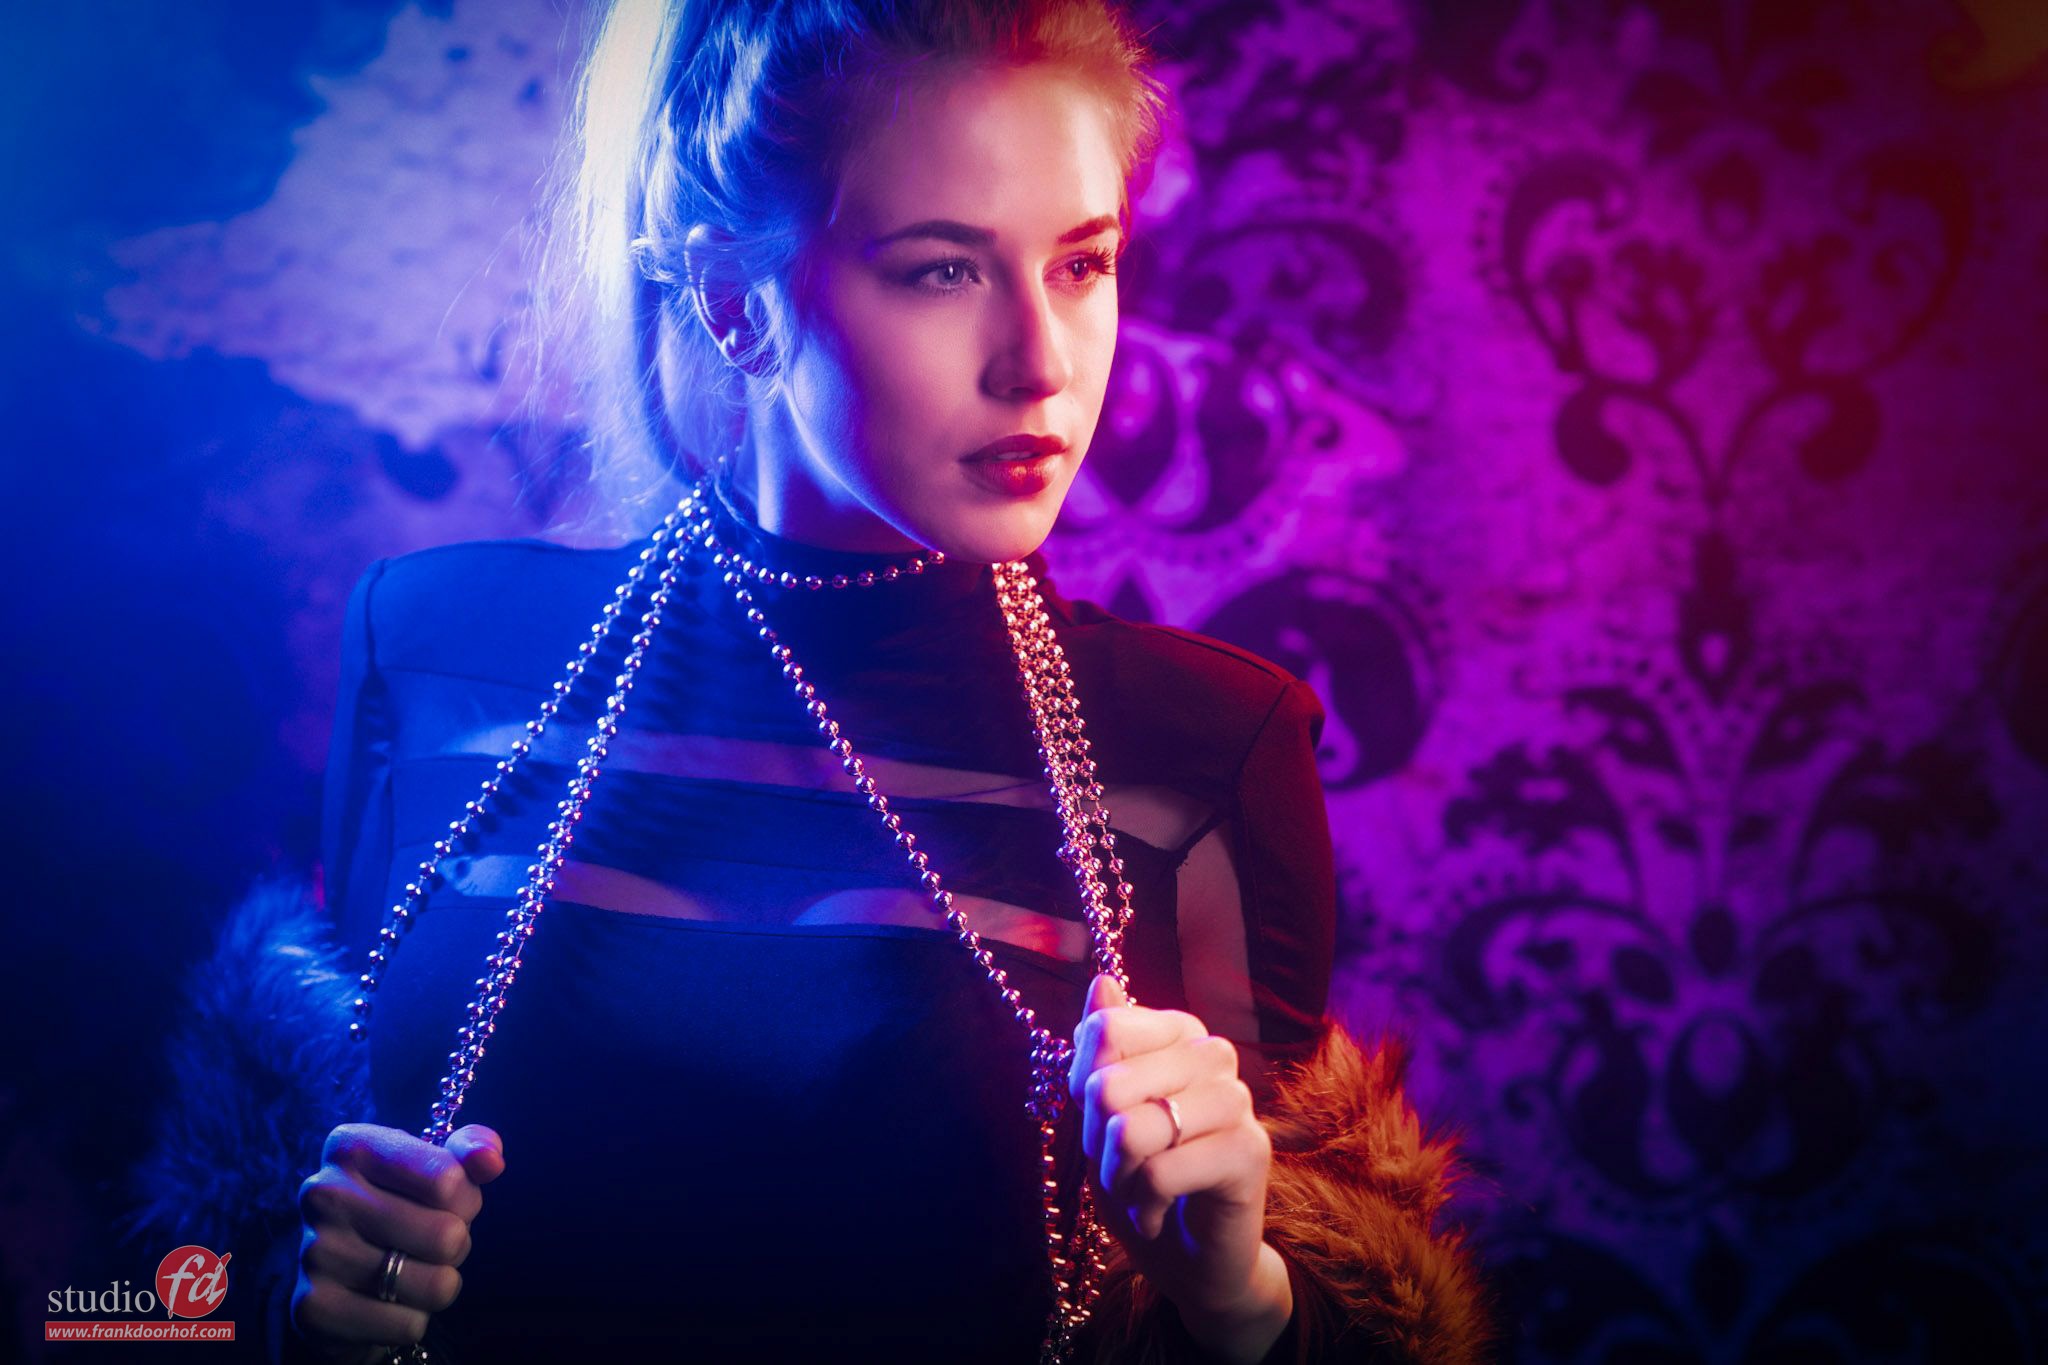
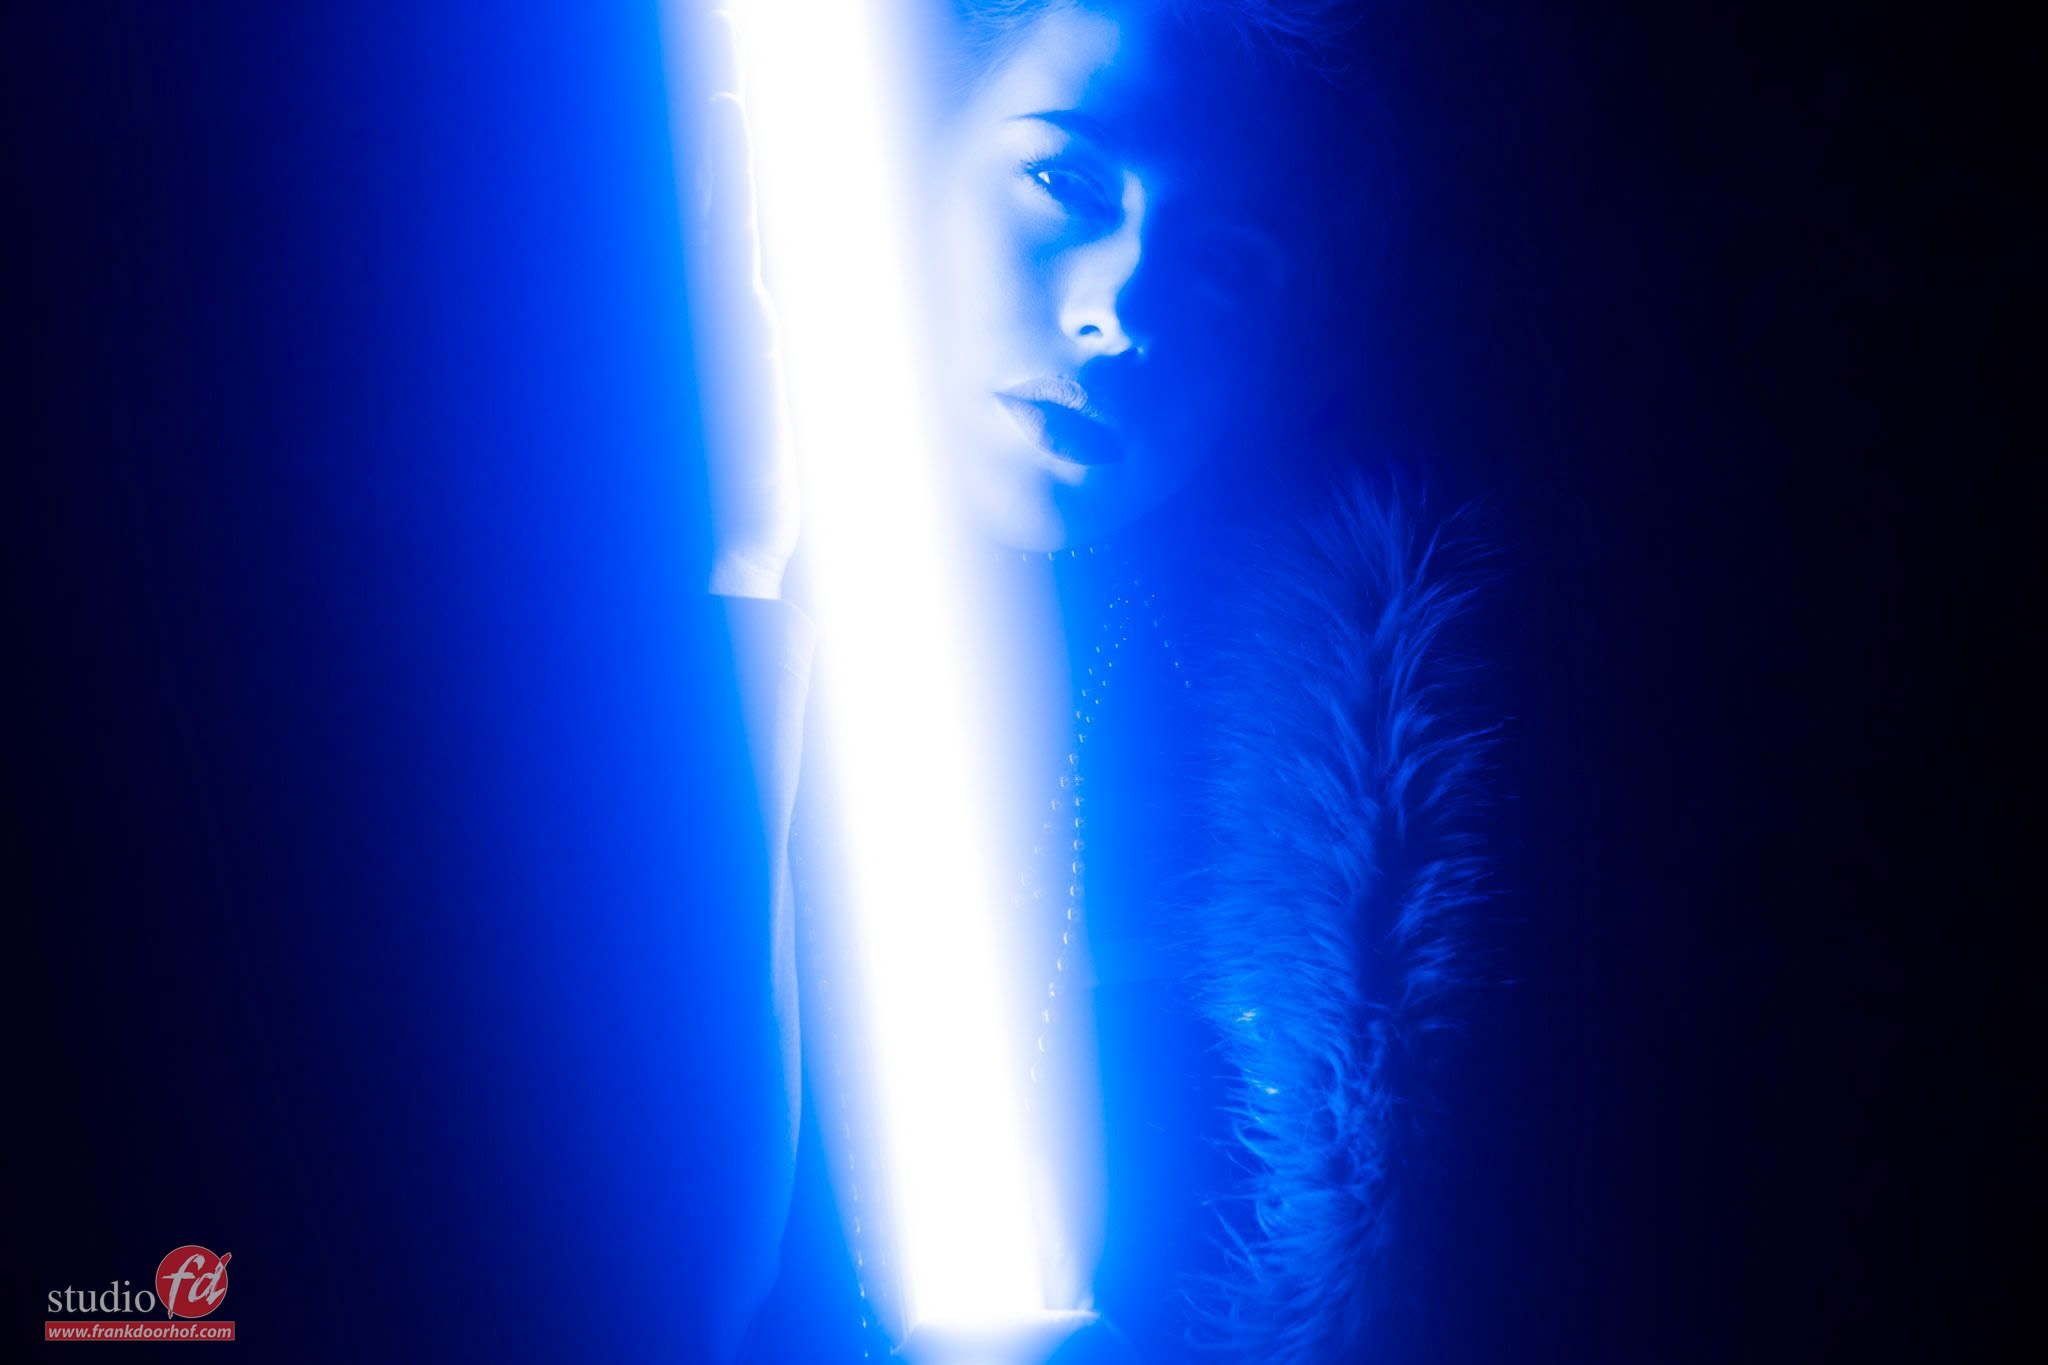
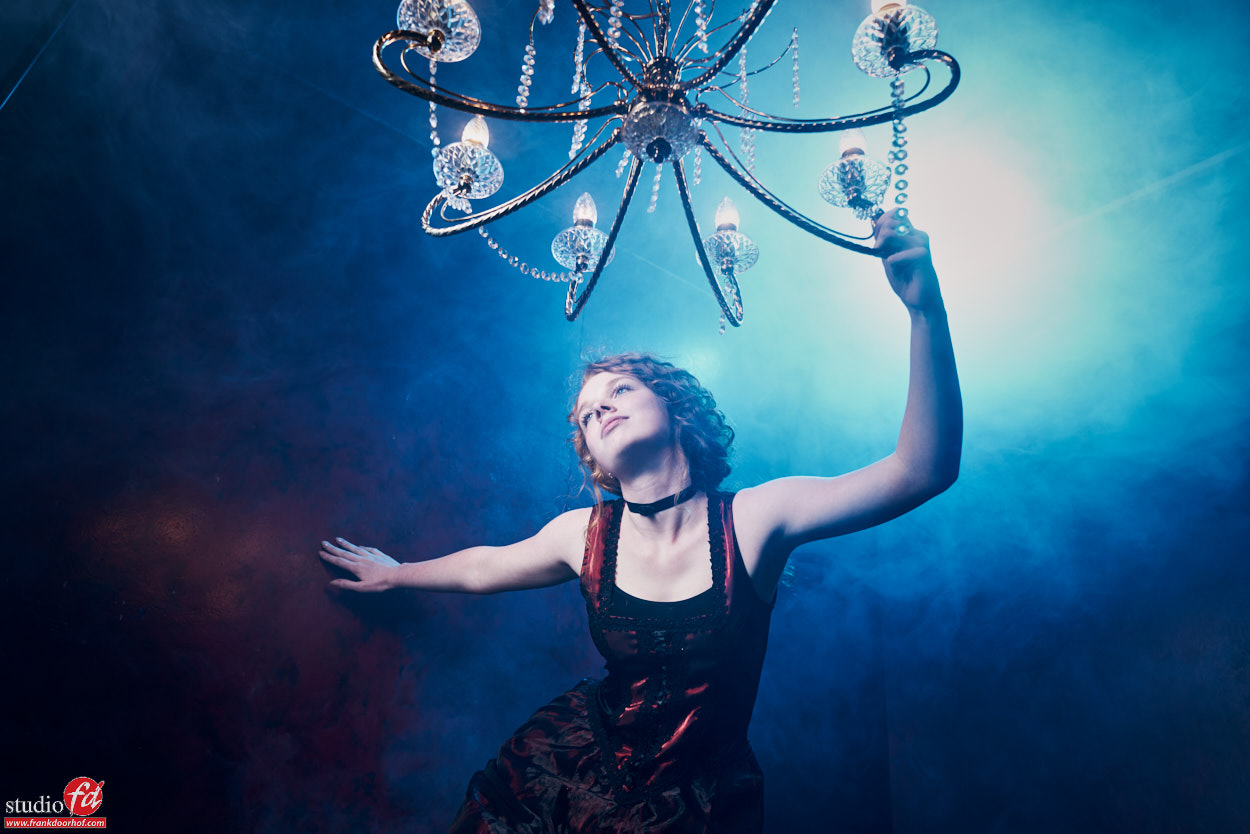
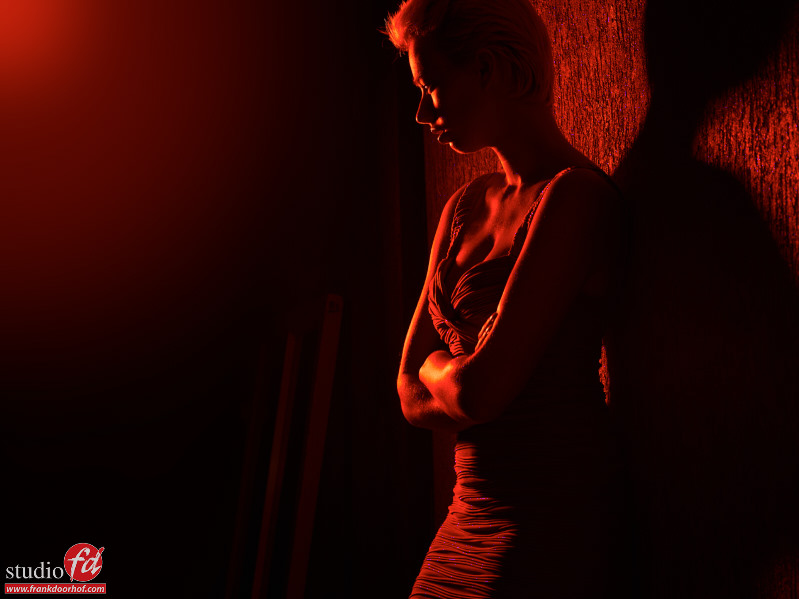
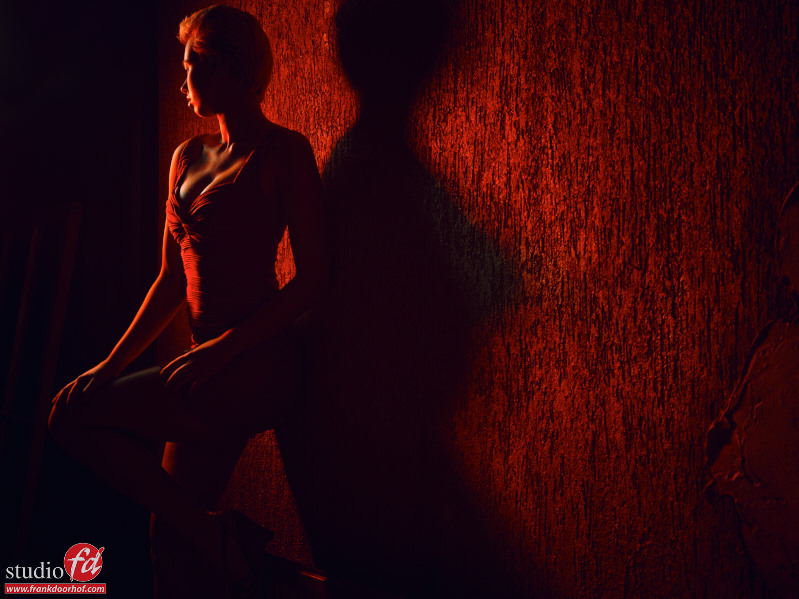
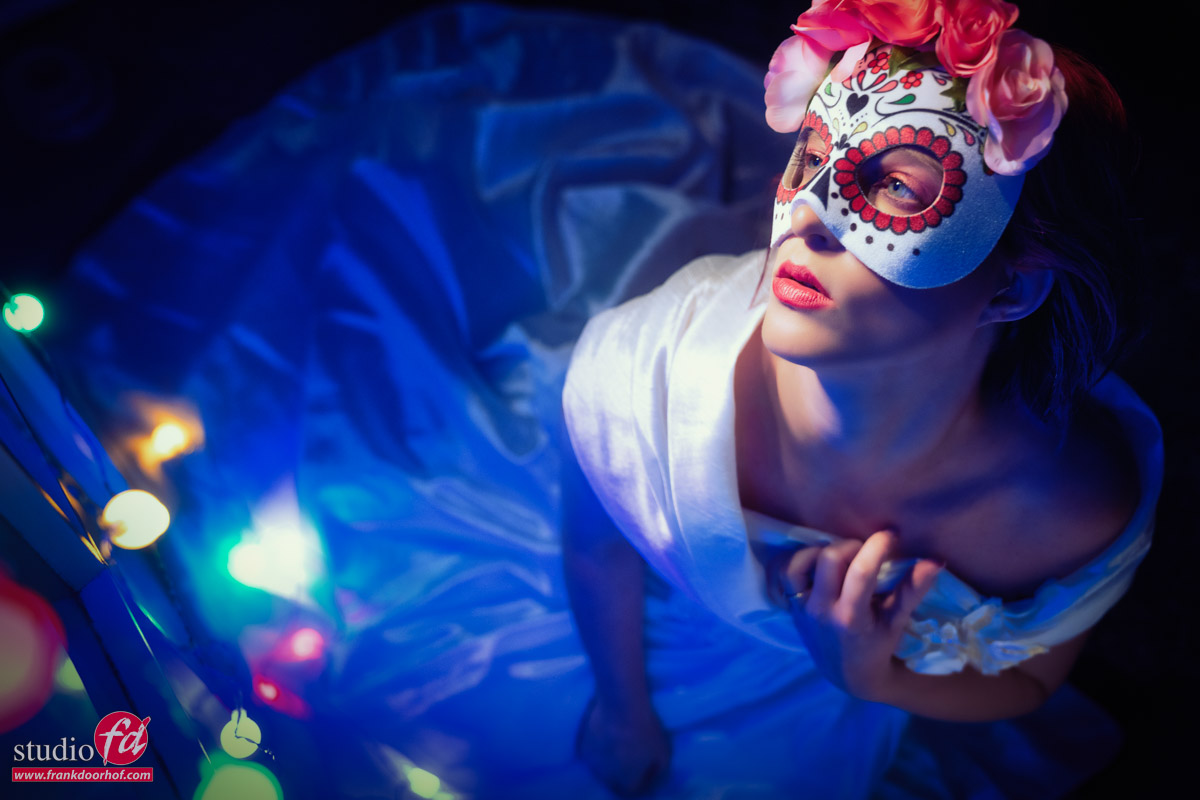
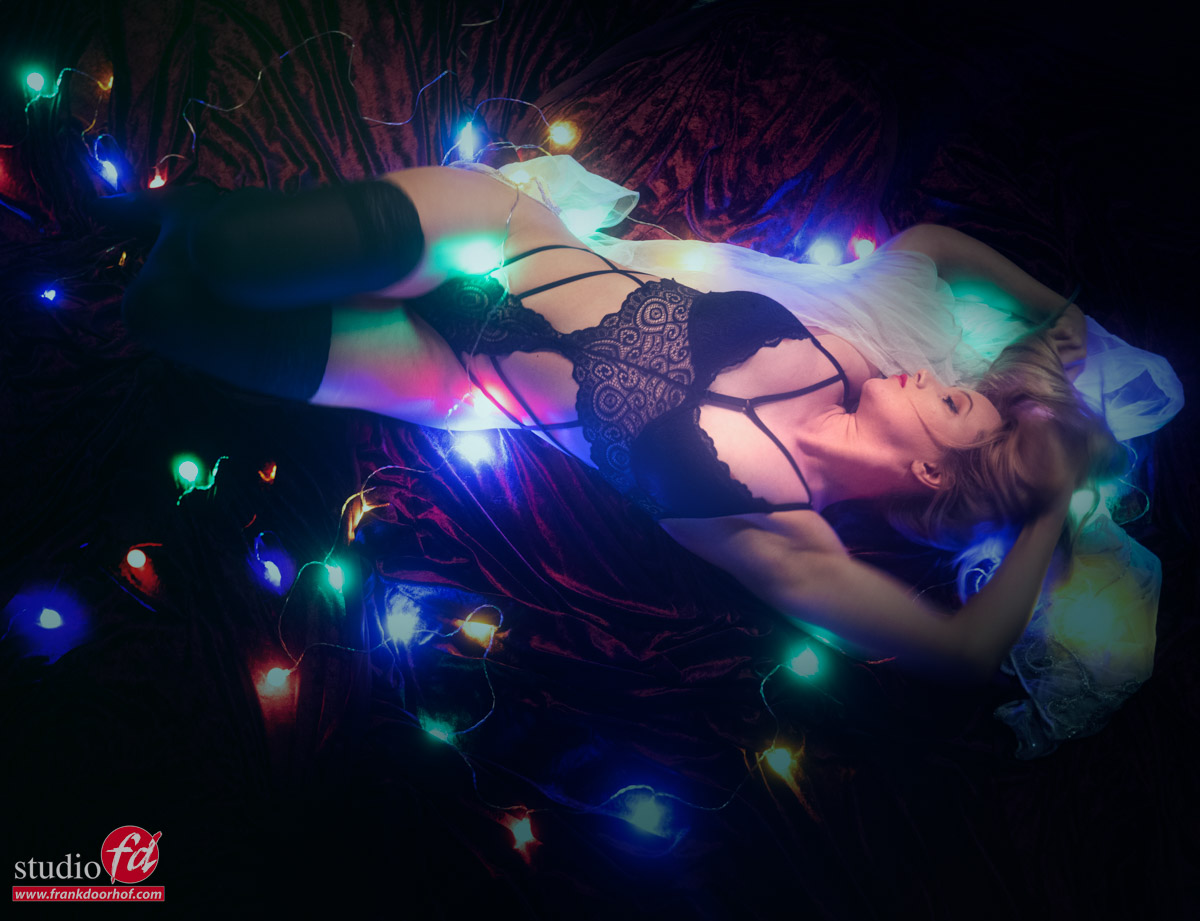
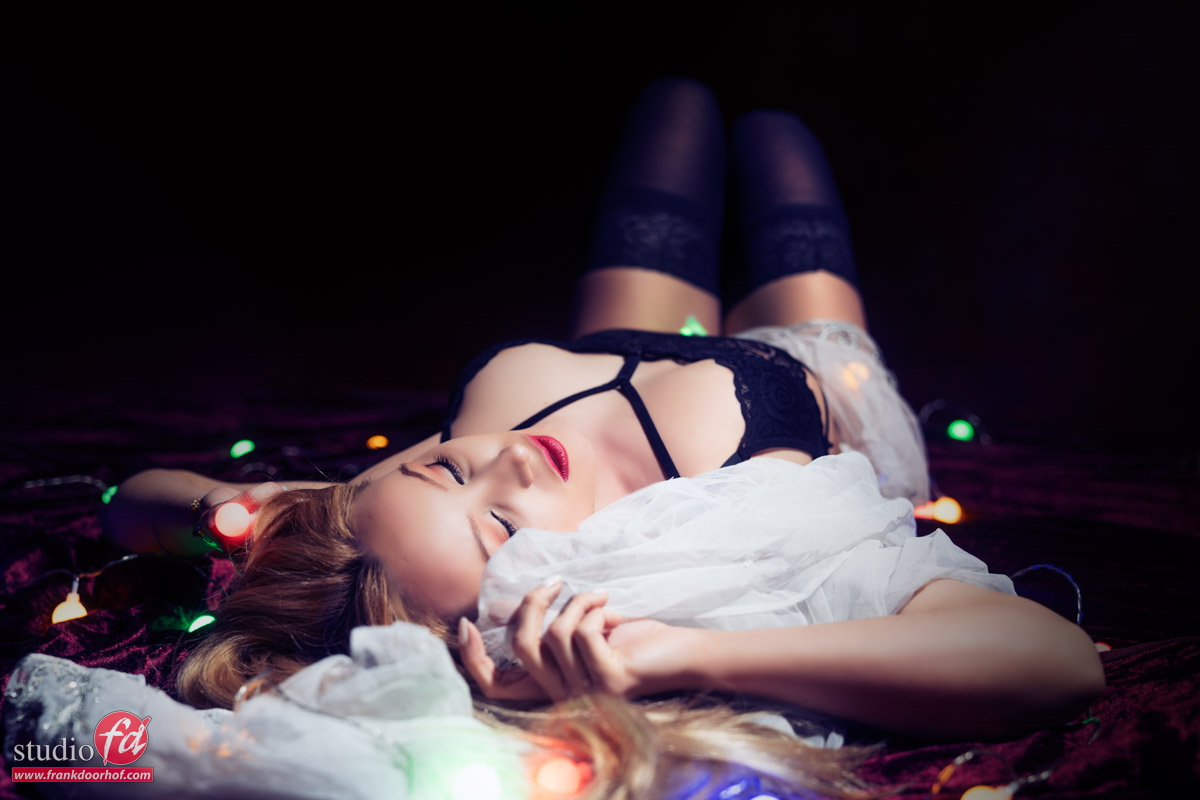
Let’s take a look at some samples I shot during workshops.
But don’t stop reading, there is a whole part under the images.
see the YouTube short about this workshop
I do have to add one more thing about combining/mixing light sources.
If you want to wow your customer or have more options yourself and you don’t want to change anything in aperture or strobe output I always advise setting the shutter speed as fast as possible and the result to the darkest you like. So let’s say f2.8 ISO1600 1/125. The added benefit of this method is that if during the shoot you realize you want the lights to be brighter you don’t have to panic or change something. You simply grab the shutter speed dial and lower the shutter speed. The model will still be correctly lit (the flash is just a pulse) but the continuous lighting will become brighter.
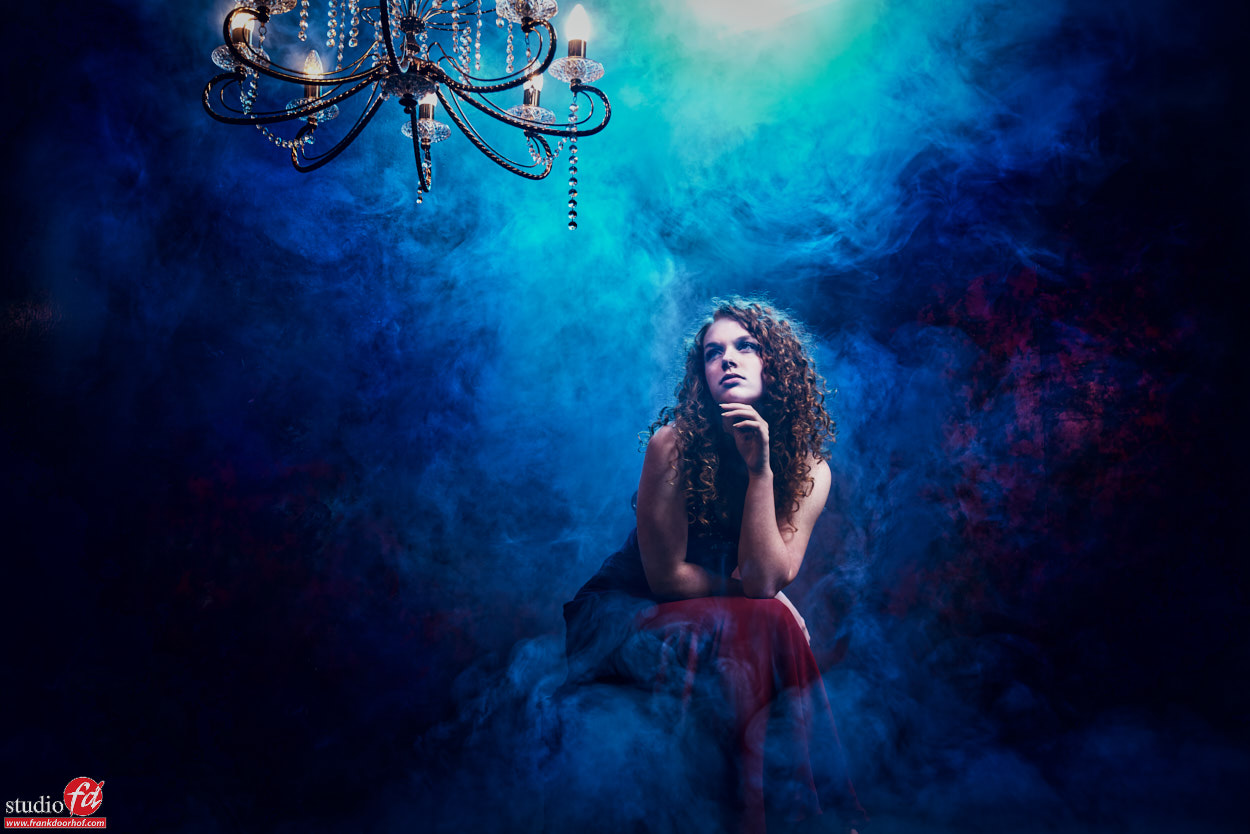
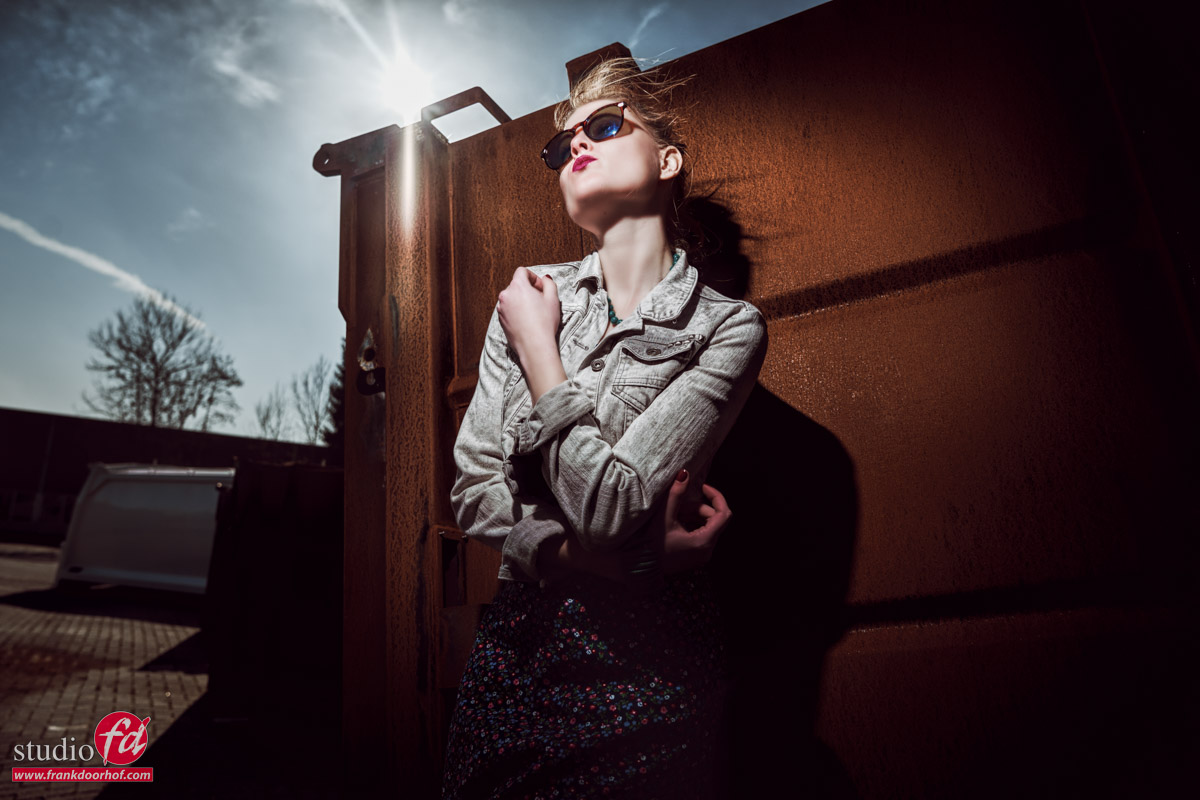
Combining/mixing light sources: Day-to-night
This is also super handy when working outside with the day-to-night technique.
No more need to use spot metering outside.
Just take the EVF and dial in the look you like (as long as the shutter stays at your X-sync) and after that use the light meter to get the strobes to the settings for aperture and ISO you just saw in your EVF. If you keep it as dark as possible you can literally light the background by just changing the shutter speed. Customers really think you’re a magician 😀

check out this video of a workshop outside
Some final thoughts
You hear me talking about the X-sync a lot during workshops, live streams, and in articles. Let me explain a bit why.
When we think about DSLR cameras when we take a photo the mirror flips up and the first shutter curtain opens followed by the second one, the faster the shutter speed, the faster these two follow each other. As you can imagine when you use strobes there is a pulse of light that is very fast (often 1/2000 and up) so when you want your image to be correctly lit you need to make sure BOTH shutter curtains are not covering the sensor, and in most cameras that are every shutter speed below 1/200 for their own speedlights and 1/125 for most strobe systems. If you shoot faster there is often a distinct black bar covering your image, that’s your second shutter curtain.
When we take into account the 1/125 rule all strobes can work in normal operation mode (later more) and you can use a normal flash meter to meter the light.
This is of course a limitation that has haunted us photographers for decades and there are solutions.
One of the most known solutions is HSS (High-Speed Sync) this makes it possible to shoot at shutter speeds up to 1/8000 without the horrible black bars. In simple words, the strobe fires several times a second covering the whole censor in different periods of time. It’s an amazing system with many drawbacks, but it does have more positives than negatives. One of the negatives is without a doubt you need a special flash meter that can meter HSS, for example, the Sekonic 858. If you use a system like this you still do the same thing as mentioned in the article but you can also make the scene darker very easily by raising the shutter speed.
BUT…. do beware that when you enter the realm of HSS the output of the strobe falls dramatically so personally I would be a bit careful with planning a shoot whether you are on the edge of HSS or not.
Other solutions to break the X-sync are :
Leaf shutter lenses
These lenses are pretty heavy in weight and price but they are awesome.
Most of all the quality is often perfect, but due to the design, you can often shoot at shutter speeds of 1/750-1500 and sometimes even higher.
Specific digital cameras
And not even the most expensive ones, my Point and Shoot Fuji camera from years ago was actually able to shoot with strobes on 1/2000 which at moment stunned me because I didn’t know this, imagine my surprise when I saw a cheap camera doing the same and even faster than my 20K+ medium format setup with leaf shutter lenses. (Don’t tell Annewiek).
Conclusion
Working with different light sources in one shot is great to really set a mood, or sometimes you just have to because it’s part of the area you are shooting in. So don’t panic and just remember that X-sync rule and that the strobe is always a pulse and the continuous lighting just builds up over time.
Next time we talk about light metering on location to fight the sun and how to combine/mixing light sources