Tag Archive for: light meter

Blowing out

We all know the white backgrounds, but to be honest I think they have had their longest time.
Now a days for example I just love the light grey backgrounds a lot more… we still use a white background for this but we just don’t light it, creating a very nice modern look. However if you still want to play with white why not try the following.


Normally we meter the model incident and add 2.5-3 stops to the background (metered reflective) to create a really nice white background without blowing out details like hair.
In the following shots I did something else, and I really like this technique. Instead of using a strobe as main light I just use the strobes on the white background and meter towards the camera (incident) to get a “correct” exposure on the face of the model. The main light source in this case is in fact the whole studio, or in other words all the light that scattered around the studio and reaches the model from the front. This will result in a very blown out background really wrapping around our model as you can see here :

Manon November 22 2013-92-Edit
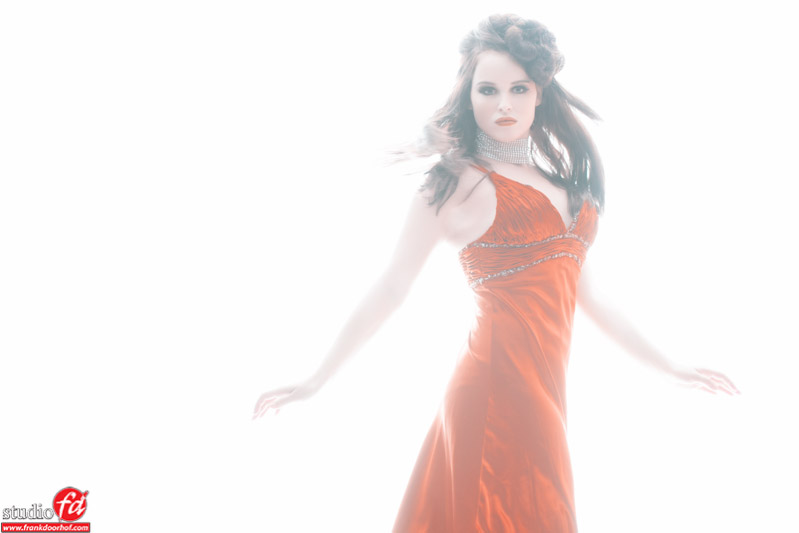
Now if the effect is a bit too strong you can always lower the exposure a bit on the the model or move the model further away from the background.


This technique also works very nice for portraits, but watch out with models with really light blond hair 🙂

Read more

Nadine outside

Today the second part of the series about the shots we did with Nadine in Almelo.
Today a small tip about “fighting” the ambient light.

Read more

Light meter calibration revisited

Over time I’ve written a lot of articles on the use of the light meter, and also some about the calibration of the meter. This has fueled some discussion and also made some people doubt their methods even more than before, so I thought that it was time for a revisit of this topic.


Why calibrate the meter
In fact you are not calibrating the meter, but the combination of the meter and the camera/lens combination.
Remember that every camera can be different, and that if ISO100 is correct it could be off for ISO200.
Knowing all this makes it easier to understand why the meter out of the box is not 100% accurate.


The quick and easy way
I’ve been experimenting a lot with the calibration process and found that if you calibrate to a QPcard101 and get the numbers to read app 128.128.128 for the gray patch you are pretty accurate. However there are some things you do have to realize.

Read more

Video with Polaroid

Last week Sharon and I visited a good friend and fellow photographer Pim van der Maden in his studio, which actually is very close to our studio (walking distance). Pim and I talked a few months ago about a large format Polaroid he still owned but hardly used anymore, I immediately got the idea that it would be cool to show you guys a small video in which Pim would explain how he worked with this camera.

When we started working with the camera the talk however soon became much more than just about the Polaroid, we just kept the camera rolling and decided we would edit it into a small “podcast” “interview on location” “instructional” video. And today you can see the video here on the blog. I hope you enjoy it, and even if you’re not into Polaroids (who isn’t ?) I think there are some very interesting things there that you can use in your own photography.

Many thanks to Emma, Pim and Sharon.
Visit Pim at his site : http://www.pimvandermaden.com