About technique and more.

Arms

Including arms in a shot can be a problem, so some people just give the advise to not include them… well that’s too easy.
Let’s look at some tips that I often share during the workshops.


Images are shot with a Beautydish with grid and the Lensbaby 80mm tilt lens.


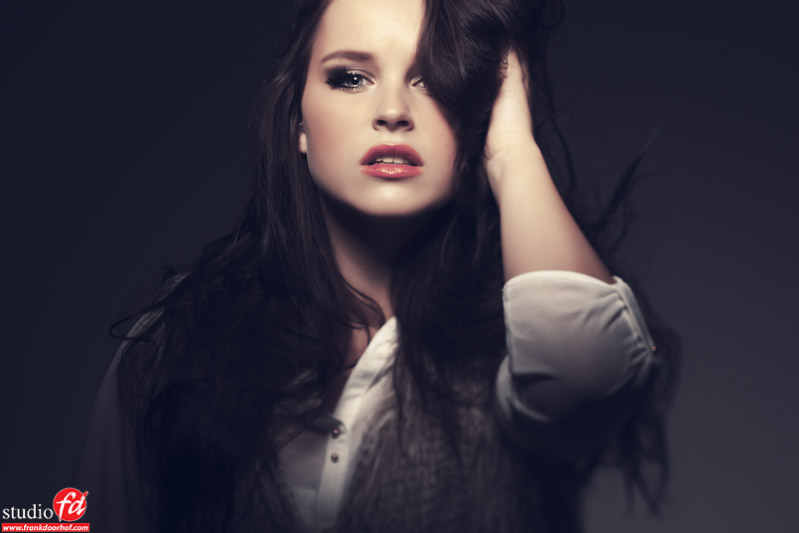
In my opinion you always should try to include both arms.
In this shot I only included one, and although I like the shot… well there’s something missing.
Also her elbow is on the absolute limit of what I find acceptable, if she would have moved it a bit more towards the left (image left) you would not see the upper arm and that gives a “weird” effect for me. Now I also have to add that all these rules are great, but if you “hit” that perfect image and the arm is a bit…. or the face is a bit ….. well in the end it’s all about the emotion a picture gives you, I have several images in my portfolio that are far from perfect (the perfect image actually doesn’t exist I think) but just gave me the emotion I wanted. So just take these tips as guidelines, to know the rules is also to know when breaking them (or better accepting a technical “error” for emotional perfection)

Manon October 5 2013 Eersel-119-Edit

Read more

Just a bit of hairspray

Spicing a shoot up can be done in many different ways, add some smoke, water, flower but if you don’t have that available you can always opt for something that the model/MUA always has with them, hairspray.


I do have to add that the model will have some very sticky hair after this, don’t light a fire in the studio (especially close to her hair) and keep it away from the strobes. But if you take care (or in other words just use common sense) it can be a great addition to a shoot. Lighting it from the back will give you a little bit of extra pop to the spray.


In these shots I added a bit of Clarity from topaz (get it here http://www.topazlabs.com/716.html and use Doorhof99 for a cool 15% discount) to really make the image pop, something I think Clarity really is great for.


Model : Manon
Shot during the workshops in Eersel at Studio76

Manon October 5 2013 Eersel-53-Edit

Read more

Simple props and weird angles

Creating new ideas and looks is always a challenge.
When you start out often you will shoot following the rules, meaning a certain lens, a certain light setup etc.


Today a very simple light setup with some cool results, this series was shot during the workshops I taught at Studio76 in Eersel last weekend with Nadine. But most of all I post this series to trigger you to not over think your light, often the most simple light setup works best, but also add some small props which gives you a lot of options for expressions and posing, and finally…. think about shooting with a wide angle from different angles for a unique look. Having an expressive model helps a lot of course.


Point is that styling and the proper use of props/story telling will make a shot much more interesting than just placing a model with jeans and tank-top in the same scene.

Nadine October 4 2013 Eersel-170-Edit

Read more

Model photography tips

A small tip for starting shooters:


I get a lot of questions about finding models so let’s give a bit of attention to this topic.


1. Friends and Family
Believe it or not but these are often the best choice if you want to start.


2. Websites
There are many websites offering models browse through them and find one you like and mail/PM them.


3. On the street
If you see someone you think could model just slip them a card and do a QUICK explanation of what you do, don’t take too much time. I found out that quick works much better, just before that moment that the “model” would feel like her personal time is consumed by you.

Nadine  Juli 27 2013                                                                         12802-Edit

Read more