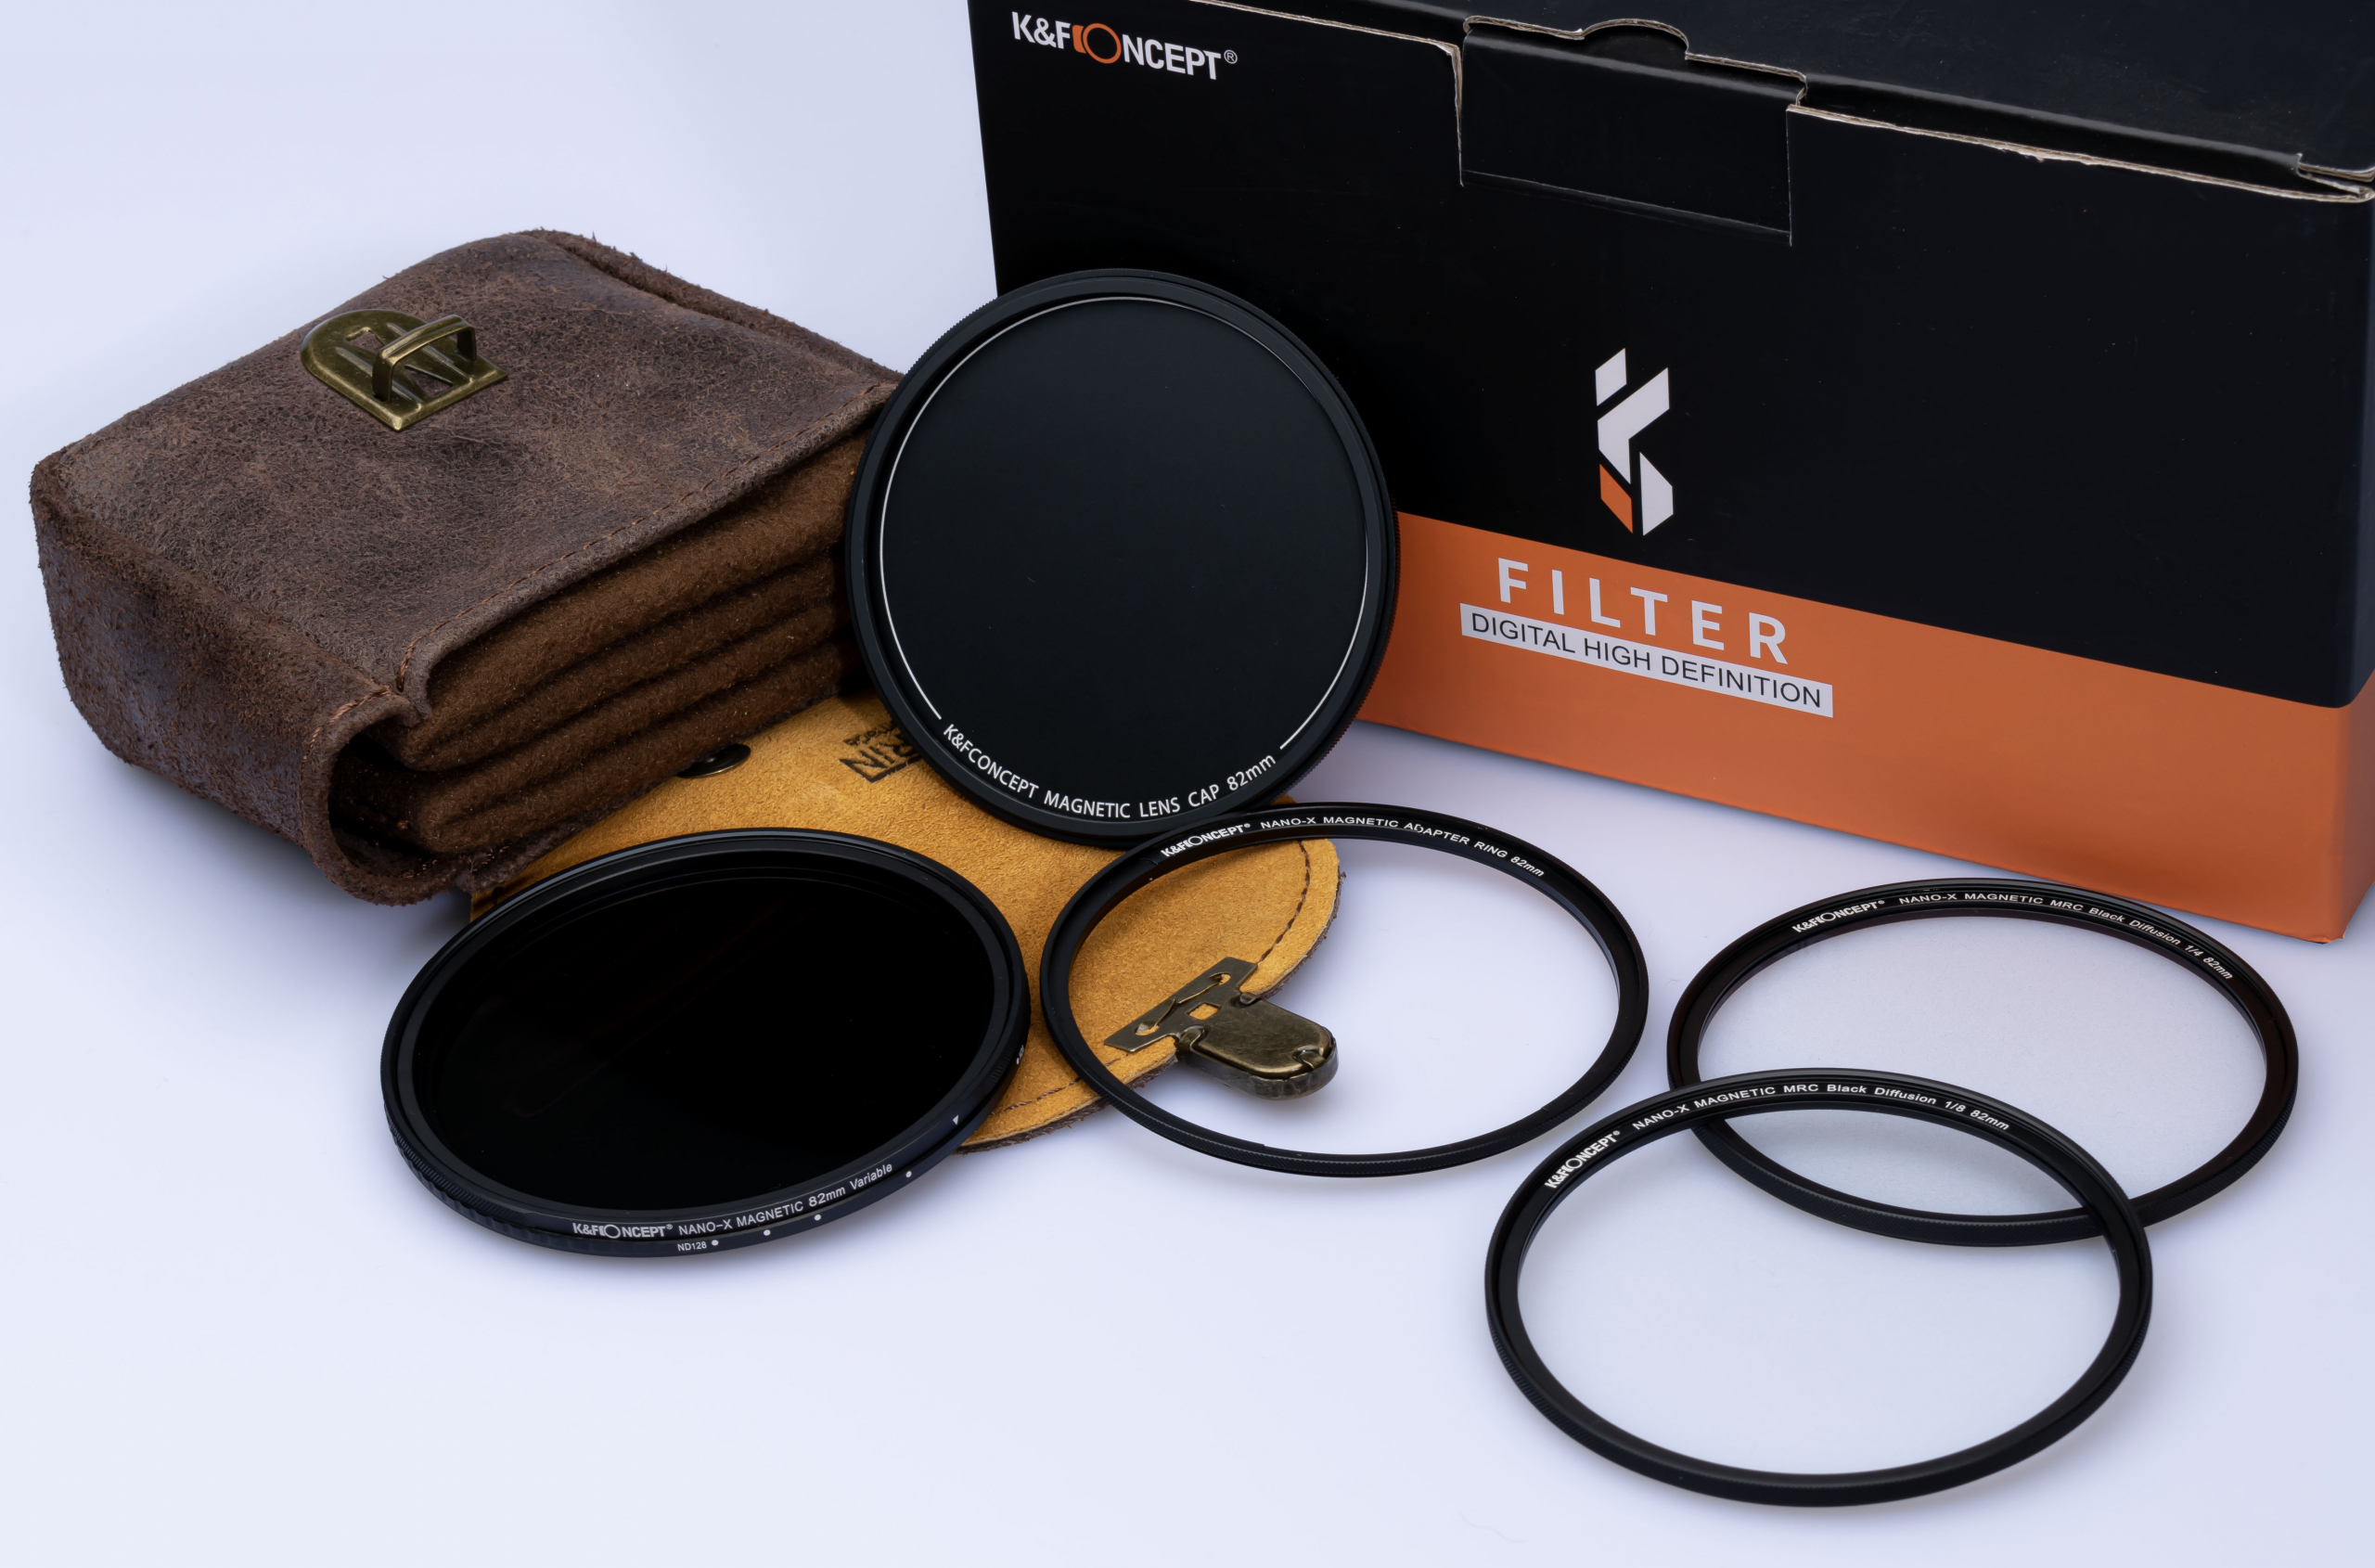
Filters come in many shapes and sizes (literally).
Personally, I’m not really a filter fan, but since I started using the Black Diffusion filters from K&F concept I have literally fallen in love with those filters.
The Black Diffusion filters from K&F concept give a fantastic “glow” effect on highlights, but do not “ruin” the photo due to loss of sharpness, photos remain razor-sharp, but as soon as some backlight falls on the lens, you see the highlights really “glow” fantastic. “. but that’s not all, I mainly use the filters for the impact they have on lens flares.
Where normally a lens flare can be a bit “harsh”, the filters provide a fantastic smooth rendering of the flare.
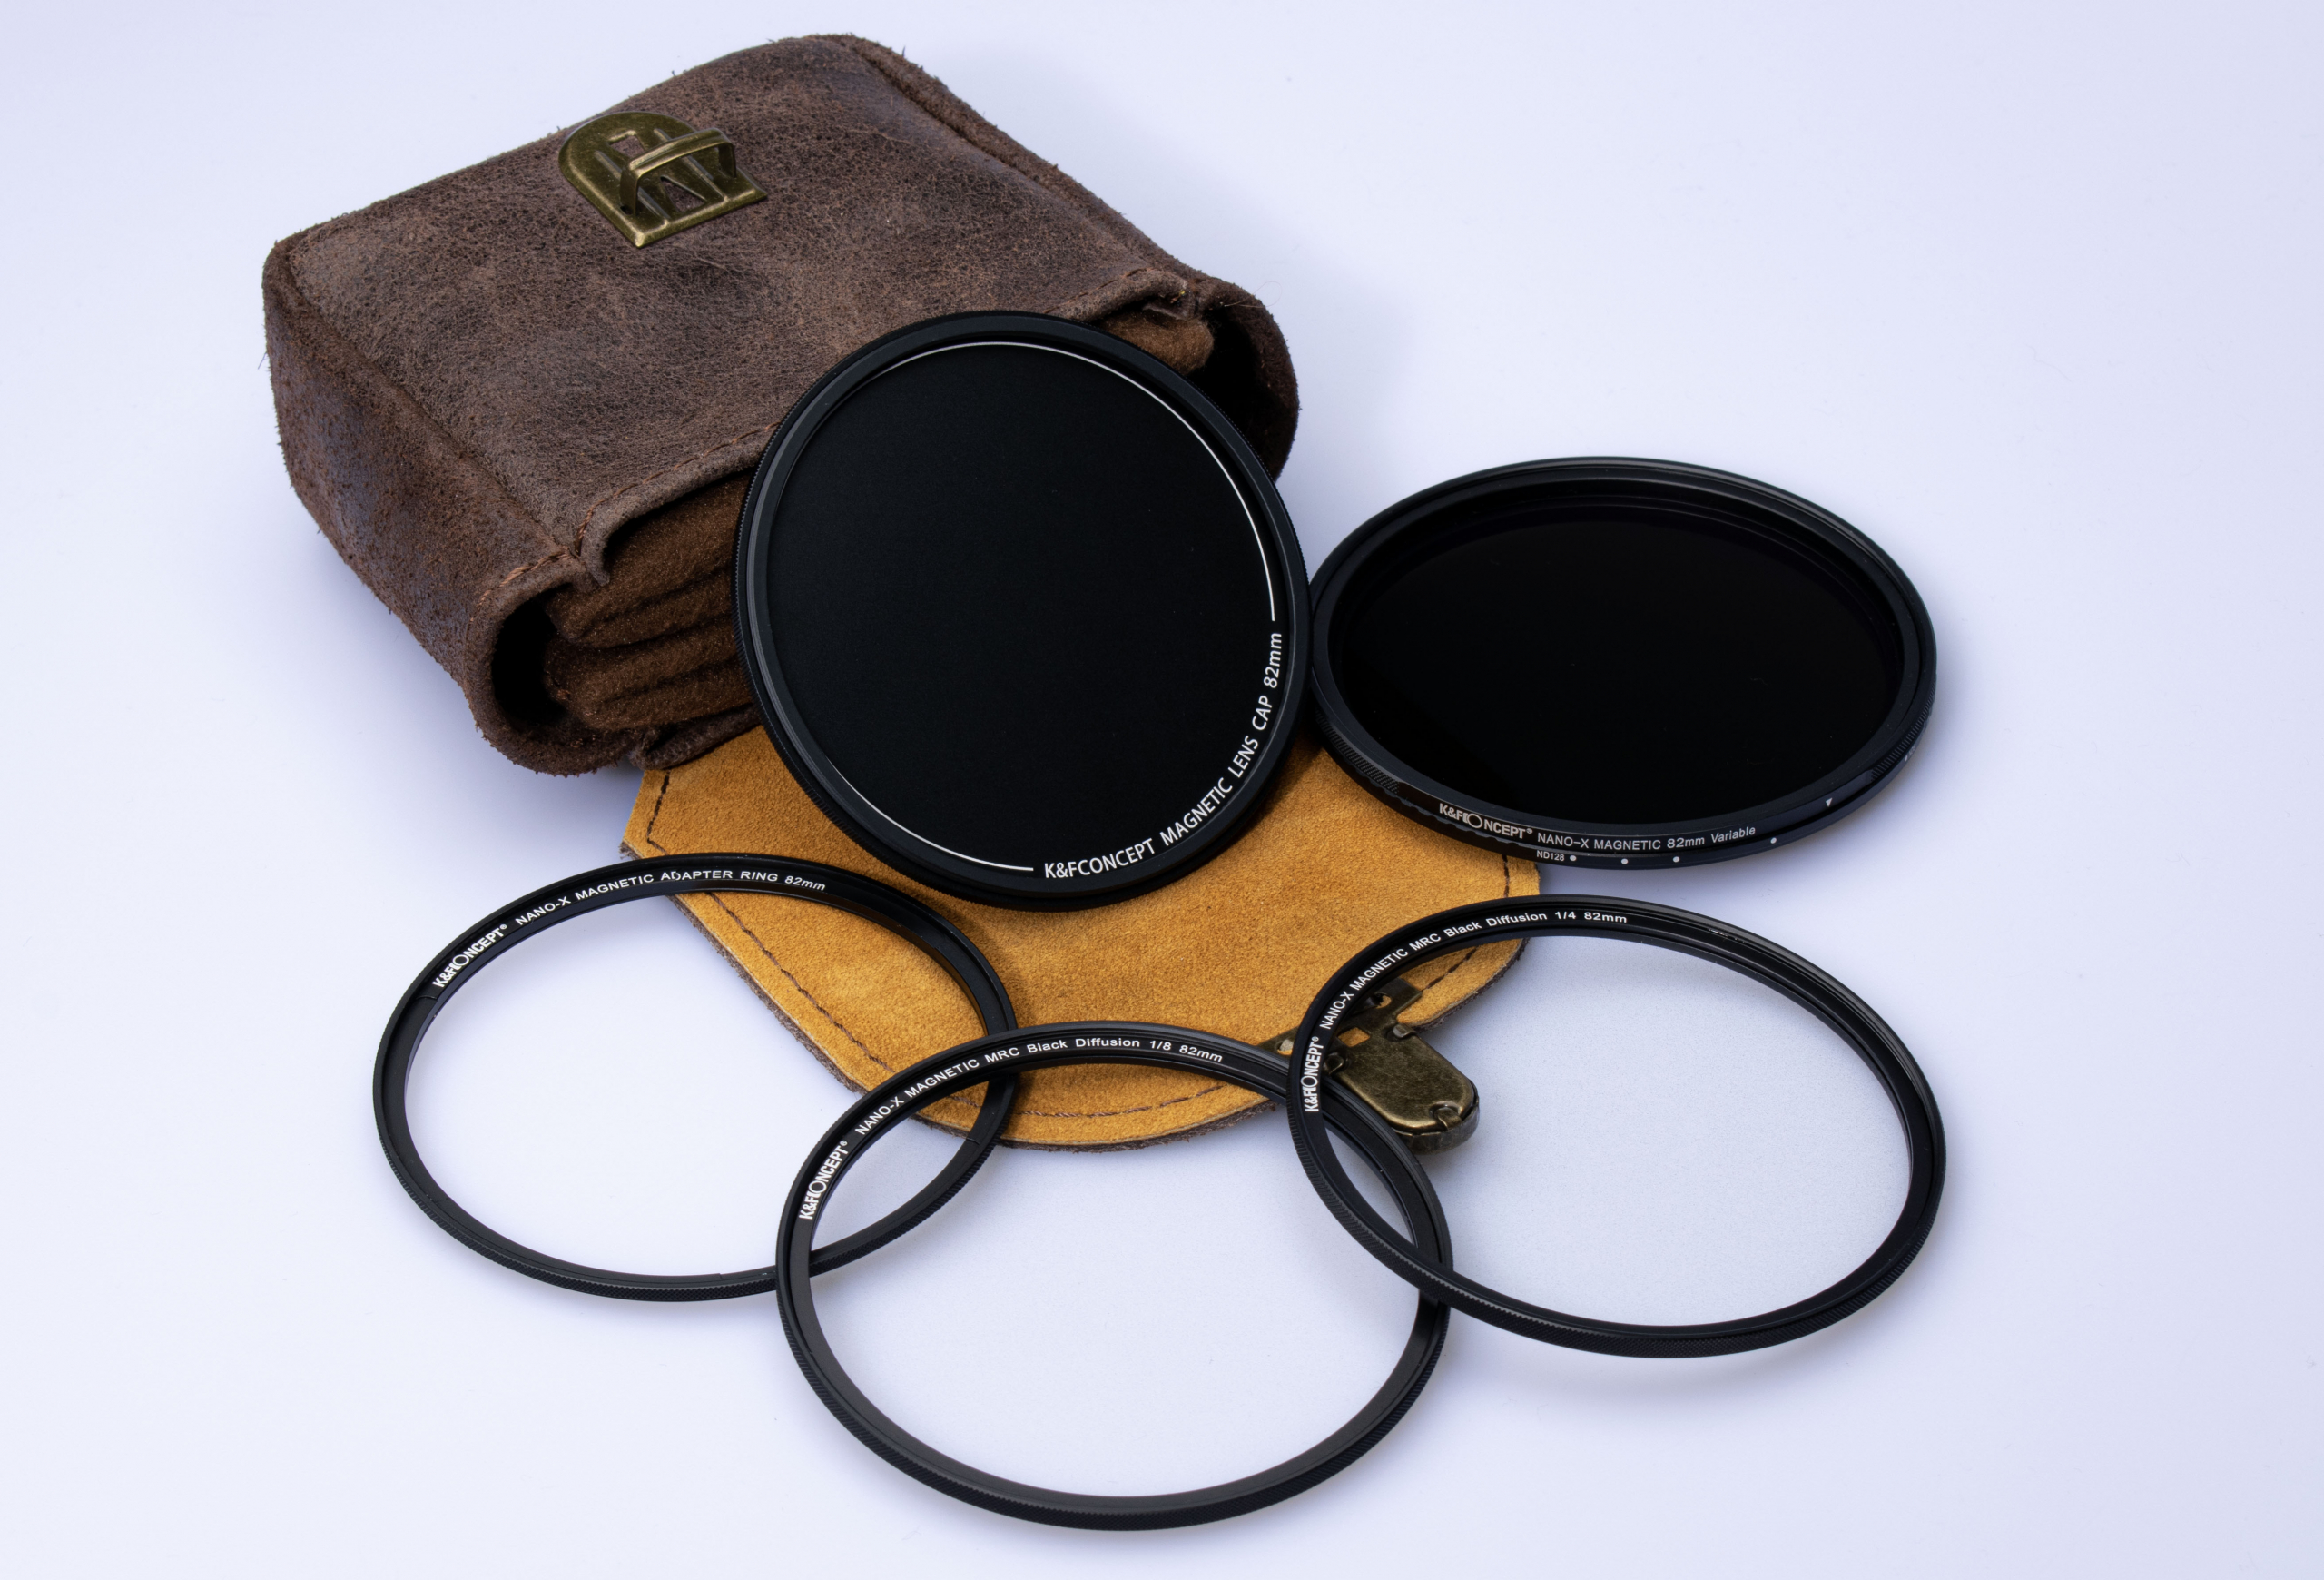
The Black diffusion is available in different strengths, but I mainly use the 1/8 and 1/4.
It will therefore come as no surprise that you will find these 2 in the package.
But there’s more…
You probably see them sometimes, those shots where the water is really super smooth, in case you’re wondering how they do that…. a really long shutter speed. Normally, however, this will not work because you would then get a totally overexposed photo, so you have to ensure that less light falls on the sensor. And for that we use so-called ND (Neutral Density) filters, which are available in different values (stops) which indicate how much light is lowered.
Now you may be wondering what I do with an ND filter?
Well… with outdoor flash we have a similar problem.
Many flashes that are a bit more powerful have a limitation on the shutter speed that you can use (often this is max 1/125-1/200, called the X-sync). If you shoot faster, you will be treated to a “nice” black bar (the shutter curtain). This often means that if you work with flash outside, you get photos with a depth of field from here to eternity, and that’s not always what you aim for of course.
By using an ND filter, we are able to block part of the light so less light falls on the sensor, this means we can now open the aperture, resulting in less depth of field. Awesome.
Now the question that we all want to ask “what strength should I buy?”
Well, that’s not so easy to answer.
Sometimes you want a little less and sometimes a little more…. luckily we have a solution for that too.
In addition to the 1/4 and 1/8 Black Diffusion filters, the Frank Doorhof package also includes a variable ND filter from 8-128, a very useful range for both model photography with flash on location and landscapes. The variable ND filter has clear indications for the stops and is also fully adjustable. More flexibility is almost impossible.
If you’re already getting excited…. just wait
One of the major drawbacks of filters is that they are sometimes impossible to get off your lens.
There only needs to be a small grain of sand on the ring or maybe you don’t pay attention when mounting the filter and it’s not aligned perfectly, drama, drama, drama 😀
Well…. we solved that too.
All filters are magnetic
This means that you only have to place the magnetic ring on your lens, my advise is to do this in a clean environment and also, just to be sure, clean everything with a blower so that there is nothing on the lens mount where the ring is placed. Once the ring is on, you can change the filters with lighting speed.
Happy yet?
Again this is not all, when we do something… we do it the right way.
Due to the design of the filters and the ring, you can also combine the filters.
For example, if you want more diffusion than 1/4, you just click the 1/8 on top of the 1/4 and you get a heavier effect.
Of course, the variable ND filter is also fully magnetic and has no protruding parts, so you can still use the lens hood if necessary.
Almost done
Ok, in terms of filters we are done now, but there is more.
Of course we can just give you the filters in a box, but that is not really convenient on location and doesn’t look cool/special, so we opted for a beautiful handmade leather pouch, and they are all unique (handmade). We have a few of them in the studio and they are indeed all slightly different, so you really buy something unique.
In this video I introduce the package to you and show you what it contains and what you can do with it.
The filterpack is now available via www.frankdoorhof.com/shop (for the Benelux) or in the stores that sell K&F Concept.
https://frankdoorhof.com/web/wp-content/uploads/2022/11/FD-filter-pack-KF-Concept-2.png6701200Frank Doorhofhttps://frankdoorhof.com/web/wp-content/uploads/2015/03/studioFD_Logo-1FV.pngFrank Doorhof2022-11-22 13:00:302022-11-22 13:00:30A new Frank Doorhof allround filter pack
As you all know I’m a big advocate for creating backups, Annewiek and I ran a PC shop for over 20 years and the misery that dataloss can give is something you never want to experience. We had people in the store literally crying because they lost everything. Trust me you never want this to happen. And it’s in essence very easily to prevent.
We all probably lost a few photos or videos and we all know how that feels, imagine losing all your work and images of loved ones, yes it happens daily.
So besides storing images on your internal drive (the dumbest thing you can do) it’s important to create a proper backup system. By the way, if you use a laptop and you see a C: and D: drive, this is NOT storing your images on a separate drive, it’s the same drive but divided into two (or more) partitions. It sounds ridiculous but we had several customers who used laptops this way and thought they were safe if the main drive crashed.
The safe way
Remember that NO solution is 100% fool proof, and in the end YOU are responsible for making the backups, or at least automate the process.
My advise is to use a DAS next to the computer, this is a system that uses several drives to make sure that if one drive fails you don’t lose any data, as long as you replace that drive. It’s a super easy way to never think about storage space again, if it’s full you just replace a drive, and when you can’t add space anymore… well well done that’s a lot of data, now buy a second unit or a larger unit and connect them.
But it doesn’t stop there.
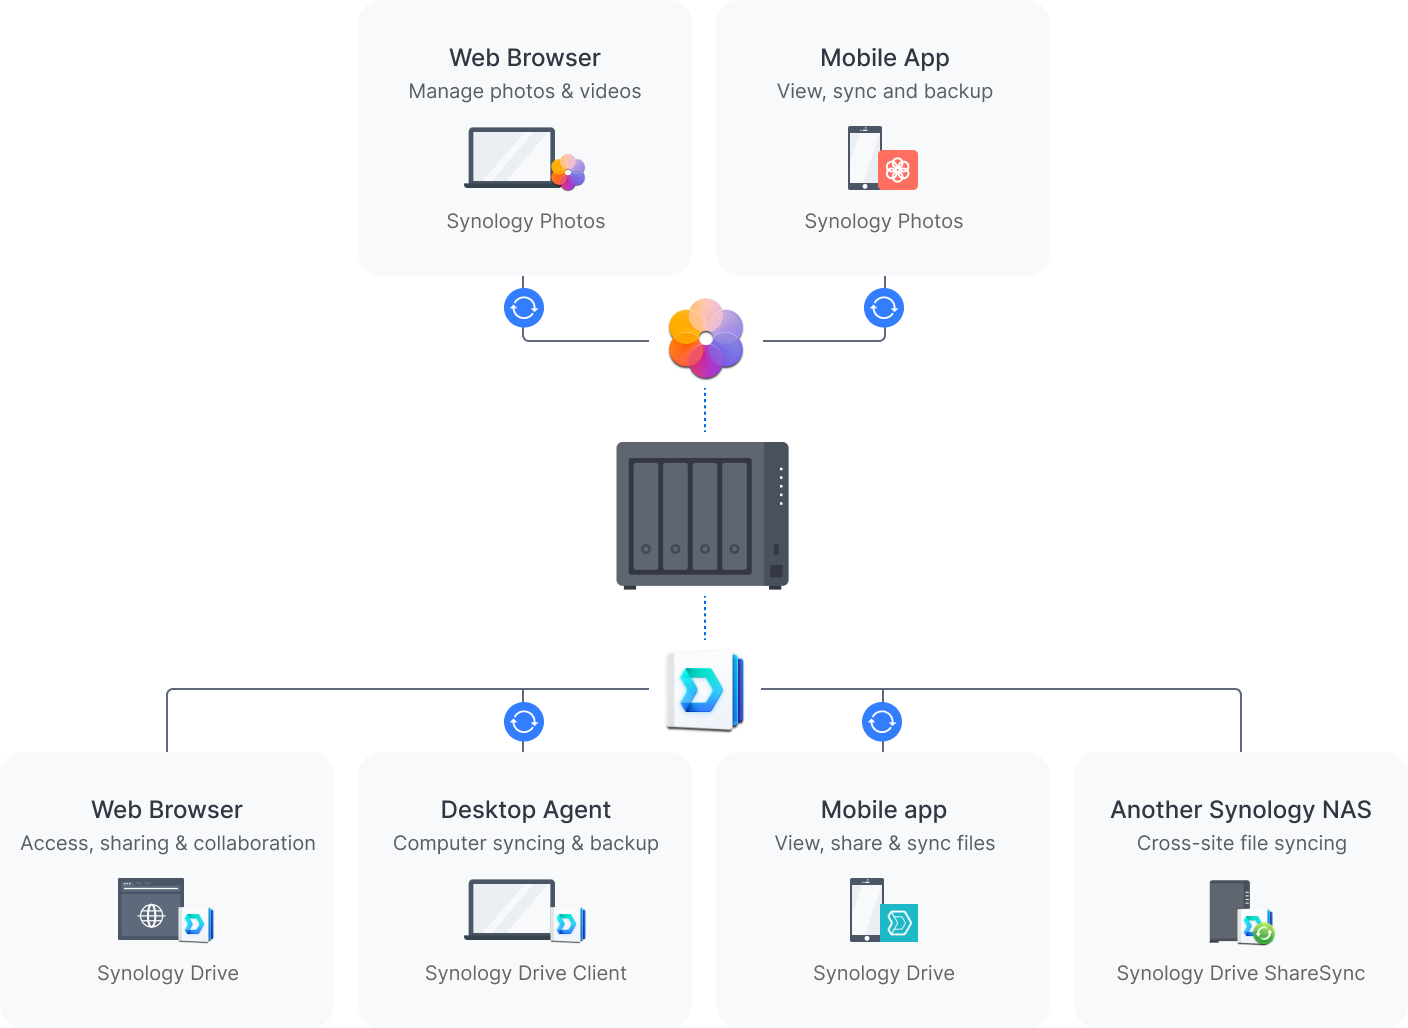
There should always, always at least be a second backup. Those backups are often placed on a NAS system.
The difference between a DAS is that a DAS is attached directly to your system and a NAS is on your network, the NAS also has it’s own IP address in your network.
The main advantages of a NAS is that you can work on it with several people, and even remotely.
Synology
During our years in the computer store we sold several brands, but the brand I always came back to as a problem solver or simply the best in its class was Synology.
So what do we do with our NAS?
We use several in our studio and home.
Mostly of course they are used for storage of our photos/videos and at home for my music.
The thing I personally really love about the Synology products is that even when you don’t know anything about setting up a network or external access Synology got you covered. It’s almost a matter of 1,2,3 to setup external access to your NAS so you can access your data from anywhere in the world. (safely of course)
But there are also a lot of apps that will make life even easier.
One of the apps we use a lot is the amazingly handy Photos app for example. Never worry about your photos on your phone anymore, as soon as we enter our home the phone starts to upload all new photos to the NAS. The only thing you have to do it download an app on your phone and make sure it’s active. (remember nothing is 100% safe unless you monitor it yourself). You can even create different albums that are accessible for certain people. For example a dedicated album just for your family.
Another thing we have setup on our system is that our Synology in the studio is syncing the retouched photos to our Synology at home, so we have the retouched photos also in a separate location and a separate database/library in Lightroom, something you can’t easily do with online backups (we also use SMUGMUG for online backups).
You could run a whole website from your NAS, but that’s something we don’t do (at the moment), what we did setup is special customers areas, using the double NIC on the Synology we’ve created a separate access to the NAS that is not connected to our home network, this speeds up the external access considerably, and makes it possible for clients to download their files straight from our NAS, especially for video projects this is a HUGE time saver, uploading 120GB to an online service and letting your customer download it sounds easy enough but customers often don’t want to install the app needed for that access. By setting up a client access area we create a totally separated part on our NAS which contains all the data for that client, they can access it and download it, and when we give permission also upload materials, especially with my music (hobby) this is awesome for collaborations between musicians.
A Synology NAS is way more than just a few disks that you use for storage, it’s (when setup correctly) a total eco system that is great for yourself and your customers, in all honestly we could not operate our business without a proper NAS.
Synology over the years have been a very reliable partner and the quality of their support and gear is without a doubt in a league of their own. So if you’re in the market for a solid and trusted backup solution, make sure to check them out.
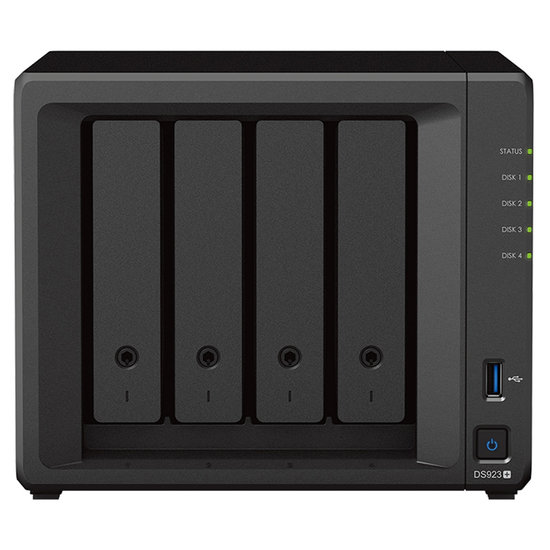
And having said that… Synology just released a brand new NAS, the diskstation DS923+
This is a very nice NAS for anyone that uses the system for photography/video and music creation. It’s very fast and can store huge amounts of data, and you can extend the system with extra bays/NAS units. It’s really a system you can grow in. And I think that’s a vital part of what we should all work towards, not replacing a NAS because it’s too small, but being able to extend the NAS with extra bays or connecting them to other units is vital for business I think.
But let’s not bore you with all the details, take a look at this new NAS here.
https://www.synology.com/en-global/products/DS923+
I’ll be testing one very soon and keep you all updated about it, but in all honesty I expect it to just work, like they all do 😀
One more thing….
I already mentioned this, but lets do it again.
A NAS/DAS or even a harddrive is something you store valuable information on, and like with bitcoin, if you lose the data it’s gone forever with no means to recover it. Luckily you can always use recovery software or for example the recovery service of your manufacturer, but best is to just prevent data loss. Here are some very simple tips.
Harddrives
use NAS drives, these are designed for the use in a NAS and will run much longer than a normal drive.
also don’t buy all your drives from the same supplier. Make sure if you need 4 drives you order from at least 2 different shops. If there is a fault in a batch it’s often in a series of harddrives. Luckily it doesn’t happen a lot, but it’s hardly any extra work to just order from two stores, or a week apart.
Brand
I know price is important, but in the total cost we are often talking about very minor differences, and let’s be honest… always ask yourself the question “how much would I pay to get all my data back?” compare that to the extra costs between a very good NAS and a NAS that is sold at the local grocery market as “weekend deal”
UPS
If you take care of your NAS it will serve you for a long time.
If you live in an area with peaks in the power, or black/brown outs it’s very wise (almost vital) to invest in a UPS or filter for the power. The UPS will keep the NAS running when the power goes out, preventing harddrive crashes, often it’s coupled with software that will shut down the NAS nicely.
Use the scheduler
In most NAS system you will find a time scheduler, I know a NAS is designed to run for days and weeks and years, but it doesn’t make any sense to keep it running when you only use it in the weekends or only during certain days. Just use the scheduler and let the NAS also take some rest now and than.
Use the vacuum cleaner
Maybe the most important one.
Just for fun, power down your PC/Mac/NAS etc. and take a look at the fans and air in/out takes. I think you will almost immediately understand why some systems just shut down after a few years. I would HIGHLY advise to clean the fans at least once a year, and if you dare also open up the case and clean the inside. Better is to just do it every month. Trust me it’s vital.
I hope you guys enjoyed this article.
Feel free to leave comments on our social media, or email us questions.
To be 100% open and clear.
We have been working with Synology for a long time in our computer business, when I started our studio we also used Synology. Later on I became one of their ambassadors and have been ever since. As with all the advise I give you guys, the products I promote I also use myself.
https://frankdoorhof.com/web/wp-content/uploads/2022/11/synology-ds923.jpg550550Frank Doorhofhttps://frankdoorhof.com/web/wp-content/uploads/2015/03/studioFD_Logo-1FV.pngFrank Doorhof2022-11-17 11:10:052022-11-17 11:10:05Backups and a new NAS release
Umbrellas?
Yes I know.
Often the first light shaper you get when you buy your first strobes.
And let’s be honest, the quality of those photos are not all that, Right?
So in most cases we immediately start saving up for soft boxes, but they retail for a lot more money, and when you finally have the budget to invest in soft boxes… the quality often doesn’t jump up immediately right? But it does.
Well it’s easy to explain actually.
When we buy something new, we take time to test things and figure out how to get the best out of it (we paid for it right?)
And believe it or not, often the softbox indeed gives you much better results after a few days, but does this mean that umbrellas are limited?
I would like to say the opposite.
The main reason most photographers don’t use umbrellas anymore is because we still remember the problems and results from umbrellas connected to that first period, but… we didn’t know what we know now right?
A new friend
Let’s be totally clear, I’m without a doubt in the category that didn’t really like umbrellas. But I’m also the first one that will admit he was wrong… and very wrong (well ok not that wrong).
The main thing about umbrellas is the way you use them.
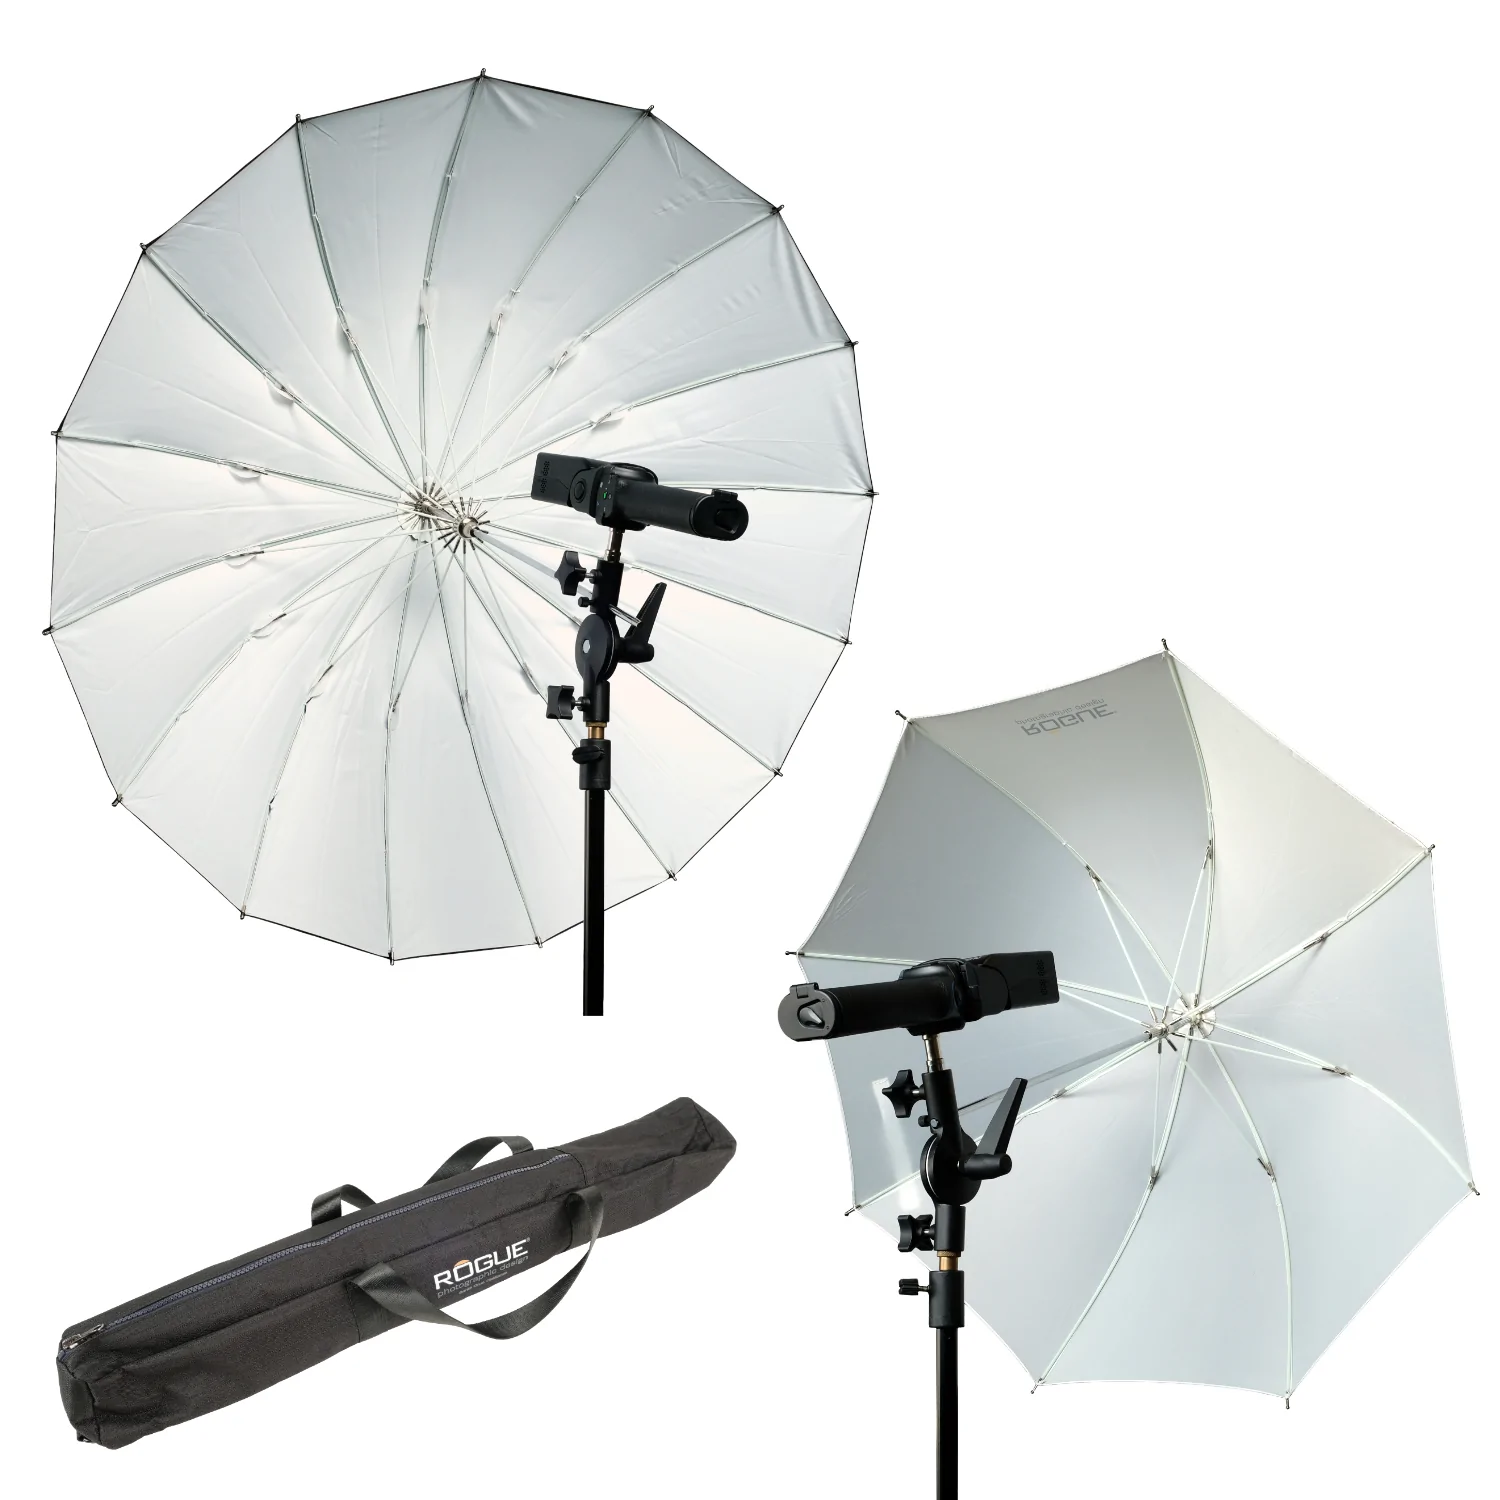
When we look at the new kit from Rogue we get two different kind of umbrellas.
First we have the white one
This is a 86cm umbrella you can use as shoot through, or reflective.
This is also often the kind of umbrella that gives beginners headaches for the simple reason the light goes everywhere. But in all honesty that’s also the power of this light shaper.
This umbrella is literally awesome to light white backgrounds.
Where with other solutions there is always some hot spotting on the background, it’s also very difficult to also include the floor, let alone also give the model a slight edge light. When you place the white umbrella correctly and adjust the distance to the preferred result you could in essence light the full background evenly, the floor AND give your model a slight accent light.
The main reason the even lighting of the background becomes more and more important has connection to the new cameras that use a soft shoulder and don’t clip highlights as easily as in the past, meaning if you get a hotspot behind your subject it can literally reflect back into your camera washing out the image and most certainly destroy detail in fine details like hairs (especially with a blond model). With umbrellas you prevent this from happening.
The white umbrella gives a beautiful soft omnidirectional quality of light and is also great to use a fill in flash, especially with larger sets and situations where you simply don’t have the room for a large soft box, or where you need a wide area of a room/set covered with light. But also think about larger groups etc. omnidirectional light is always handy.
The black one
The other umbrella is the black one.
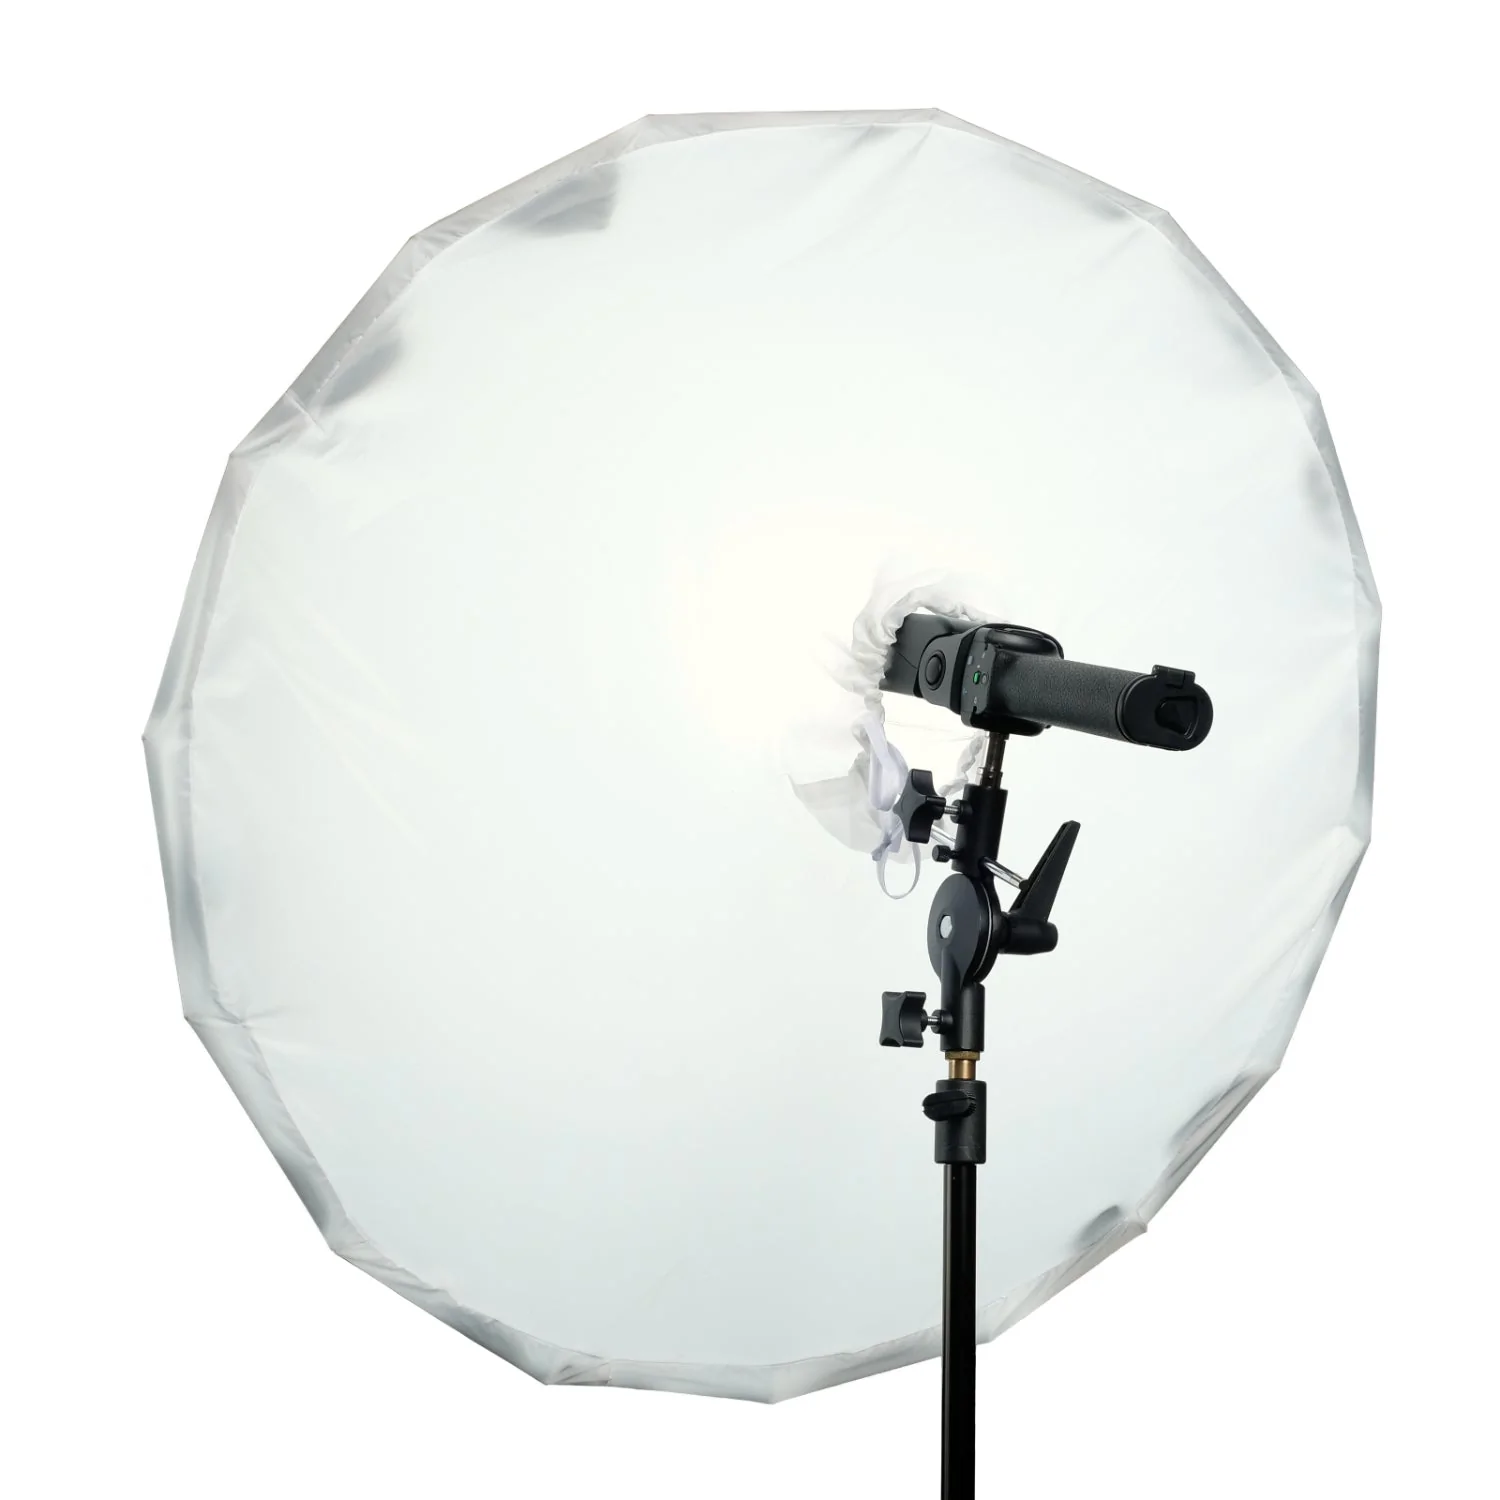
This one is used in a reflector setup and is delivered with a nice soft light sleeve that is very easy to attach and has an opening for both speedlight and larger monoheads (we use it on our Hensel Experts and speedlights).
The main thing about the black umbrella is the softness of the light when used with the sleeve, but also the spread when used without. Let me explain.
When you use a standard softbox the light is in 99% of the cases placed in the back of the softbox aimed at the front or sometimes at a diffusion panel in the middle of the box. With an umbrella (and a little bit on a beauty dish) you don’t work with direct light, but actually with reflected light, and this means you get a MUCH nicer and more even light output. Meaning softer light from a MUCH smaller (in depth) light shaper.
The other thing I really like about the black umbrella is that you can opt for both the super soft quality of light with the sleeve, but also for a much harsher quality without the sleeve, making it one of the most versatile light shapers I actually have in our studio. Well ok the Westcott Lindsay Adler projector takes that spot but that’s something completely different 😀 (and more expensive).
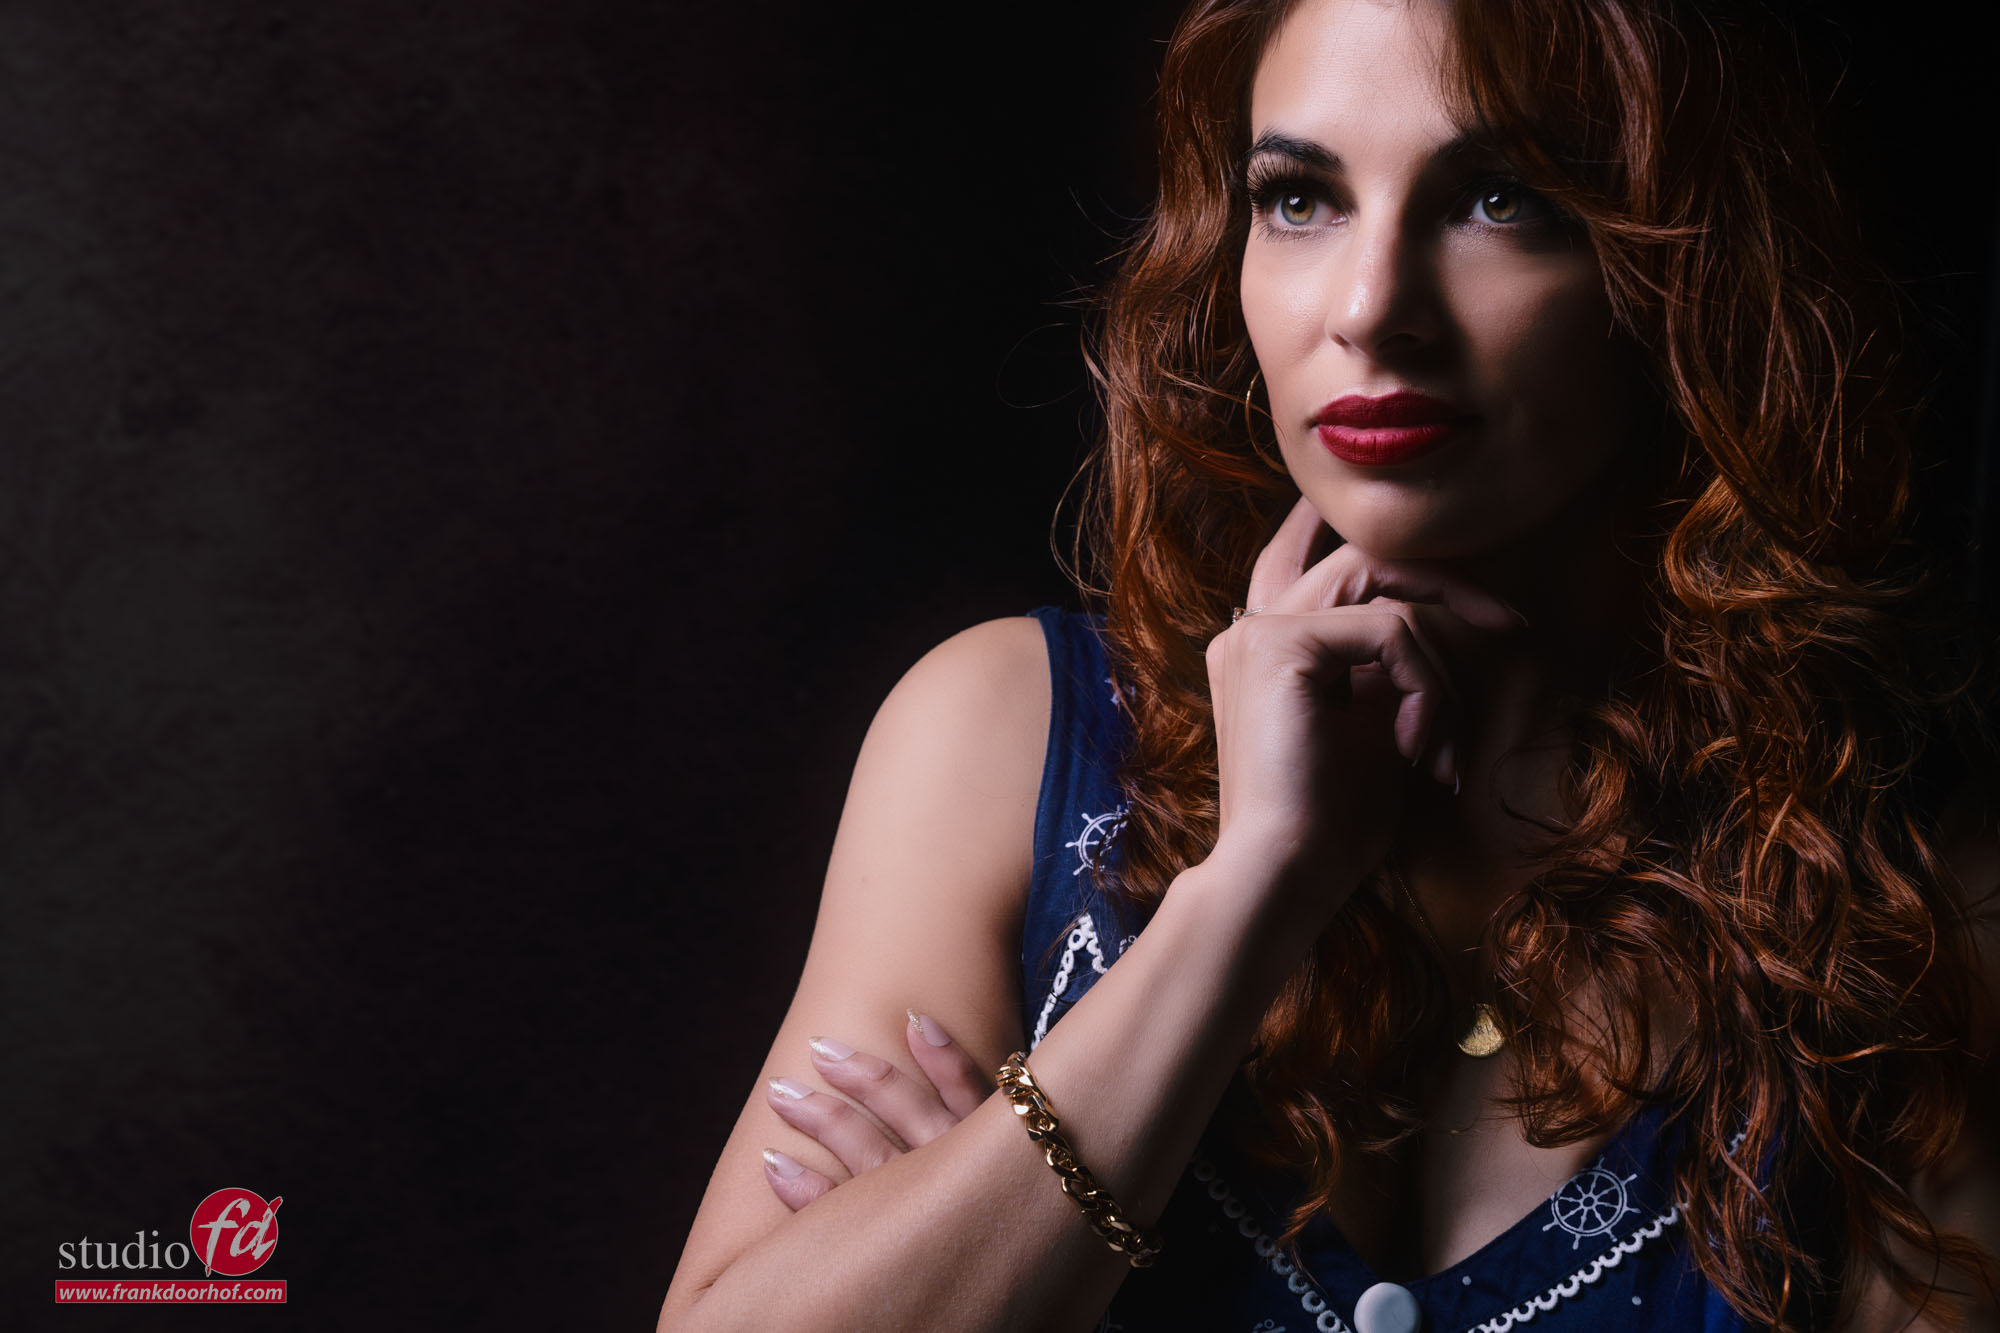
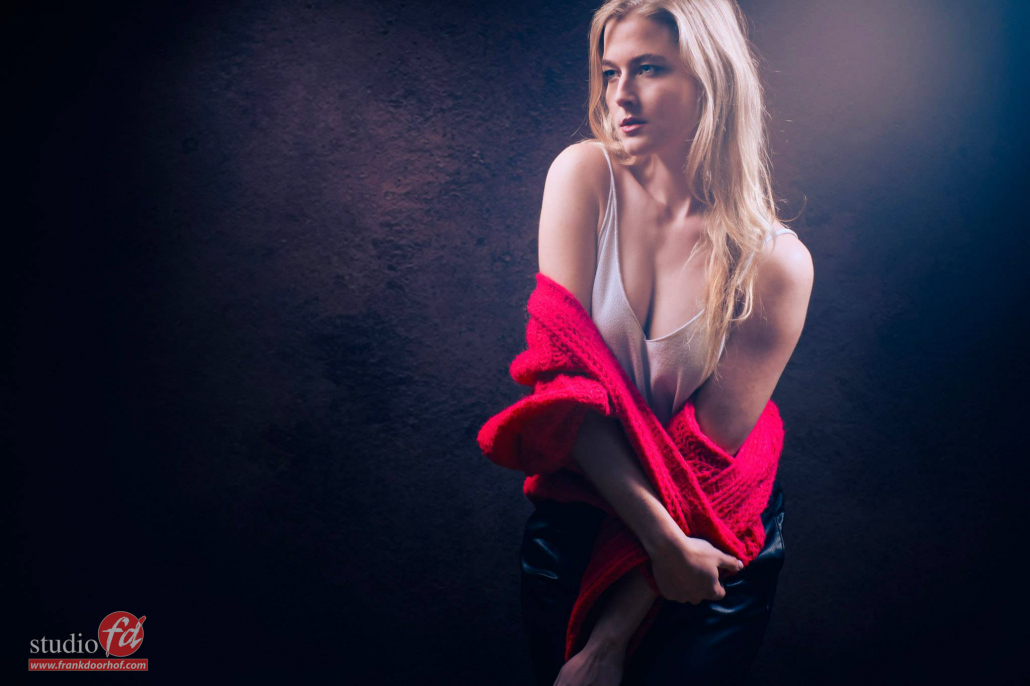
The black umbrella I use a lot for fill in flash where I want a beautiful soft quality of light but don’t want the light hitting the rest of the set. Often I place this light 2-3 stops under the main light for an effect you just can’t do in post processing without adding loads of noise and detail loss.
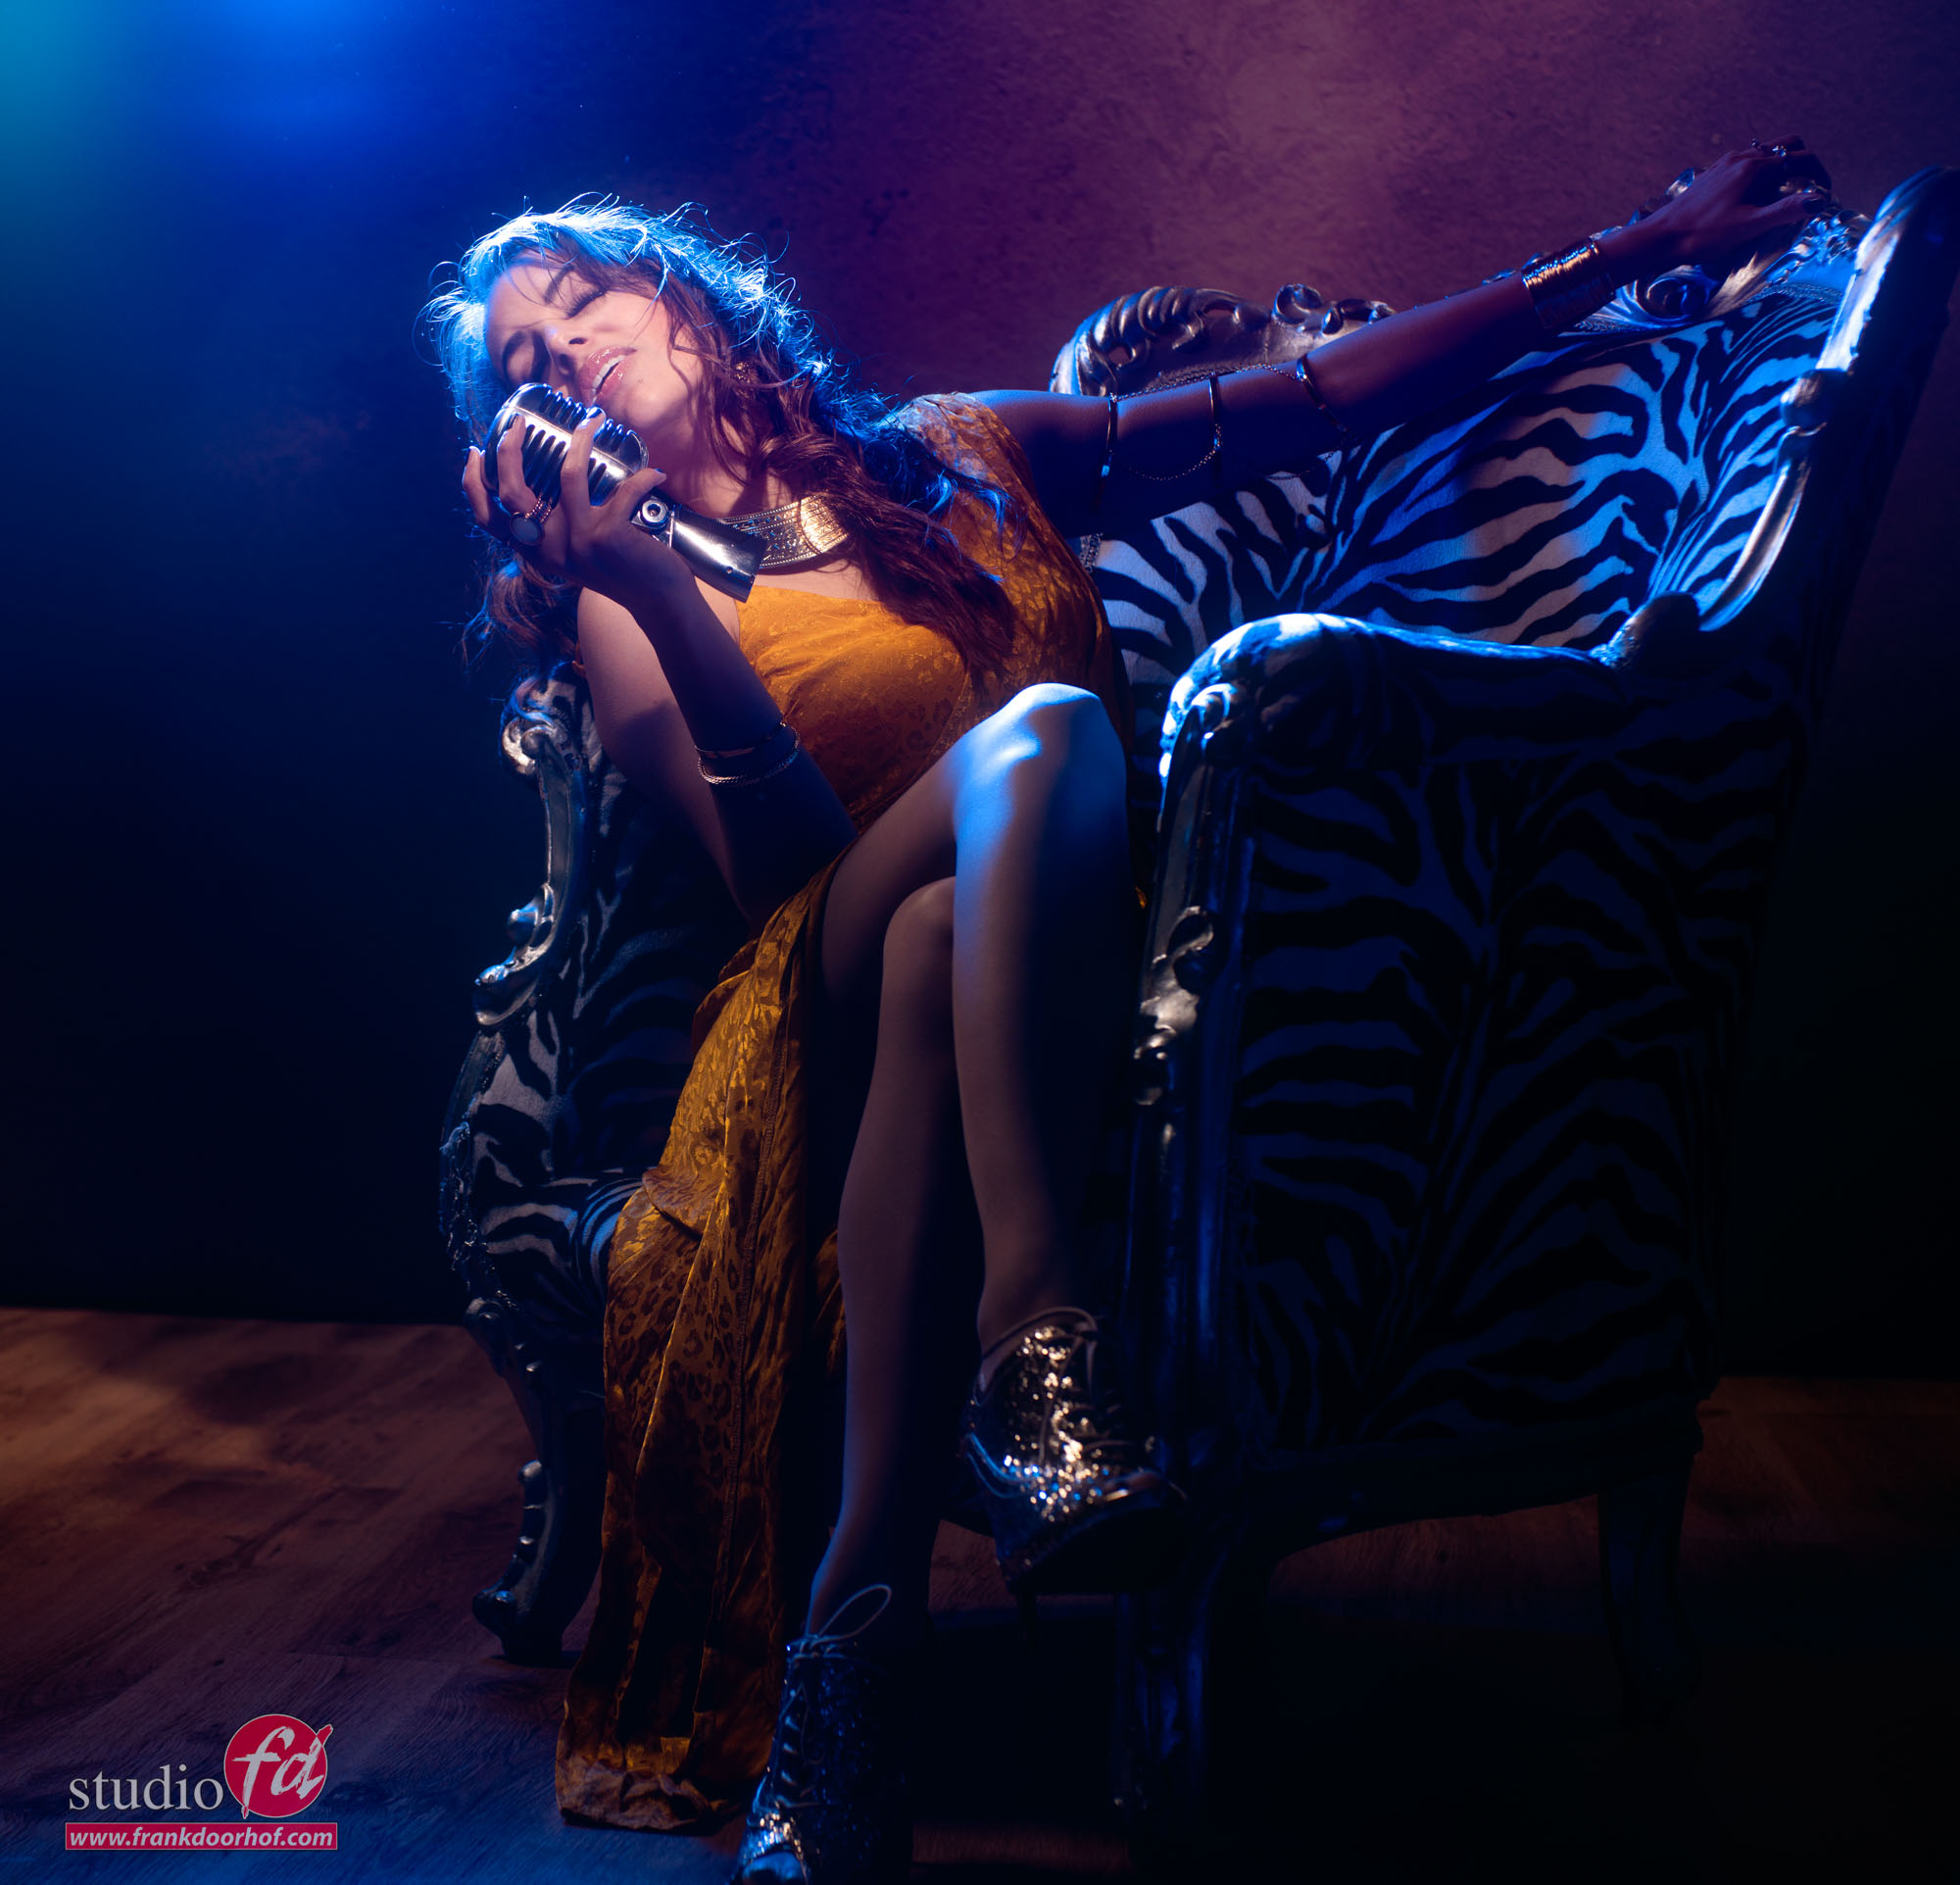
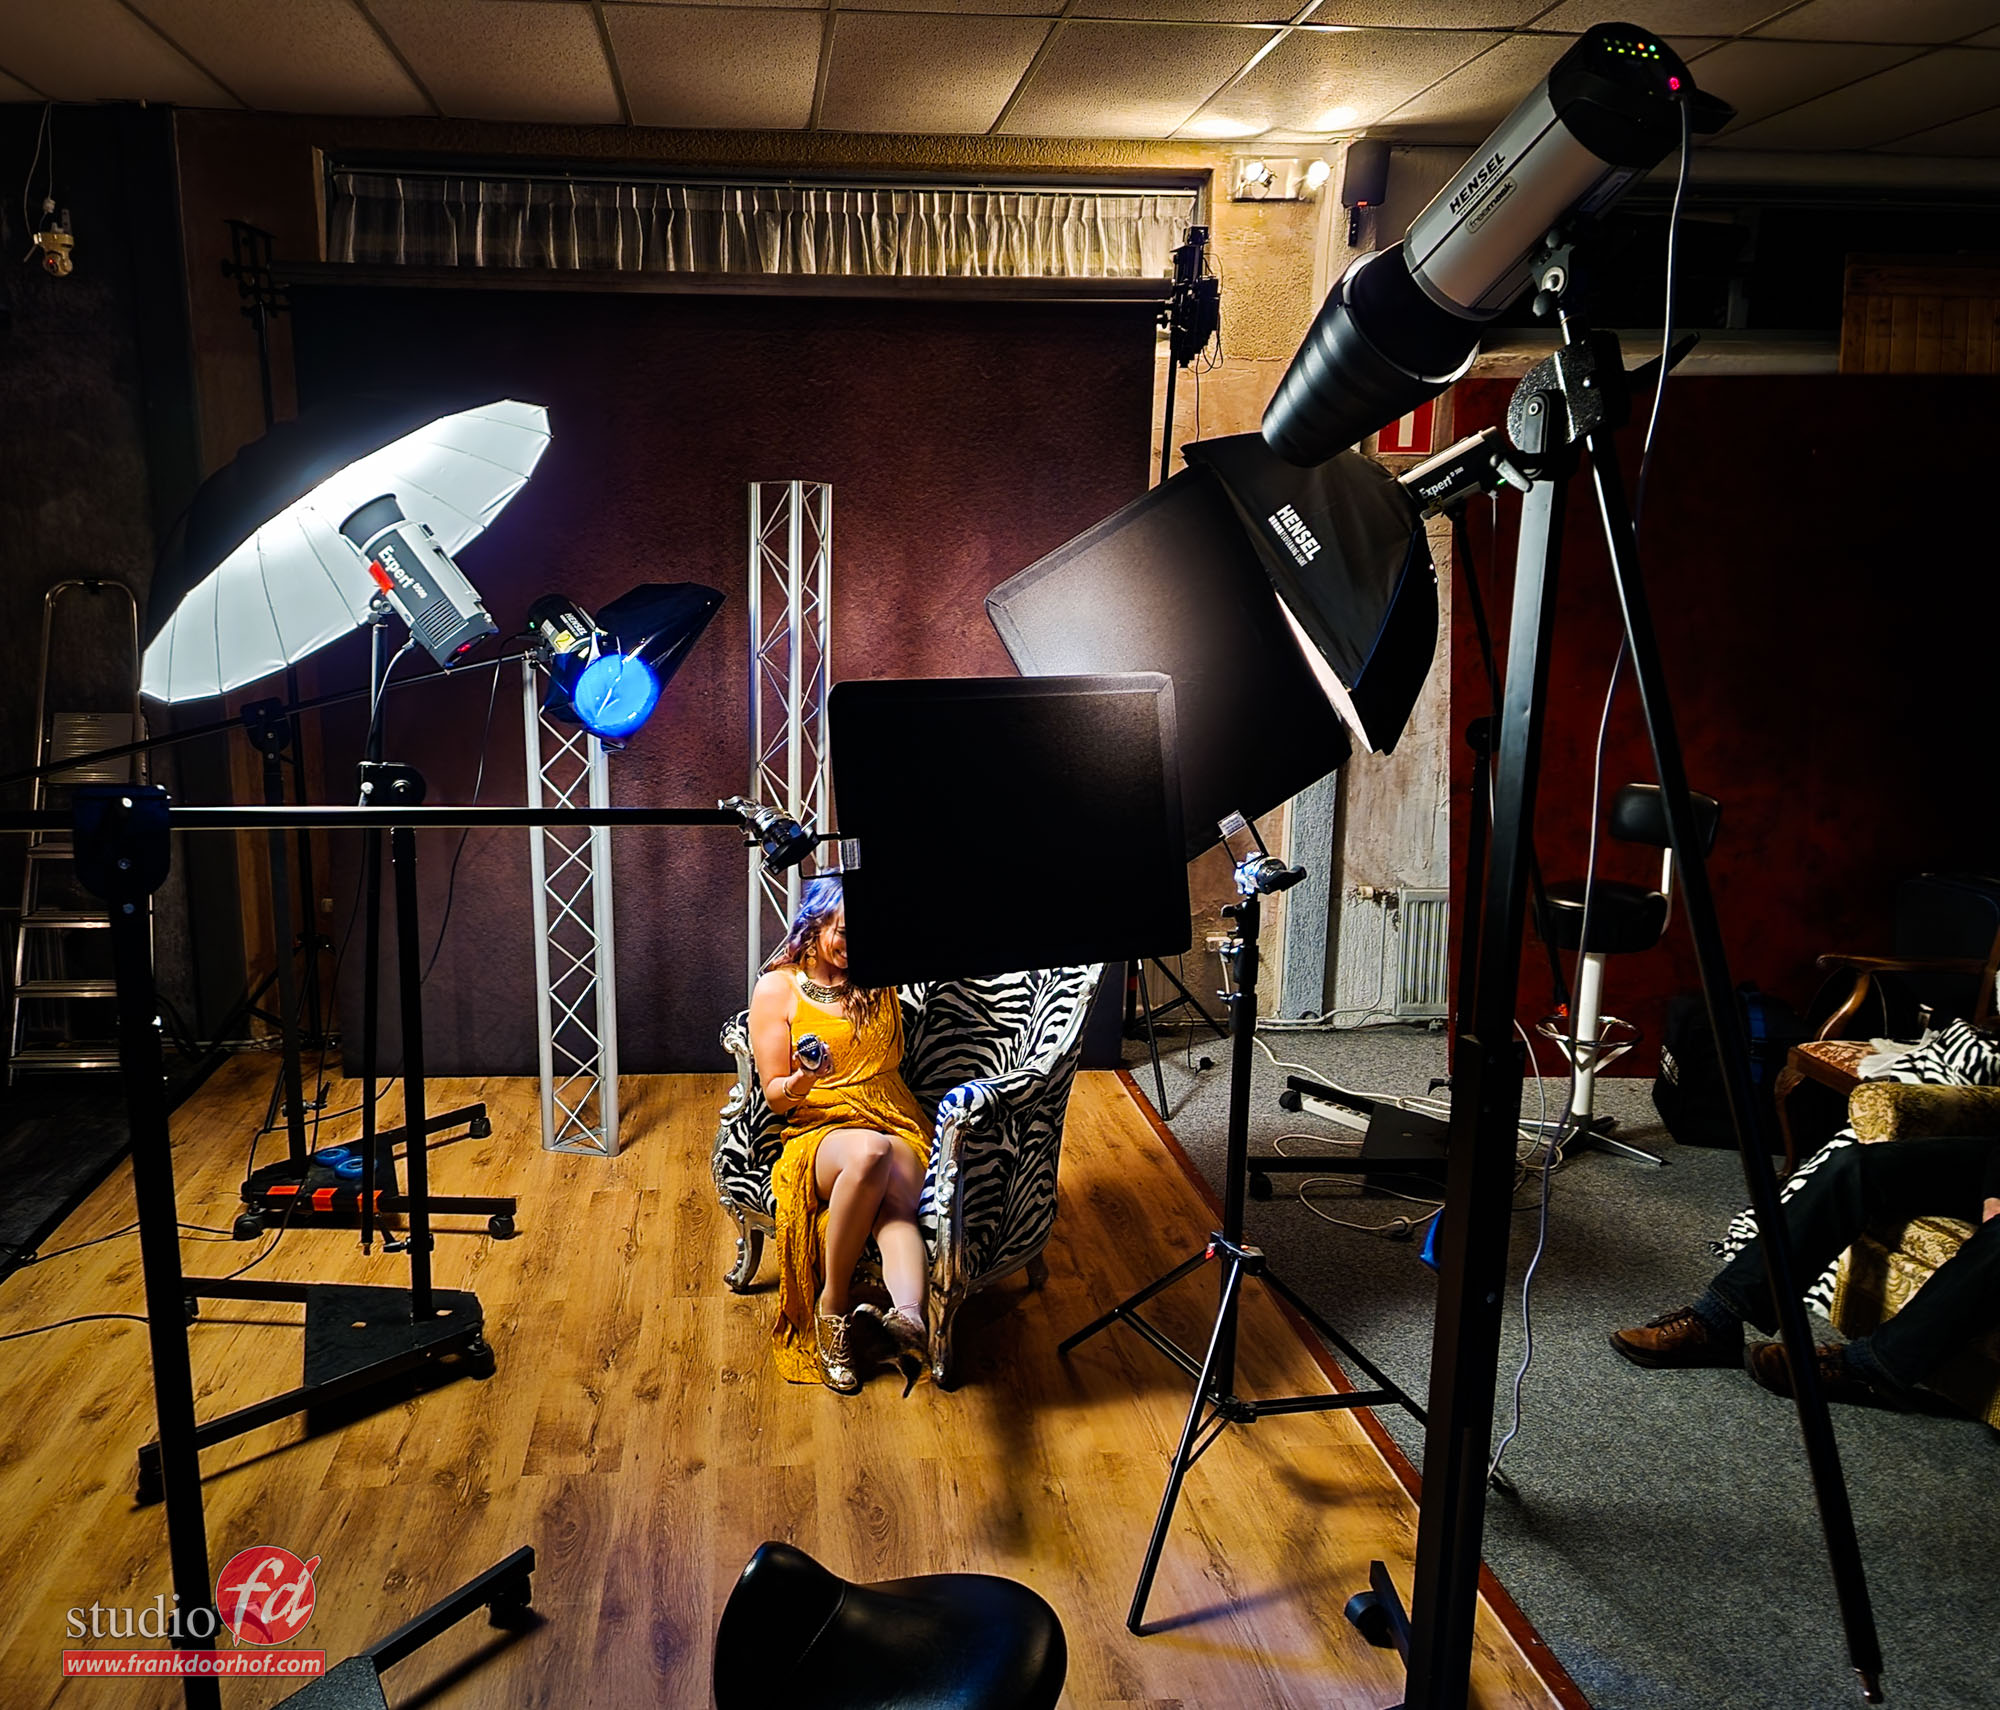
Take for example this setup.
As you can see a very nice “dark” setup with loads of mood and atmosphere.
Normally I would use a large 1.20 softbox (800 euros) for this, first of all it takes up a lot of space (can’t take it with me on location) and it’s expensive for just fill in. With the black umbrella I took of the sleeve and added a small reflector to really focus my fill in light.
By the way that’s also something I love about umbrellas, they look so simple but you can change the rod distance, add sleeves, shoot through or reflect AND use other light shapers to really change the total look of the shot. How about for example using a grid inside the reflector… have to try that soon 😀
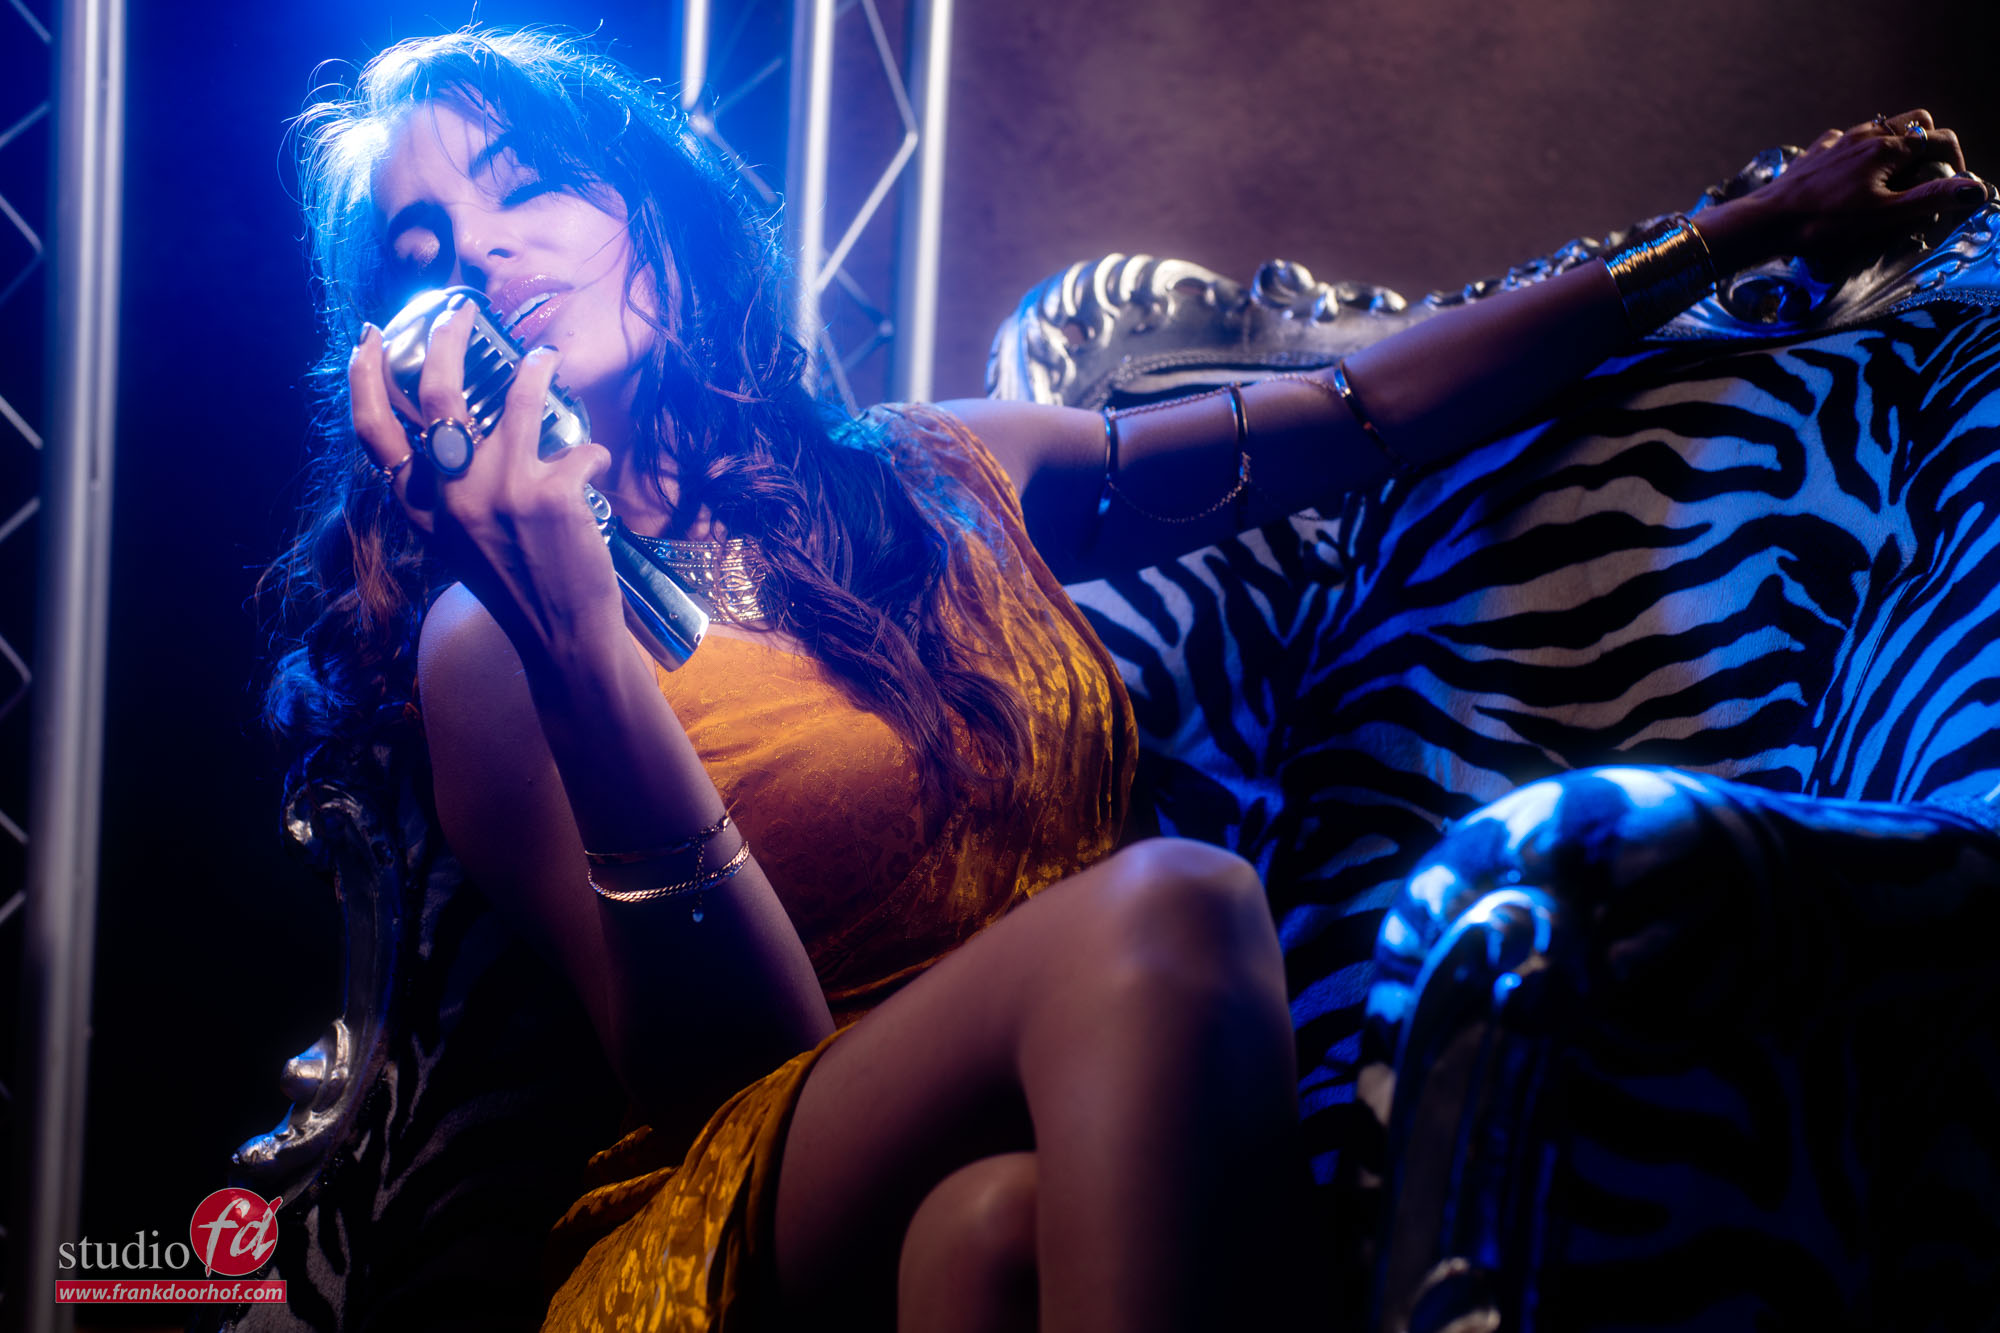
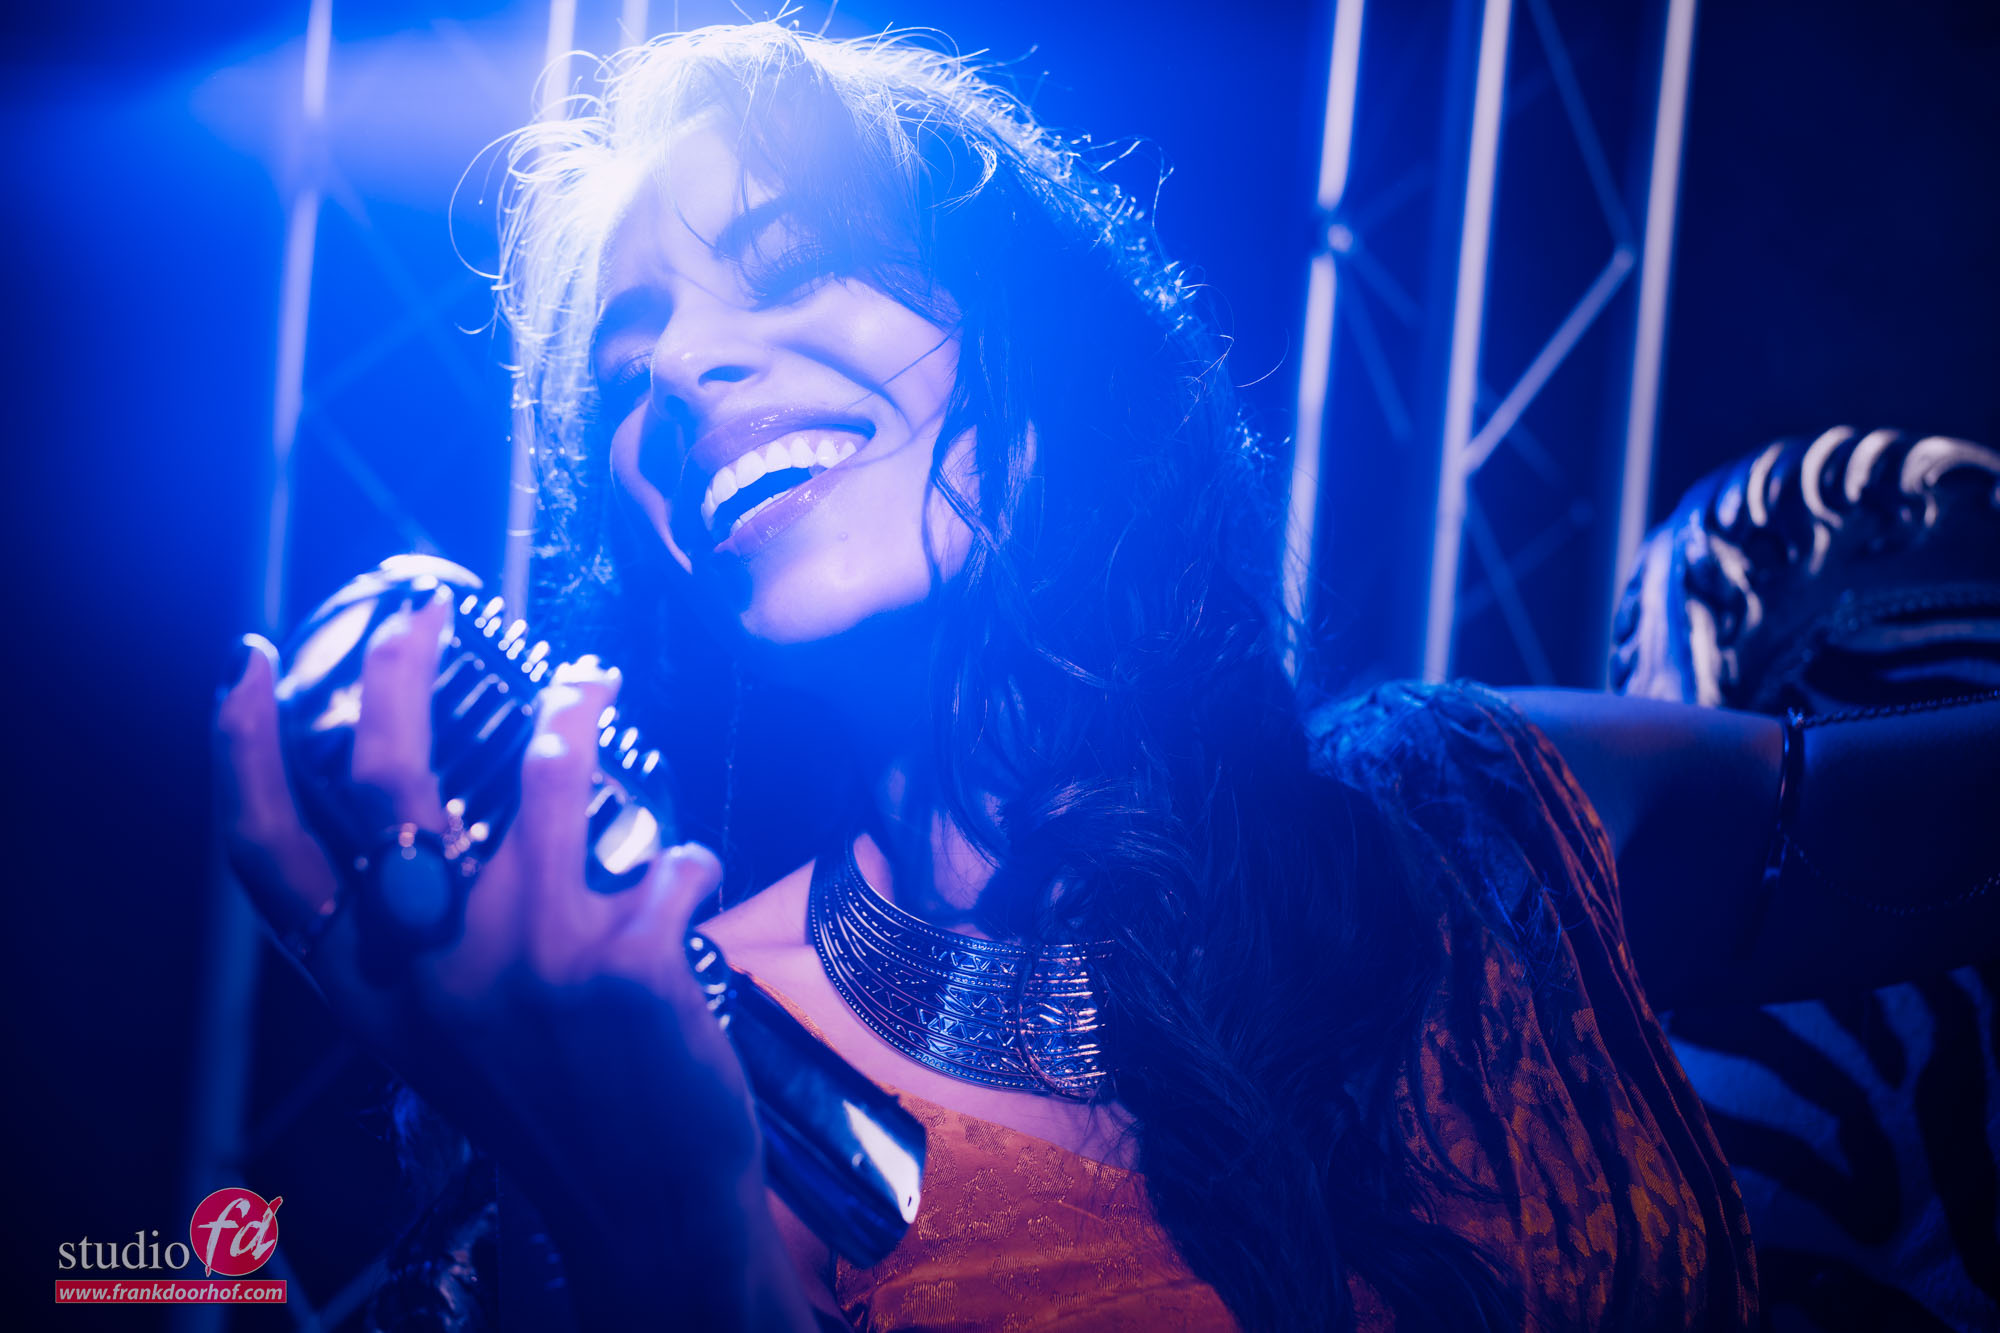
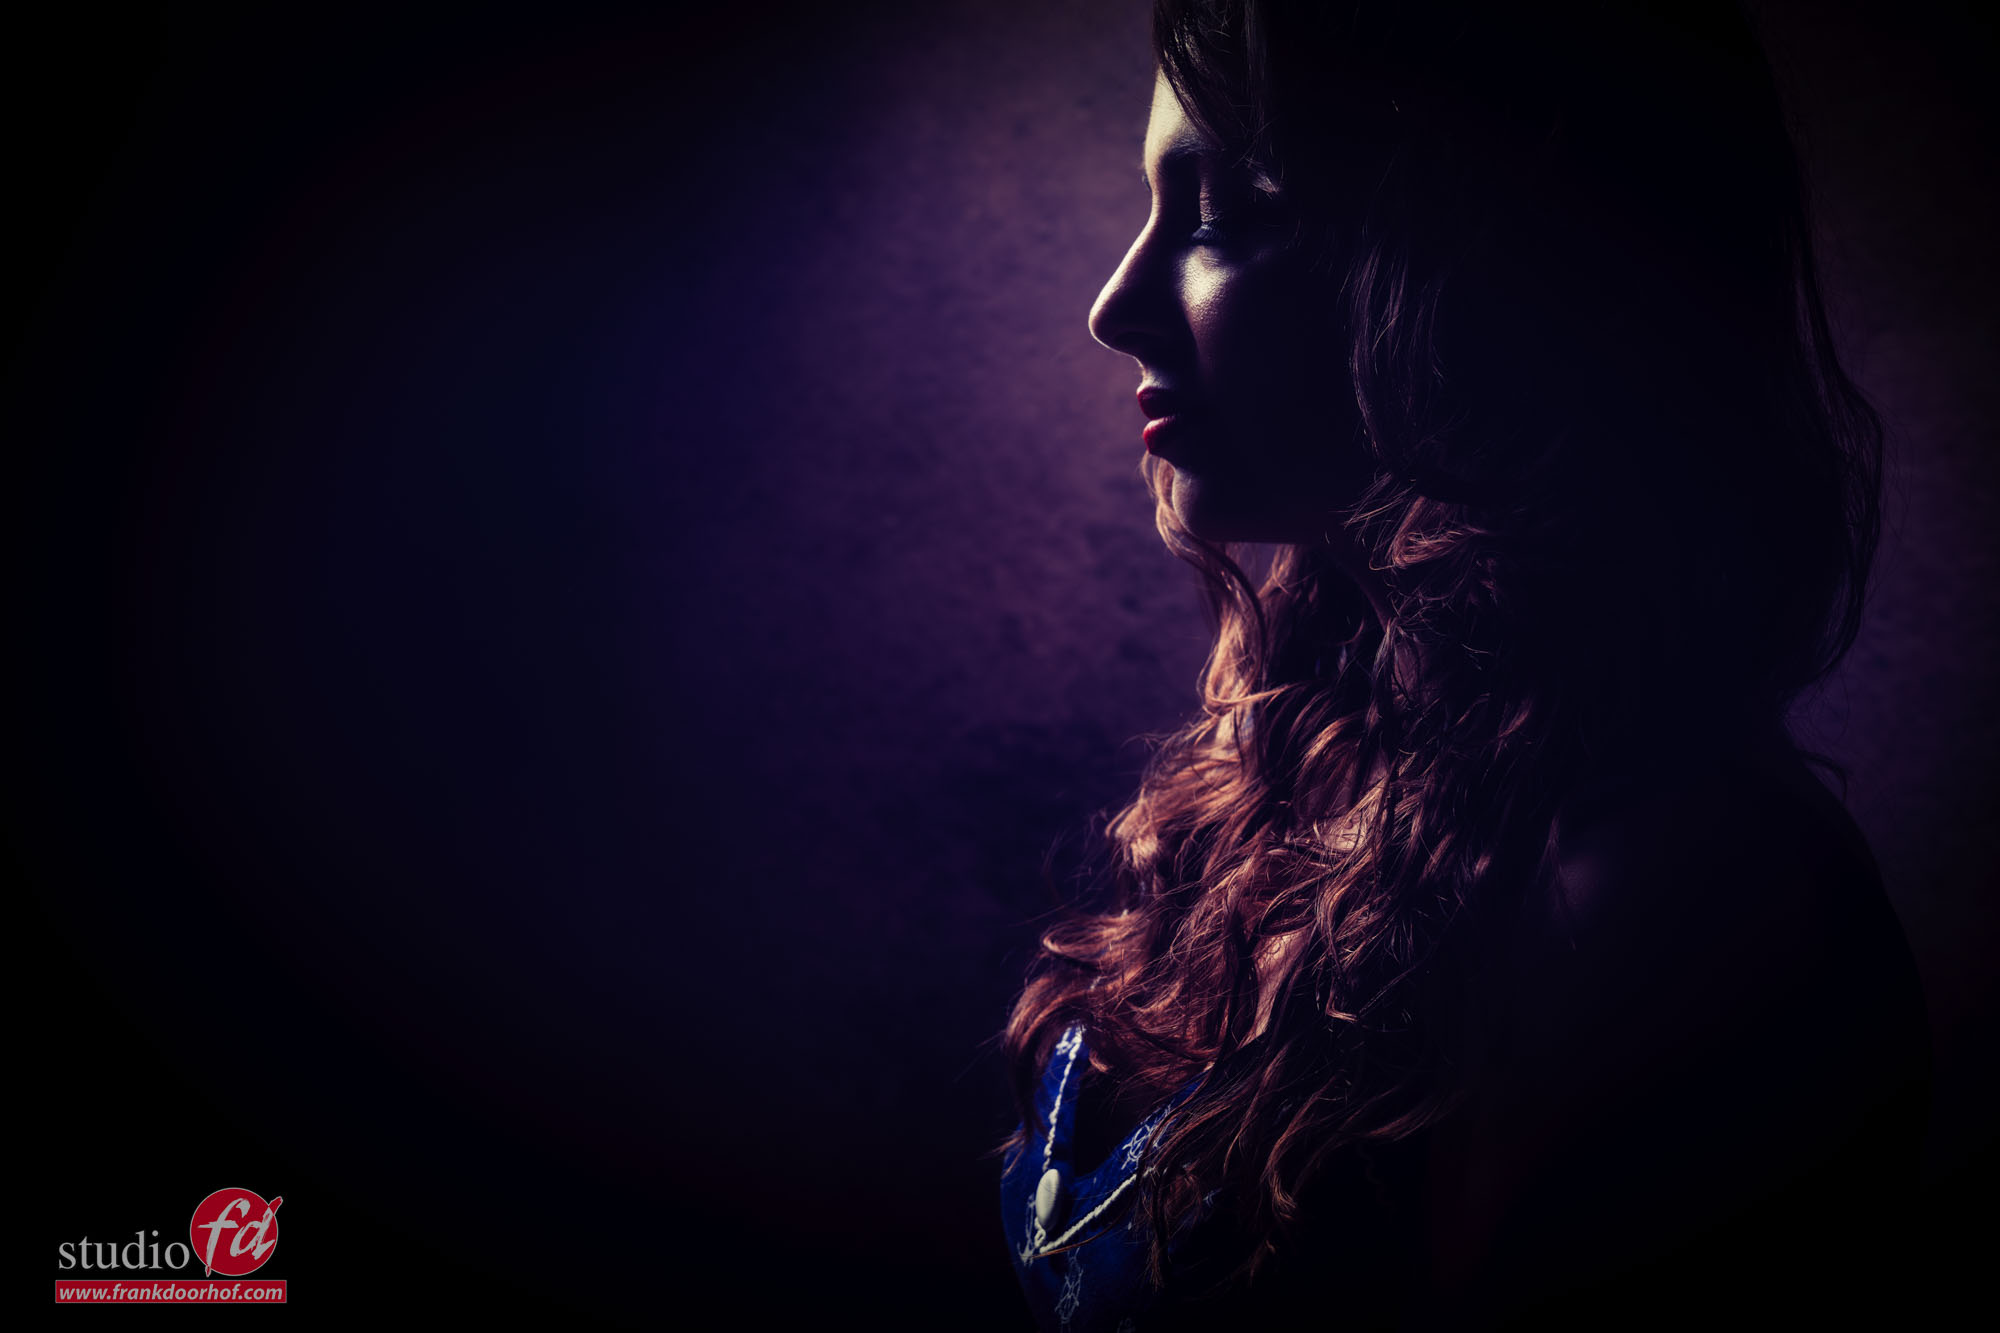
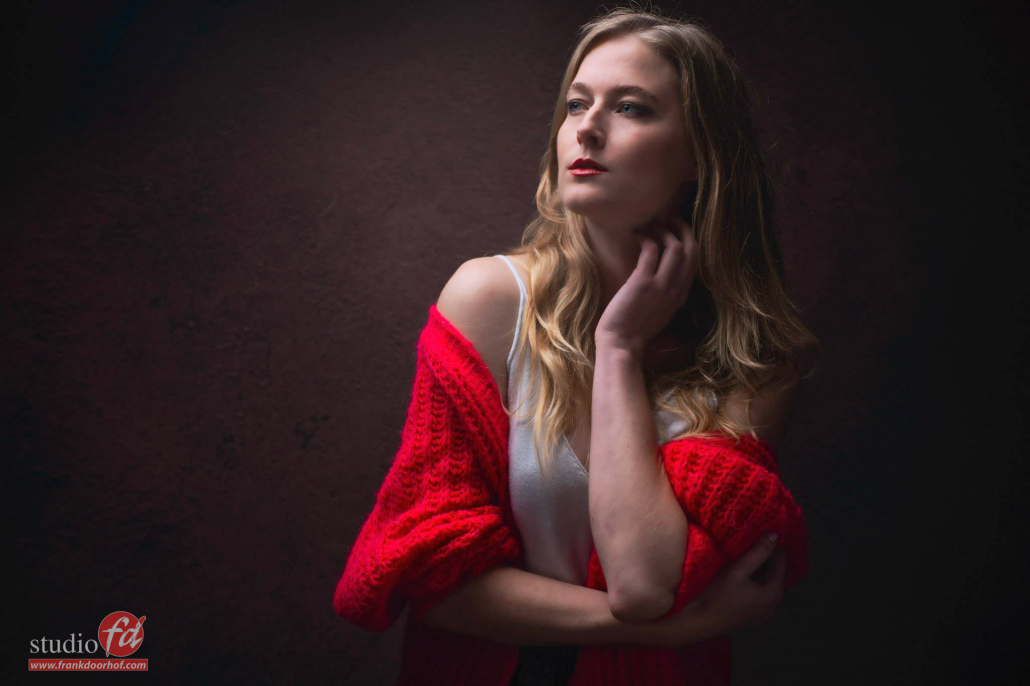
But you can also use the black umbrella for something else.
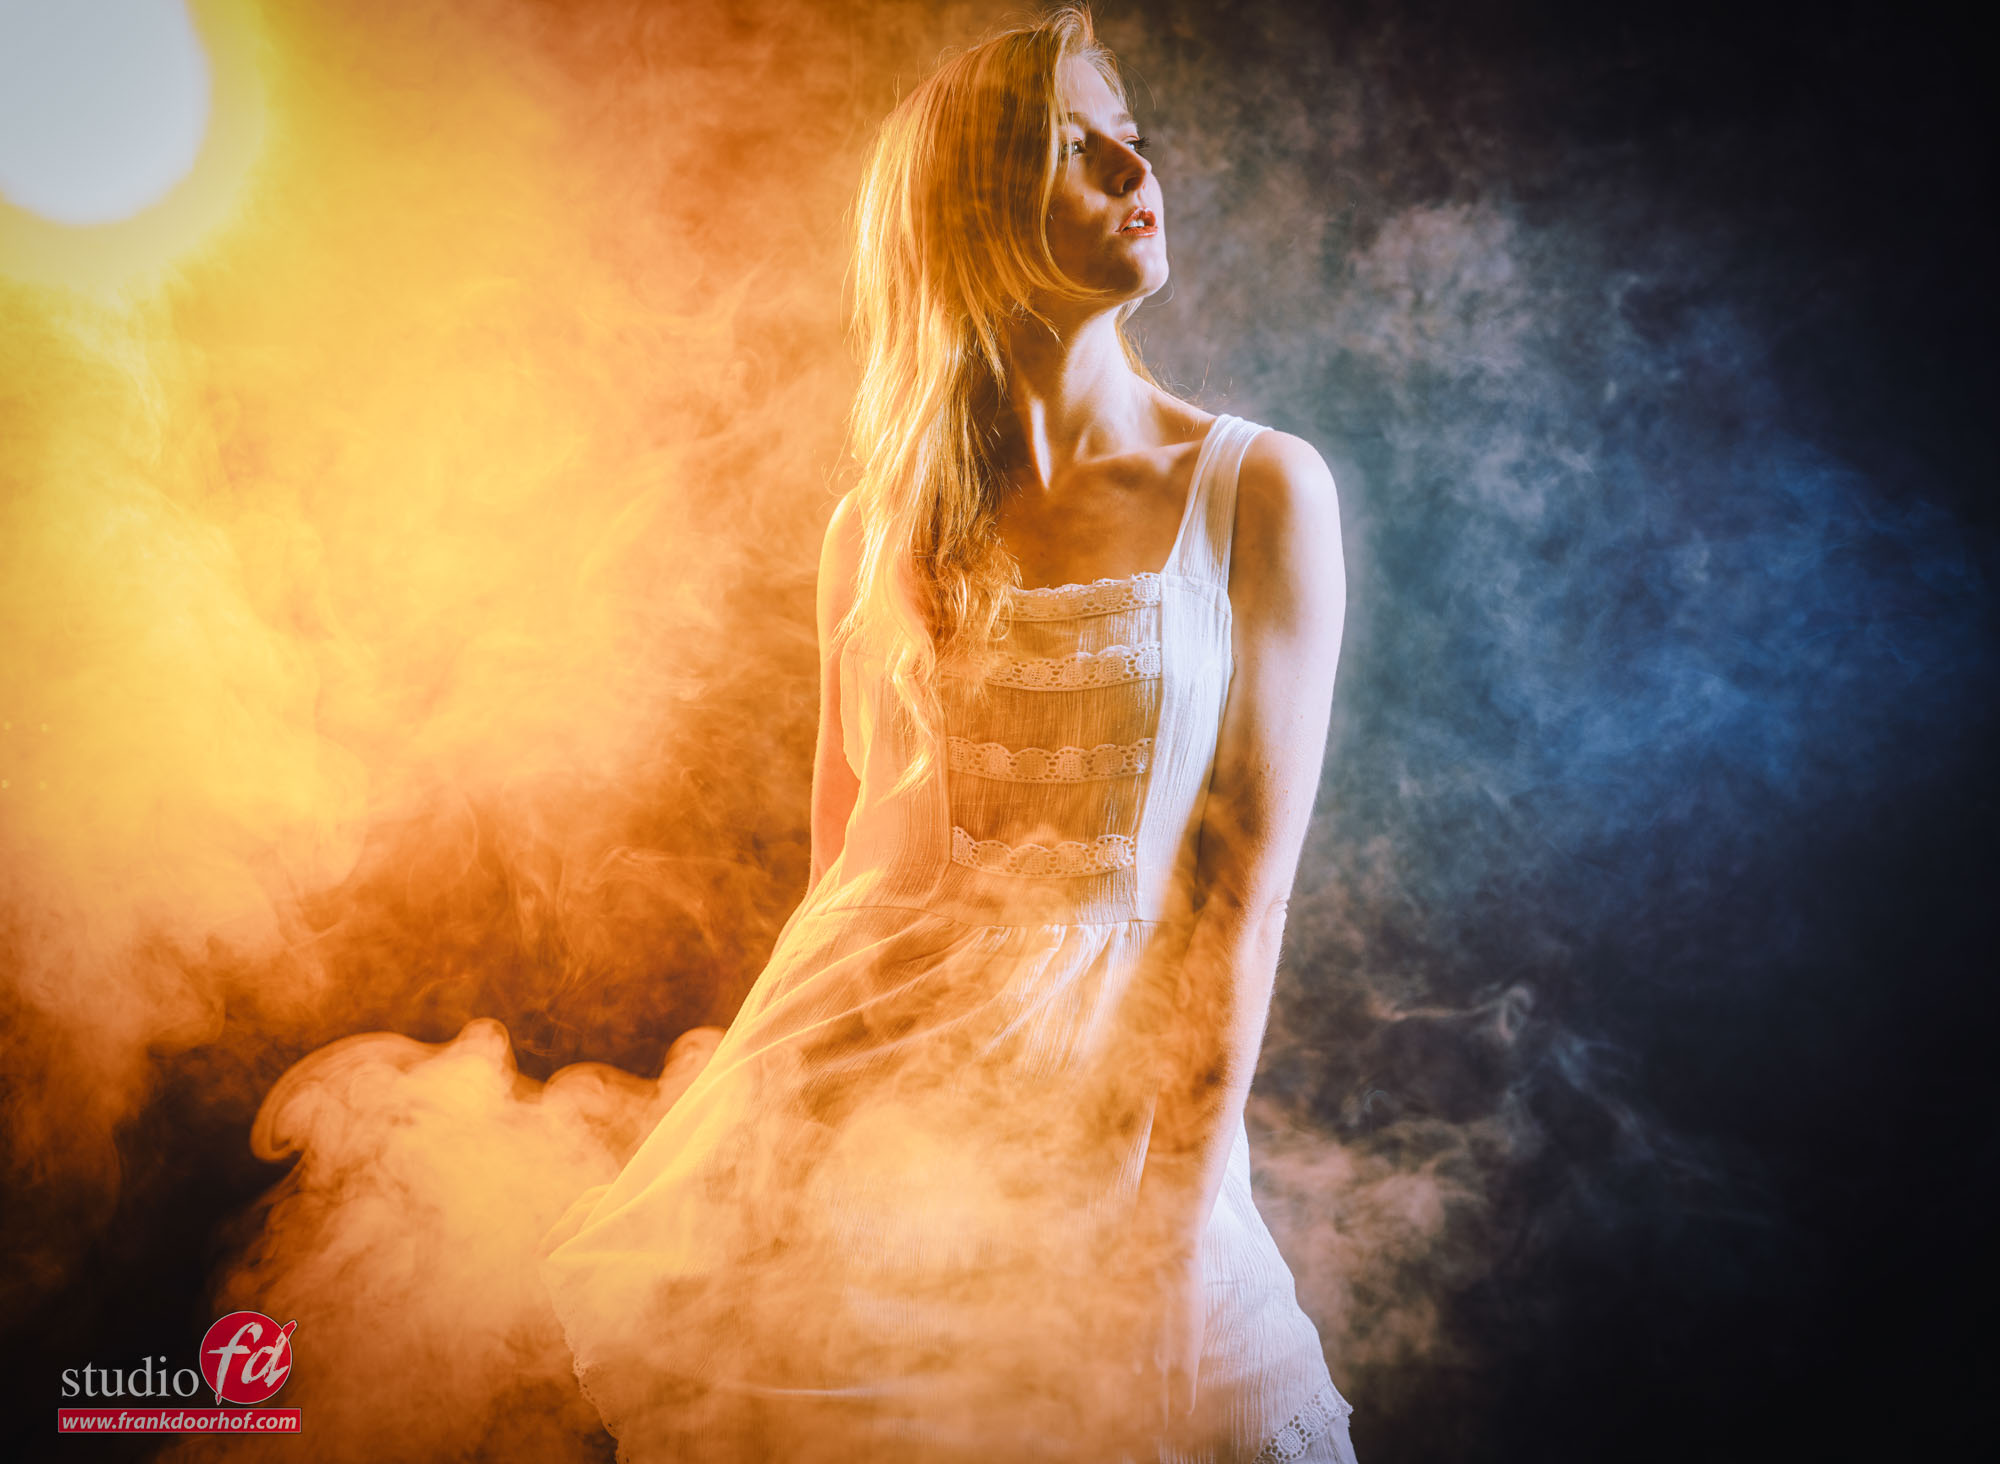
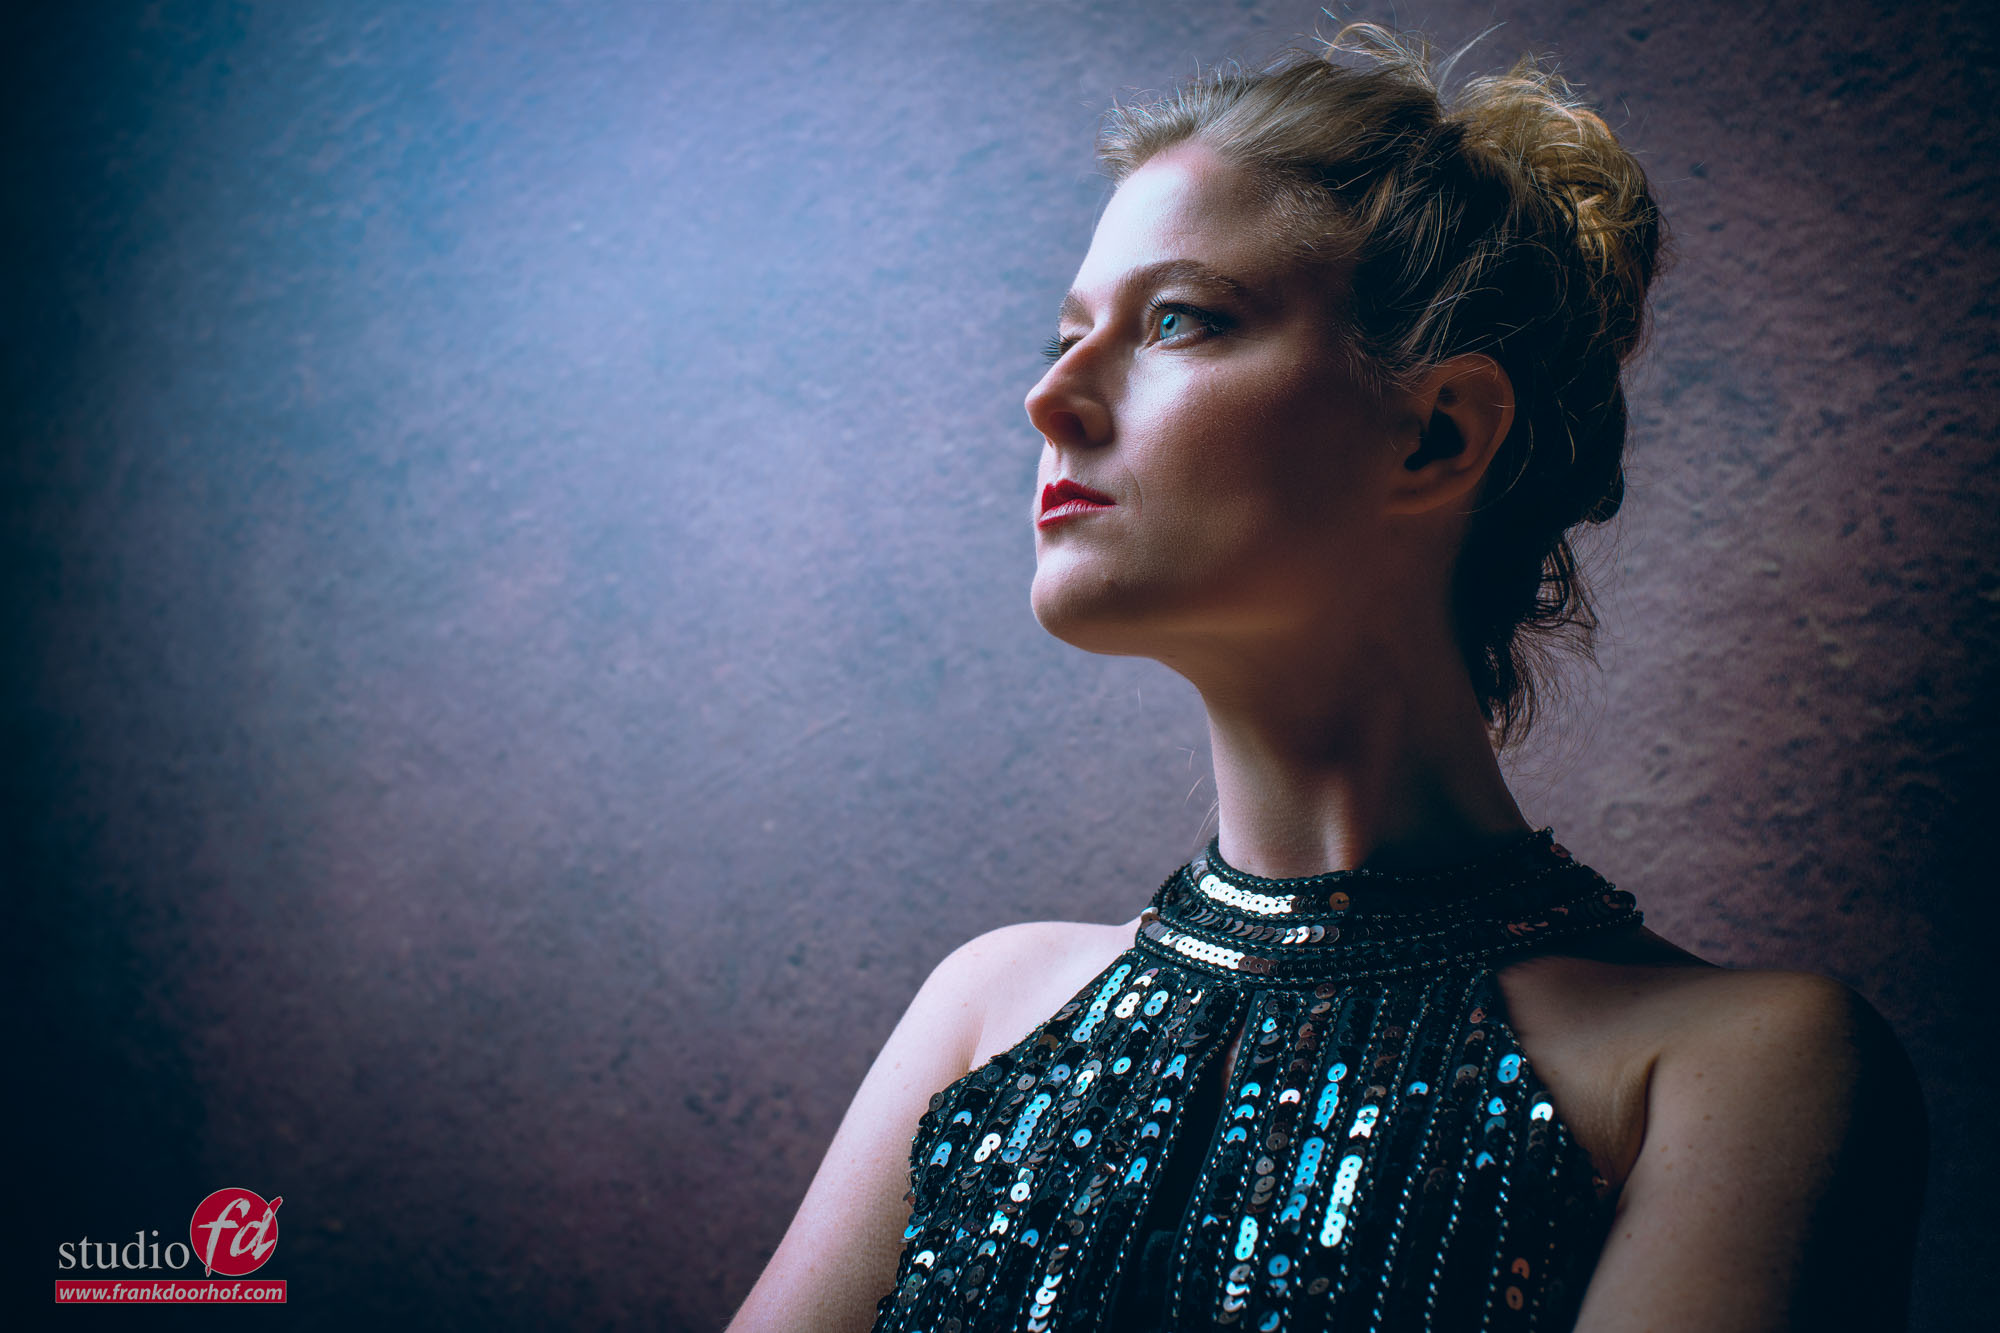
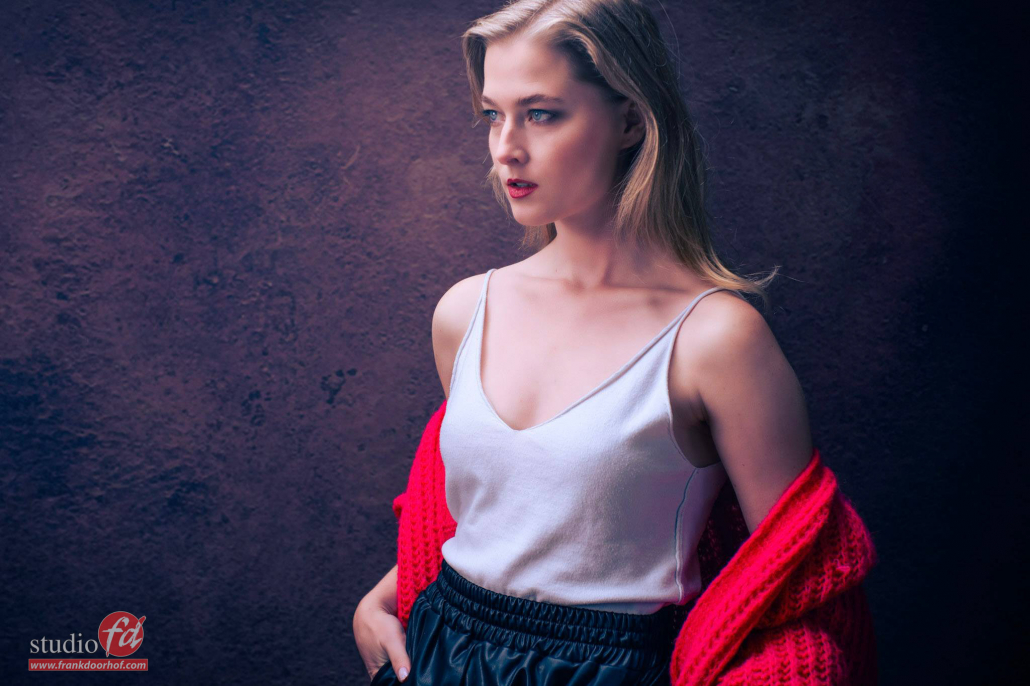
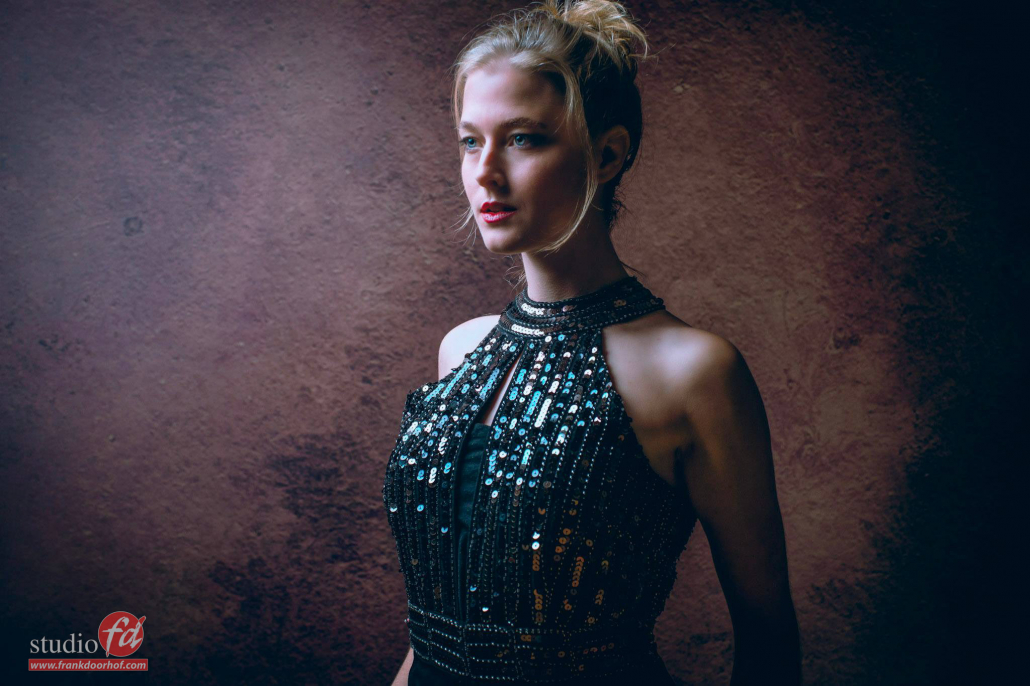
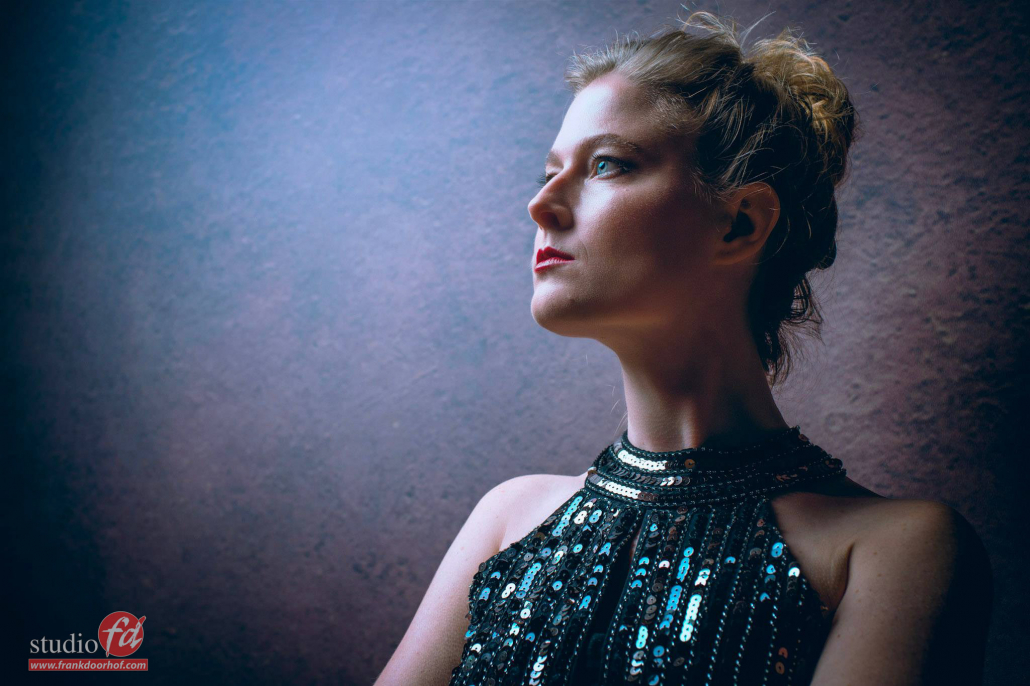
How about placing it above our model and aim it so the model is lit and the background. Add some Black diffusion filter on your lens (KF concept black diffusion filter 1/4 in this shot) and you get some interesting results from just one strobe.
Of course our cool ClickPropsBackdrops background also helps 😀
Ok, lets take a look at the disadvantages and advantages.
Disadvantages
I have to be honest I’ve been thinking about this a lot. So I decided to do it differently.
The main disadvantages of the umbrellas are often two fold.
First there is the control of light
especially when you start out you simply don’t have the proper knowledge to really use the umbrellas to their full potential. The setup can be quite difficult, not because it is difficult but because a small adjustment can give you a huge difference, in the past I would label this as hard to setup, but now that I’m a lot further in my journey I actually call it “mind boggling opportunities for many different looks”.
This about changing the distance of the light source itself, maybe making it leak on the sides on purpose, or using a reflector with or without grid, how about…. and….. you got it, you have to be able to use it to it’s max potential to really see the benefits. But when you do it will beat probably almost any light shaper you have for broad light, because let’s be clear, an umbrella is not a snoot, but it can easily replace most softboxes. So this argument I think is mostly experience and understanding of light.
The second one is a big one, construction
And this is a big one.
Most umbrellas I used in the past were easily broken or bend making them unusable in a few weeks/months of use. And although they are cheap I never really ordered new ones and just replaced them with using softboxes. The main advantage of these new Rogue umbrellas is that they are not only compact without sacrificing use cases, but their base is made from fiberglass, and that’s a BIG thing, these umbrellas will last a long time, and for lightshapers that are great on location (and in the studio) it means they get a bit more abuse than a softbox that is only used in the studio, so a sturdy construction (and a handy carrying bag) are I think essential.
To be honest this is about it, from what I can think off.
You could add wind on location, but that also goes for softboxes, and an umbrella with a sleeve is less prone for wind problems than without of course, so I would not really add this to umbrella specific.
Advantages
Ok, are you sitting down?
Price
The price of the whole kit is in Europe around 100 euros. Which gives you the white and black umbrellas, a sleeve for the black one PLUS a carrying bag, you do wonder how anyone can afford NOT to have one, right?
Usability
You name it, and you can probably light it with an umbrella.
White backgrounds.. no problem (saves on background reflectors which can’t be used for anything else)
Beauty portraits… no problem
Fill in light…. absolutely awesome
Full bodies, portraits, whole sets, the umbrella can do it all.
But most of all it fits on every brand and both speedlights and monoheads (studio strobes) but even on led lights you can place umbrellas.
Space
This is perhaps the biggest one.
Get large softbox quality in a very tight space. Especially on location, but also in the studio, I often fight with the space to fit all my lights in there. I often demo on trade shows where I only have a space of perhaps 3×4 meters which is really really tight if you also have to place your lights. So often I will bring one striplight and some reflectors or a beautydish, but add an umbrella to your kit and you can also use super soft light in tight spaces.
Conclusion
I never really looked at umbrellas the last few years, sometimes when I needed one I would pick one from storage to find out a rod was broken or it wouldn’t open nicely because something was bend, meaning most of the cases I would just not use it and grab my softbox again (safe and it worked). The new Rogue umbrellas forced me to look seriously at umbrellas again and I totally fell in love with it. It really fits my way of photography where I love to experiment with modifiers and don’t really like the one trick pony light shapers. And the umbrella is far from a one trick pony.
The umbrellas are now available via our webshop in the Benelux, or via our supported dealers.
More info on rogueflash.nl for Dutch customers and www.rogueflash.com for international customers.
I HIGHLY recommend picking up one kit and an extra white umbrella to be able to do almost anything you encounter.
See our live stream where I introduced the umbrellas via our Digital Classroom series.
This was the first time I really used them, and it’s live… so you really see me experimenting with them and finding new use cases.
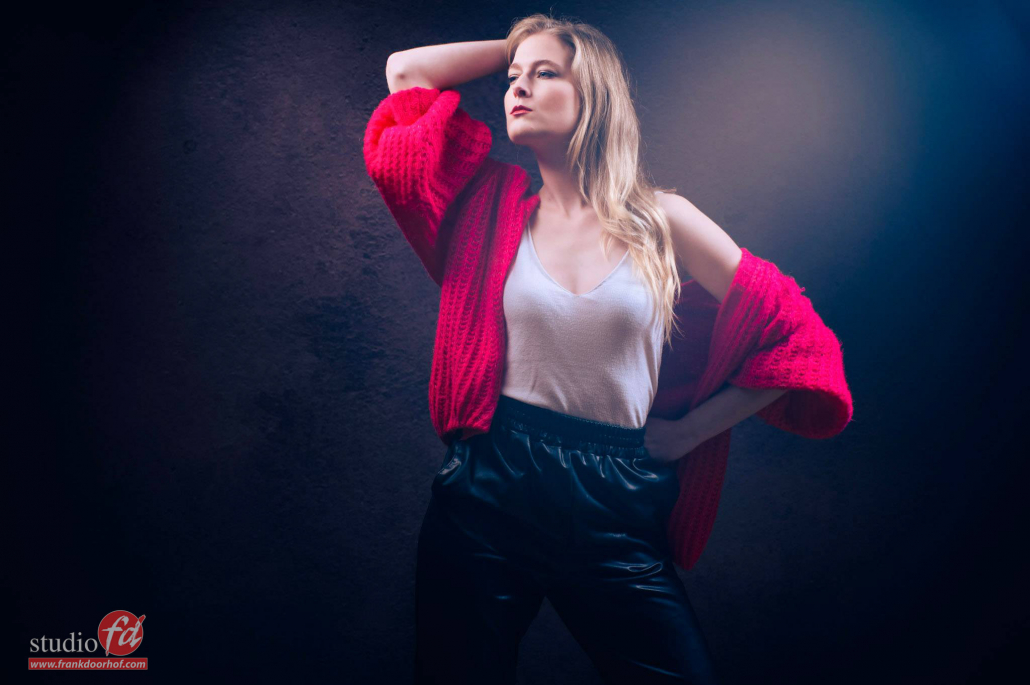
But there is more, so lets take a look at some samples.
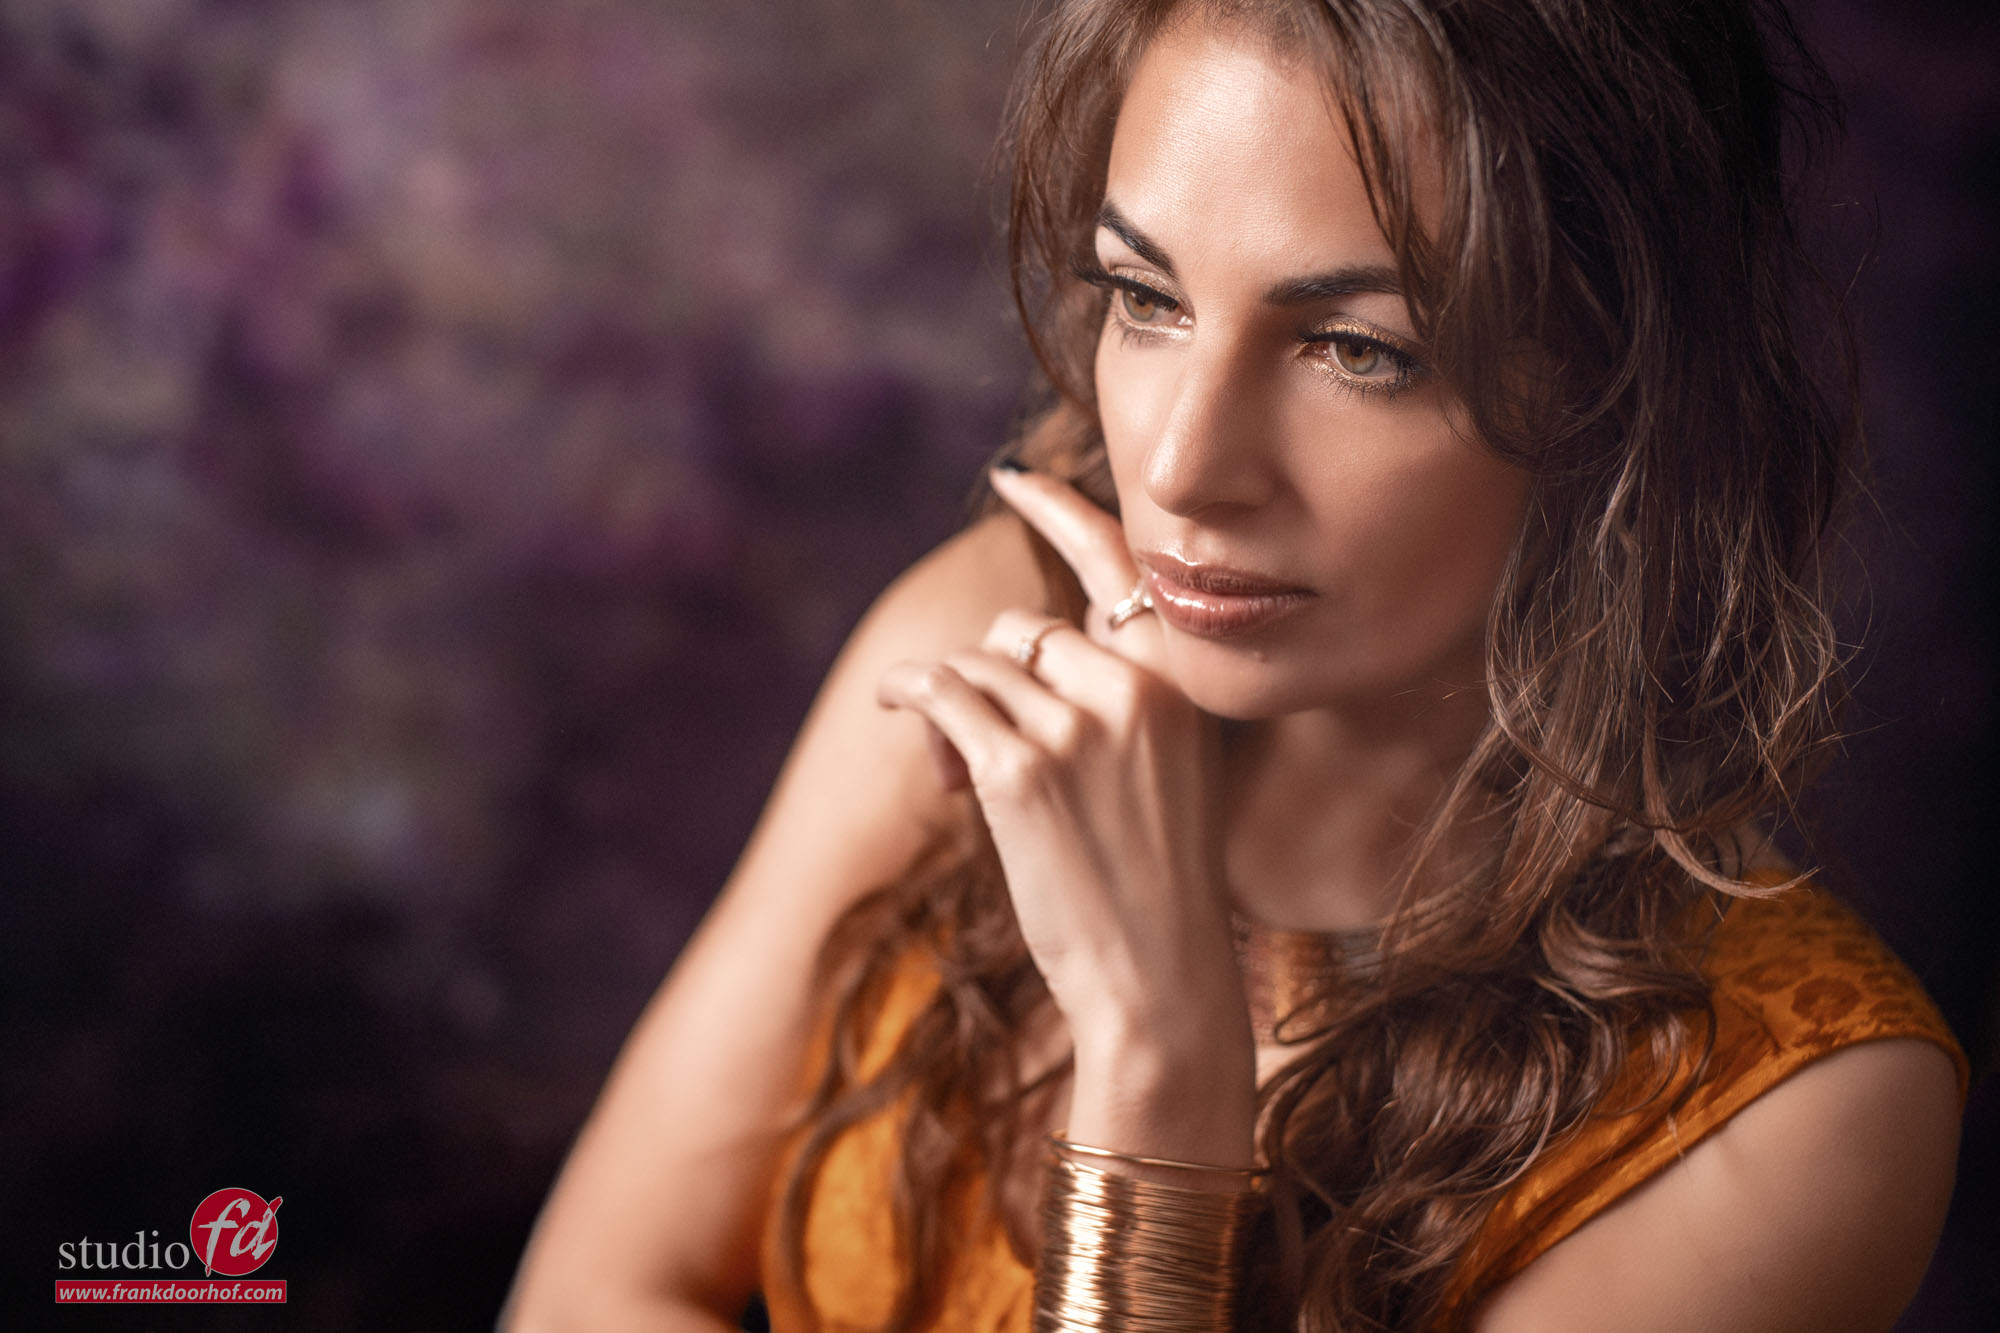
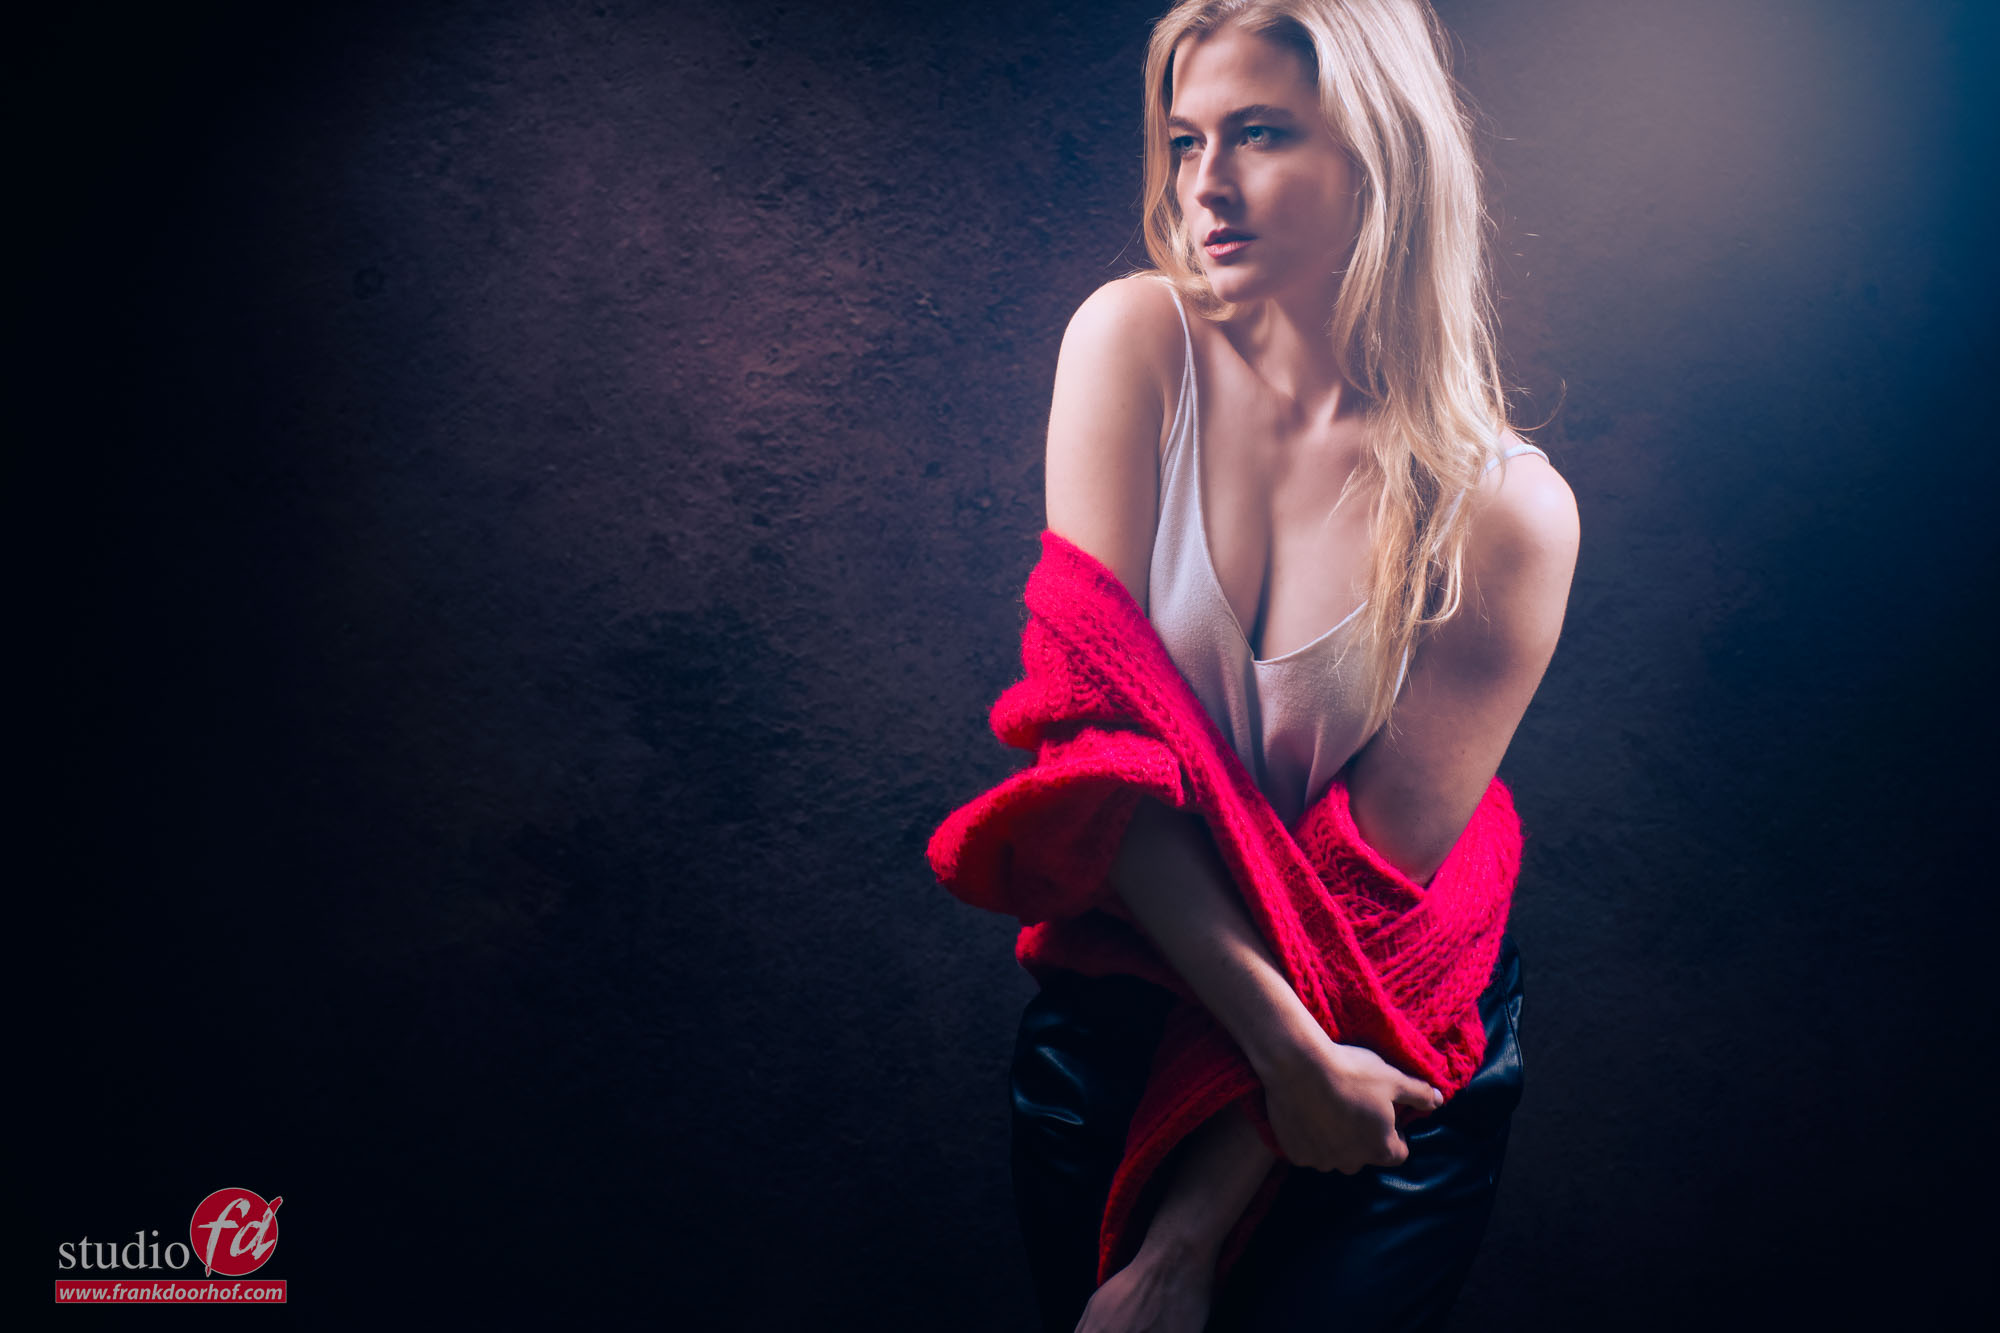
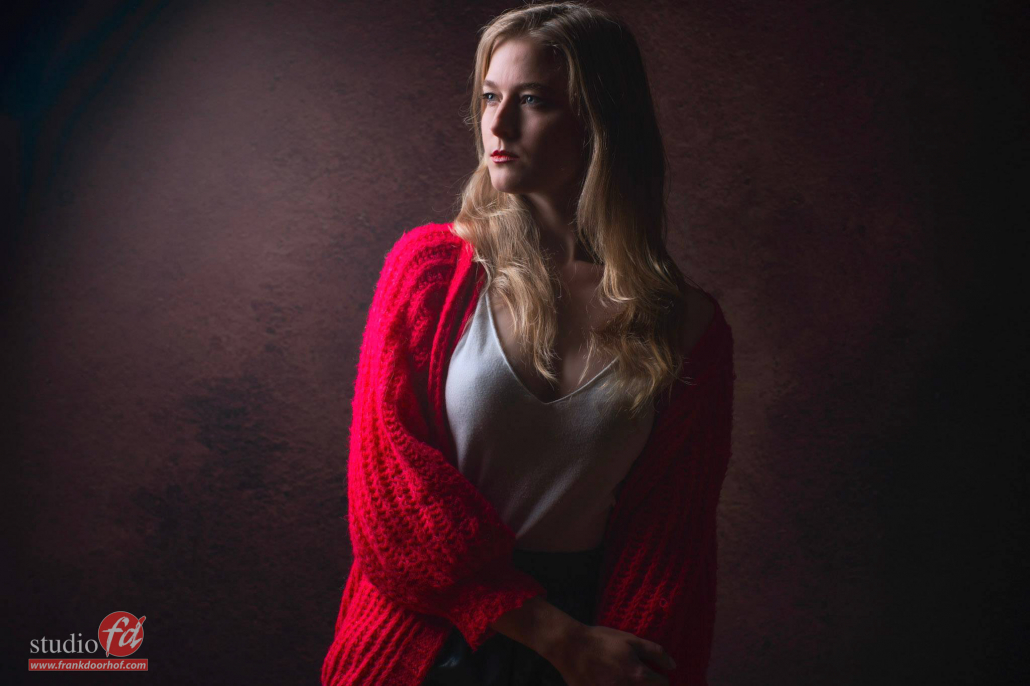
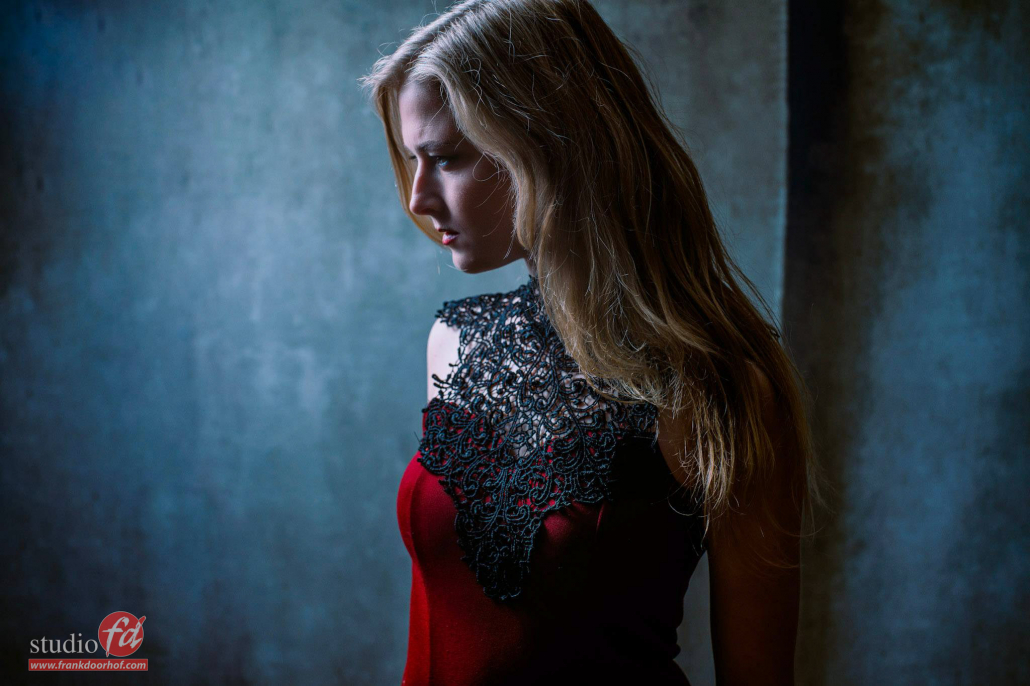
With smoke I always love the wrap around effect on my model, but I also want to see the detail in the smoke and a bit of light on the background, normally this means a 3 light setup. With proper placing the black umbrella we did it with one during a workshop smoke.
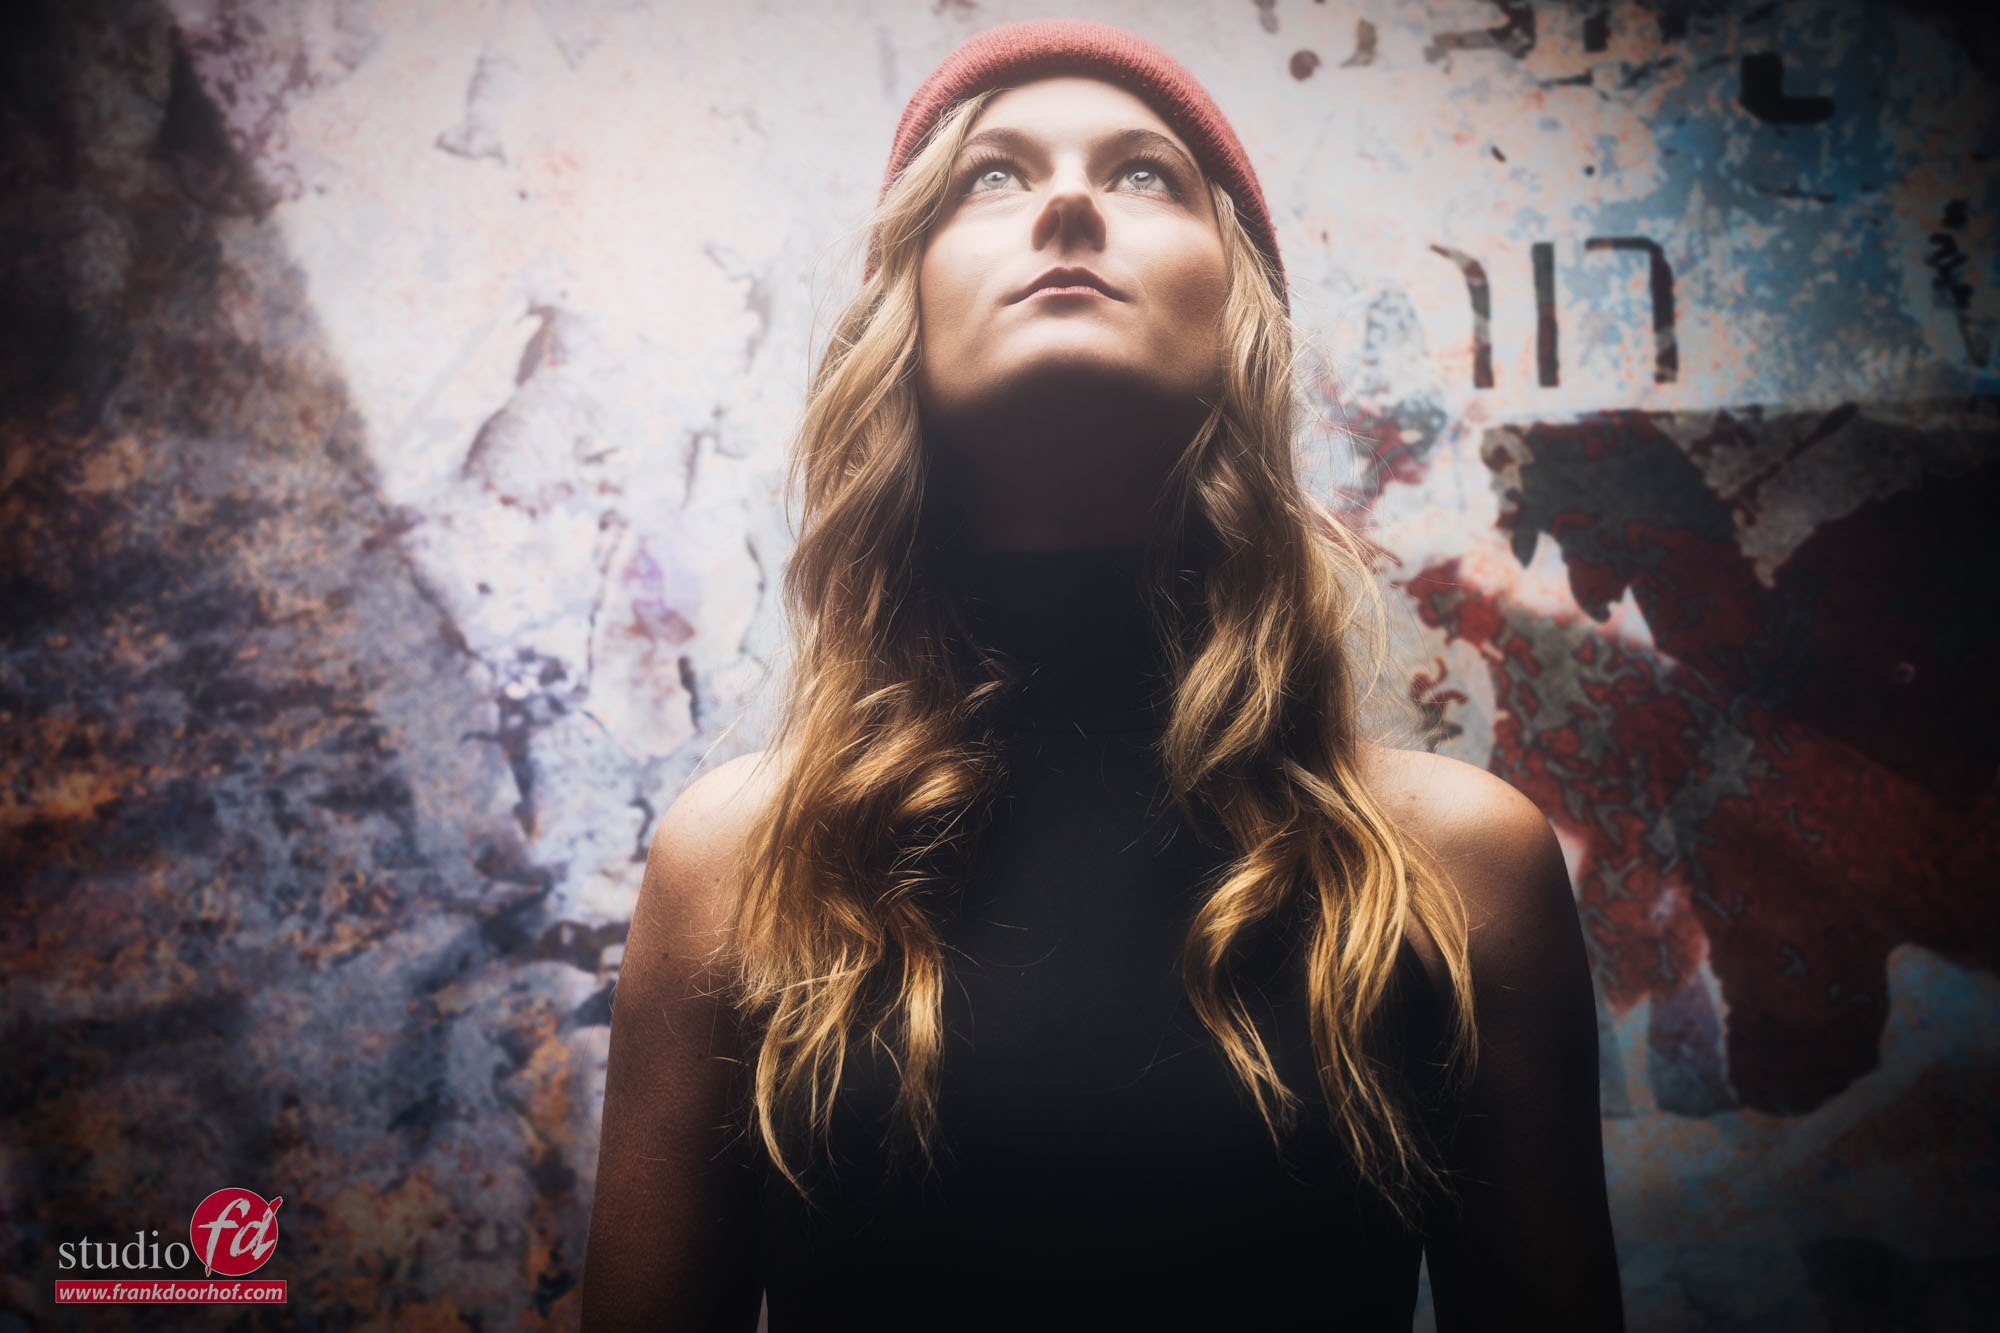
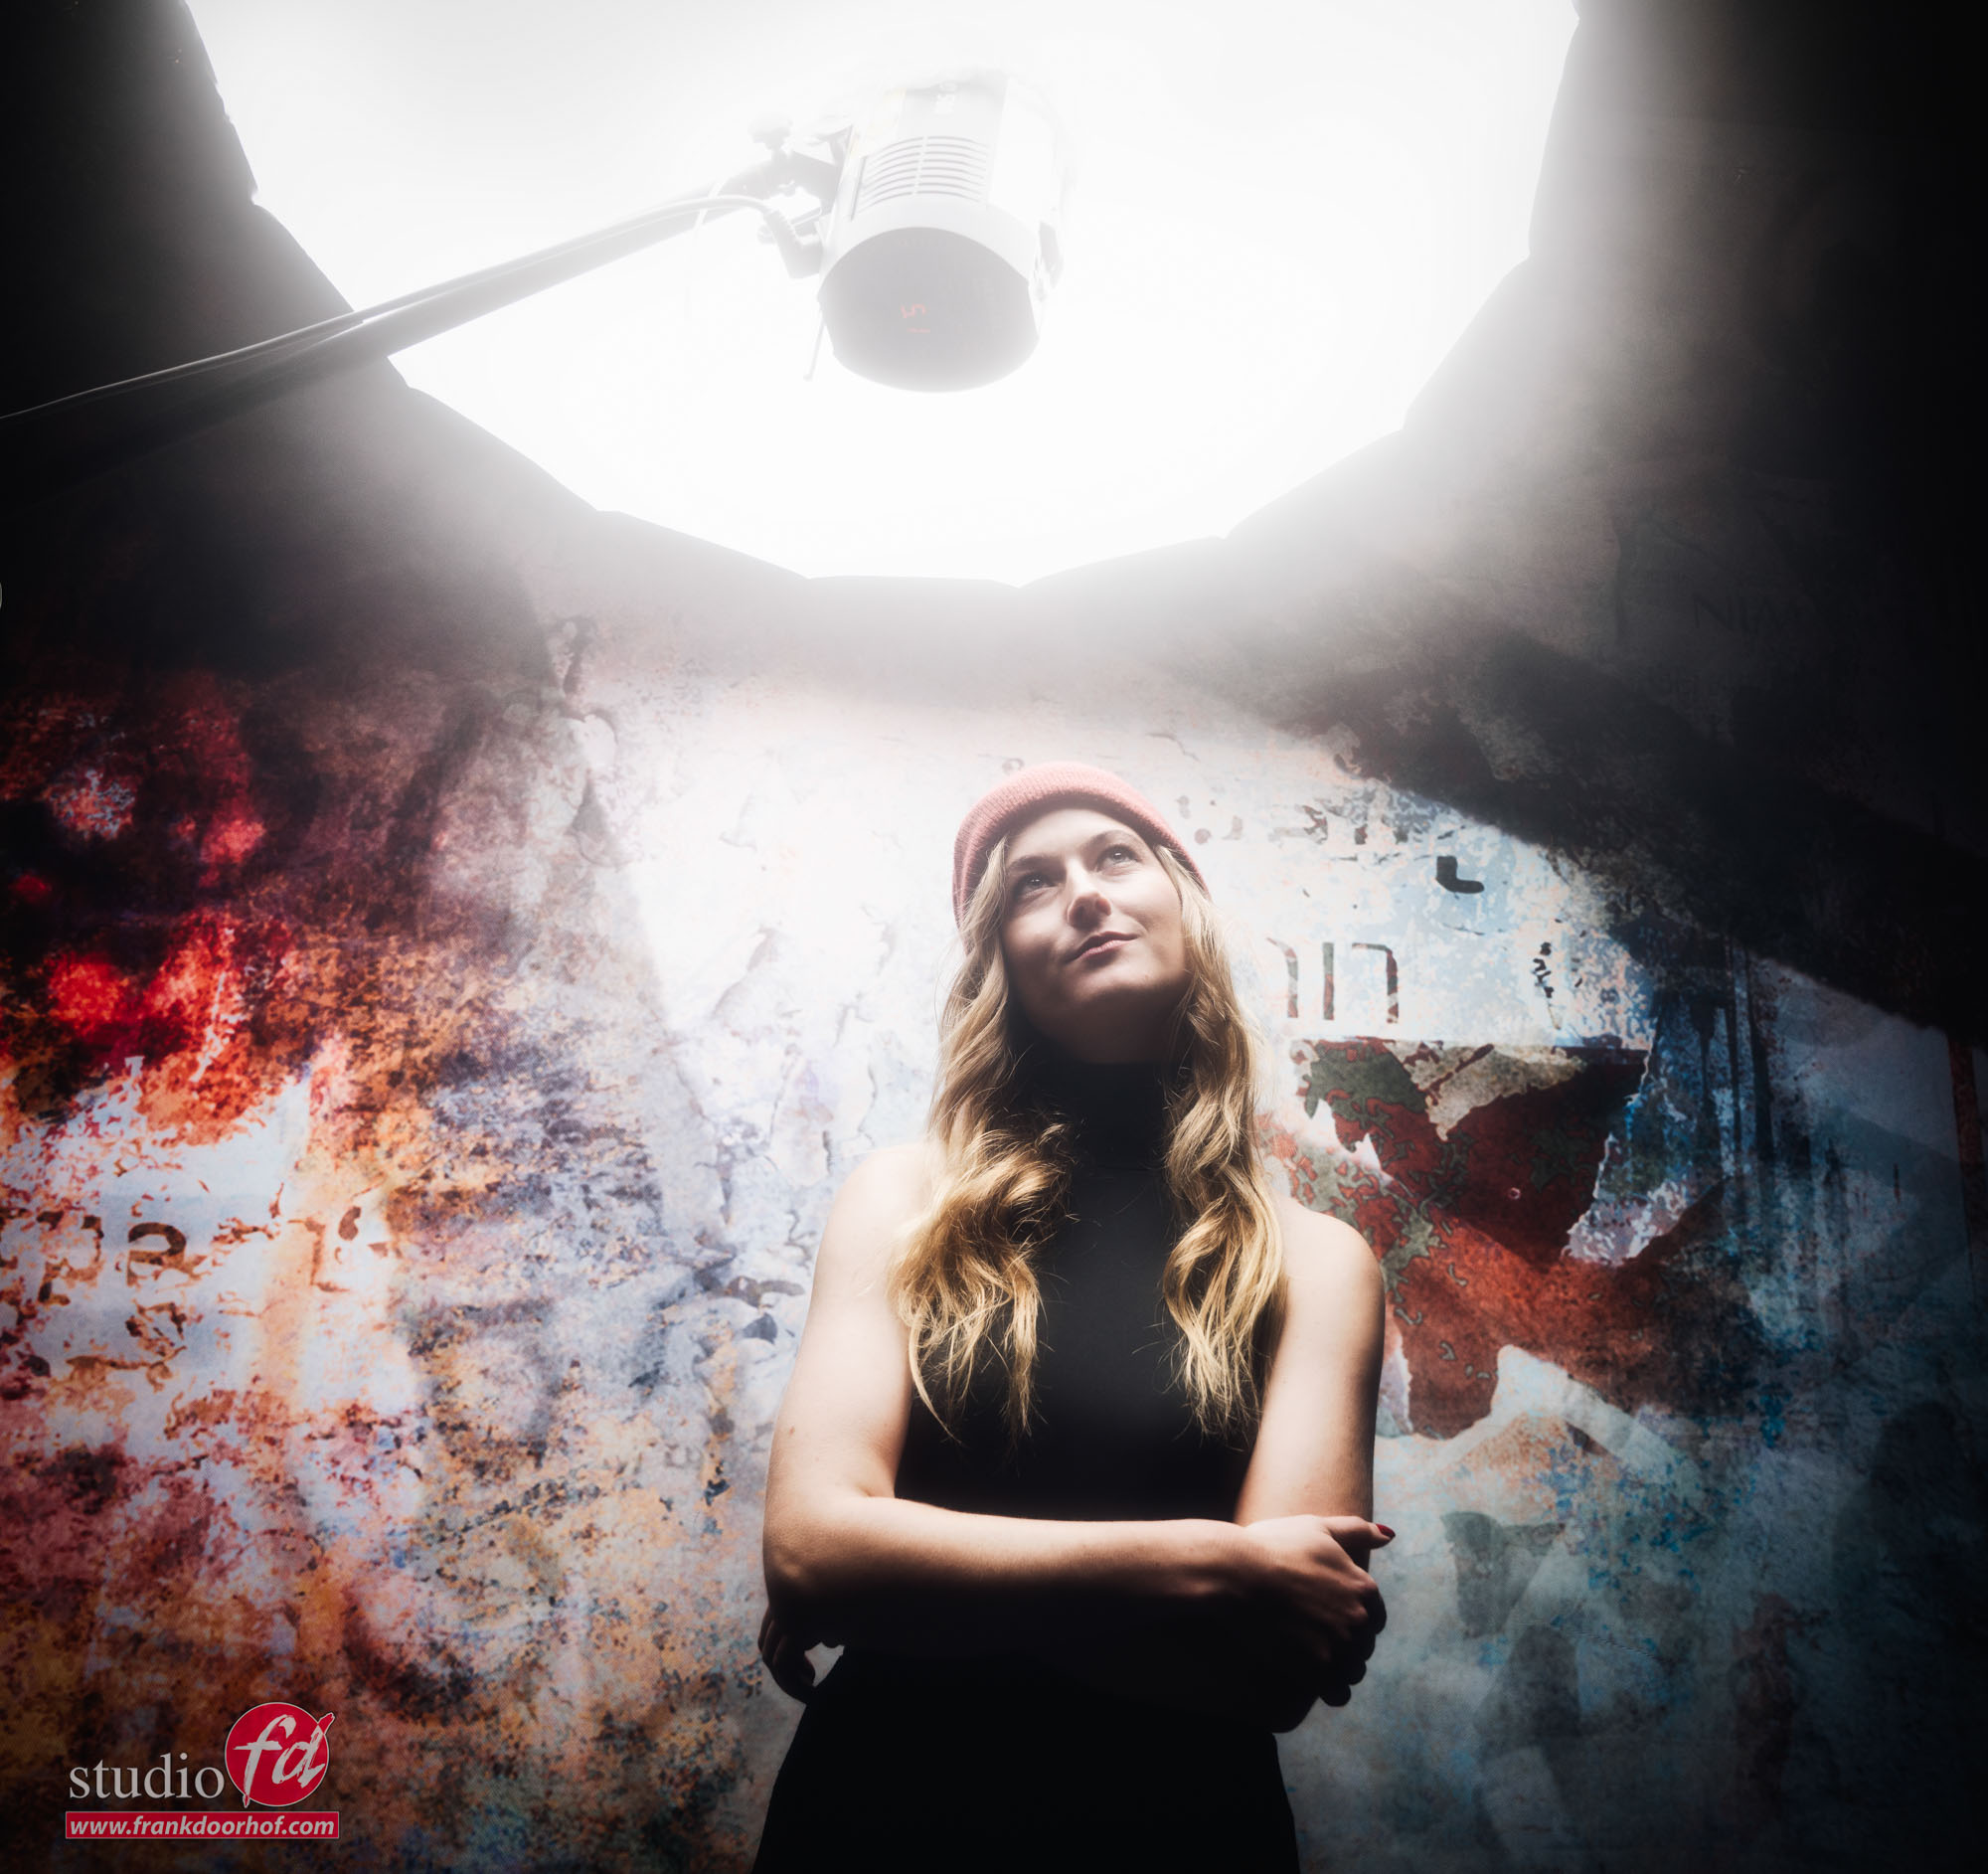
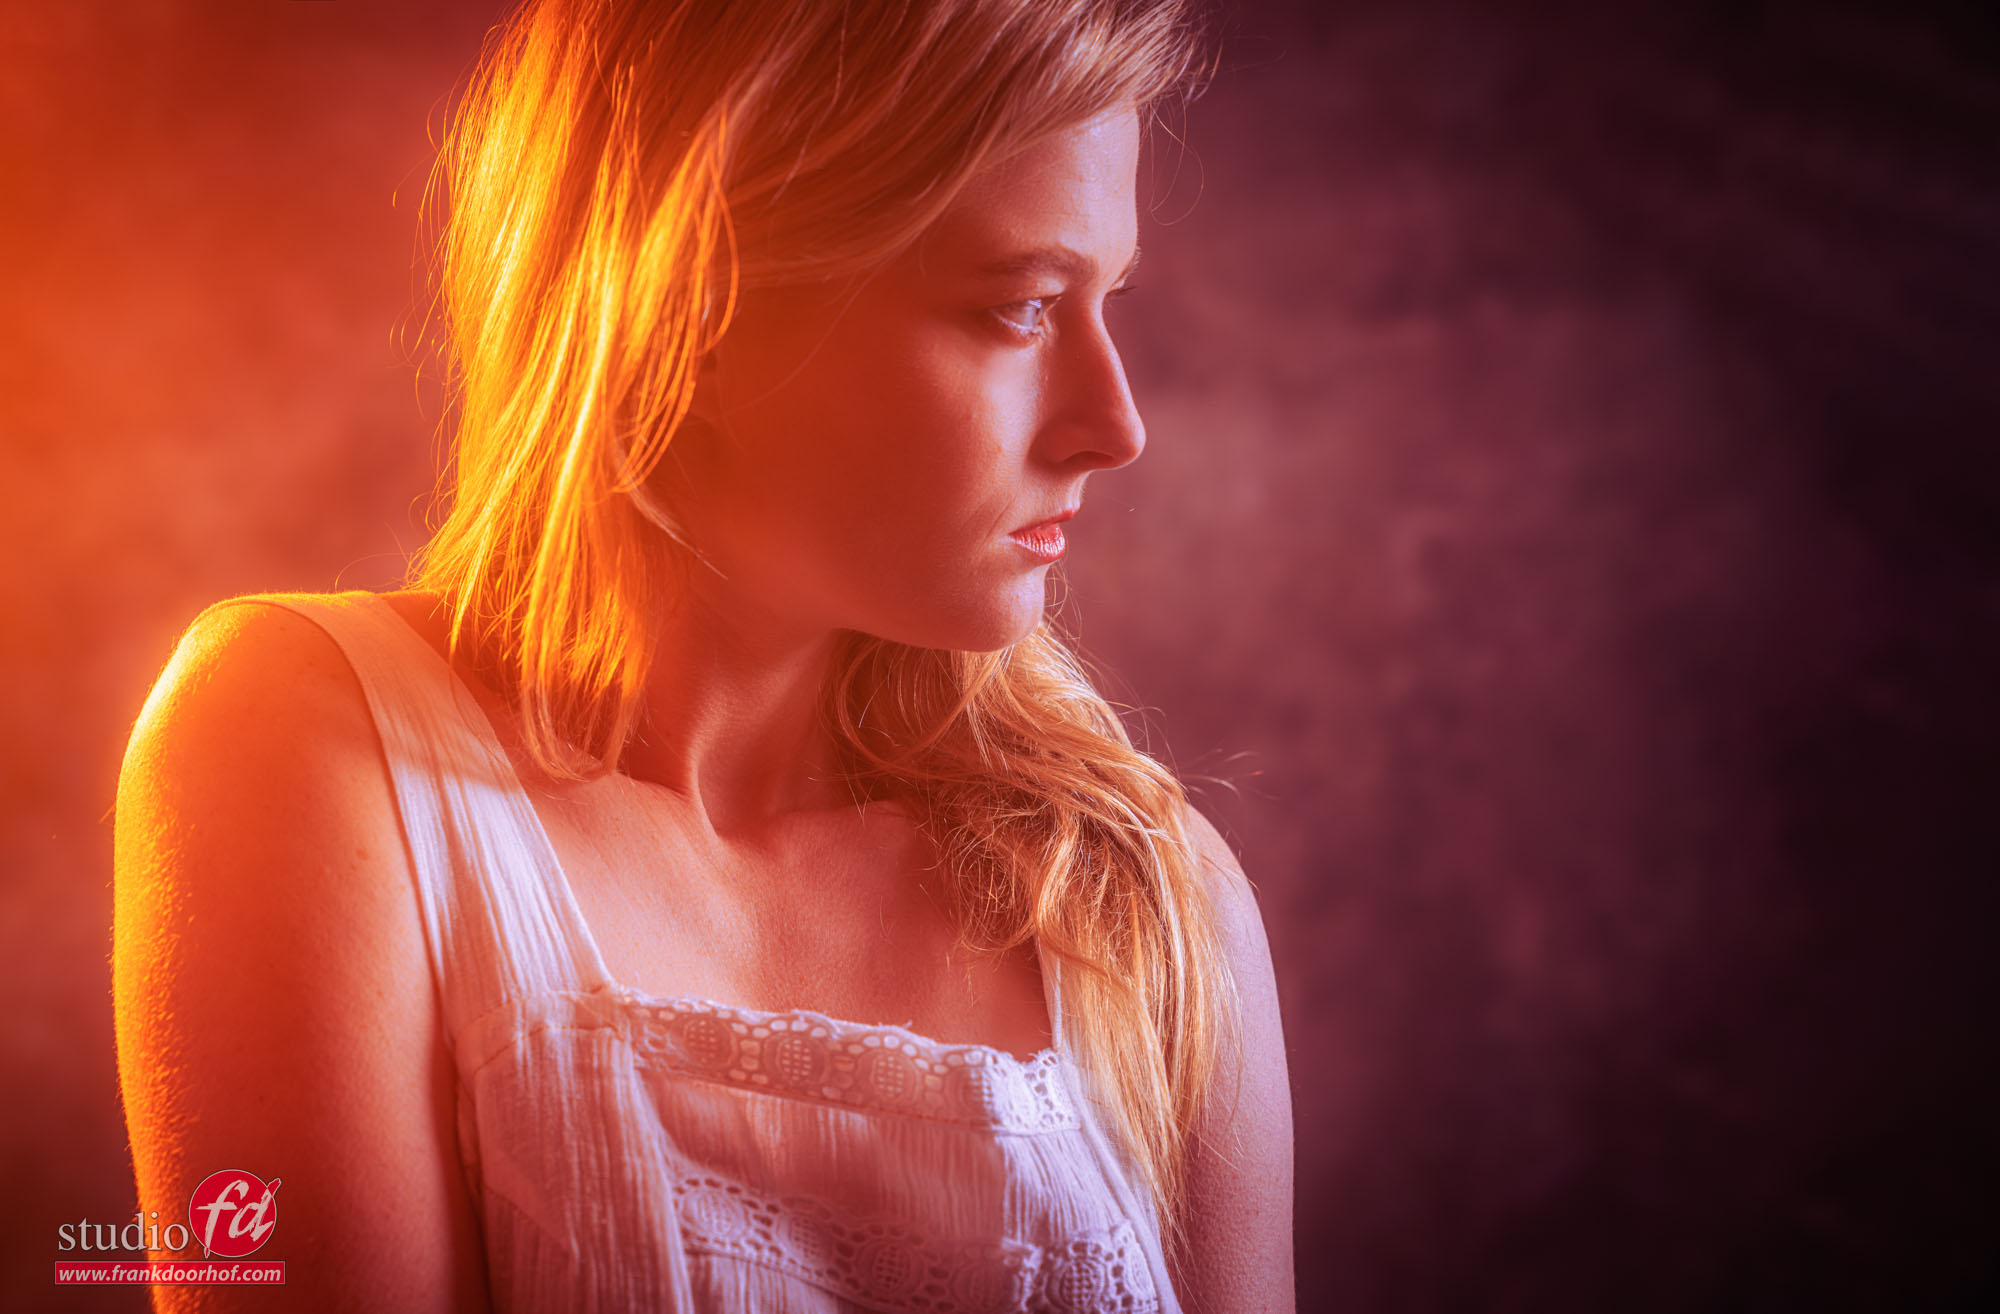
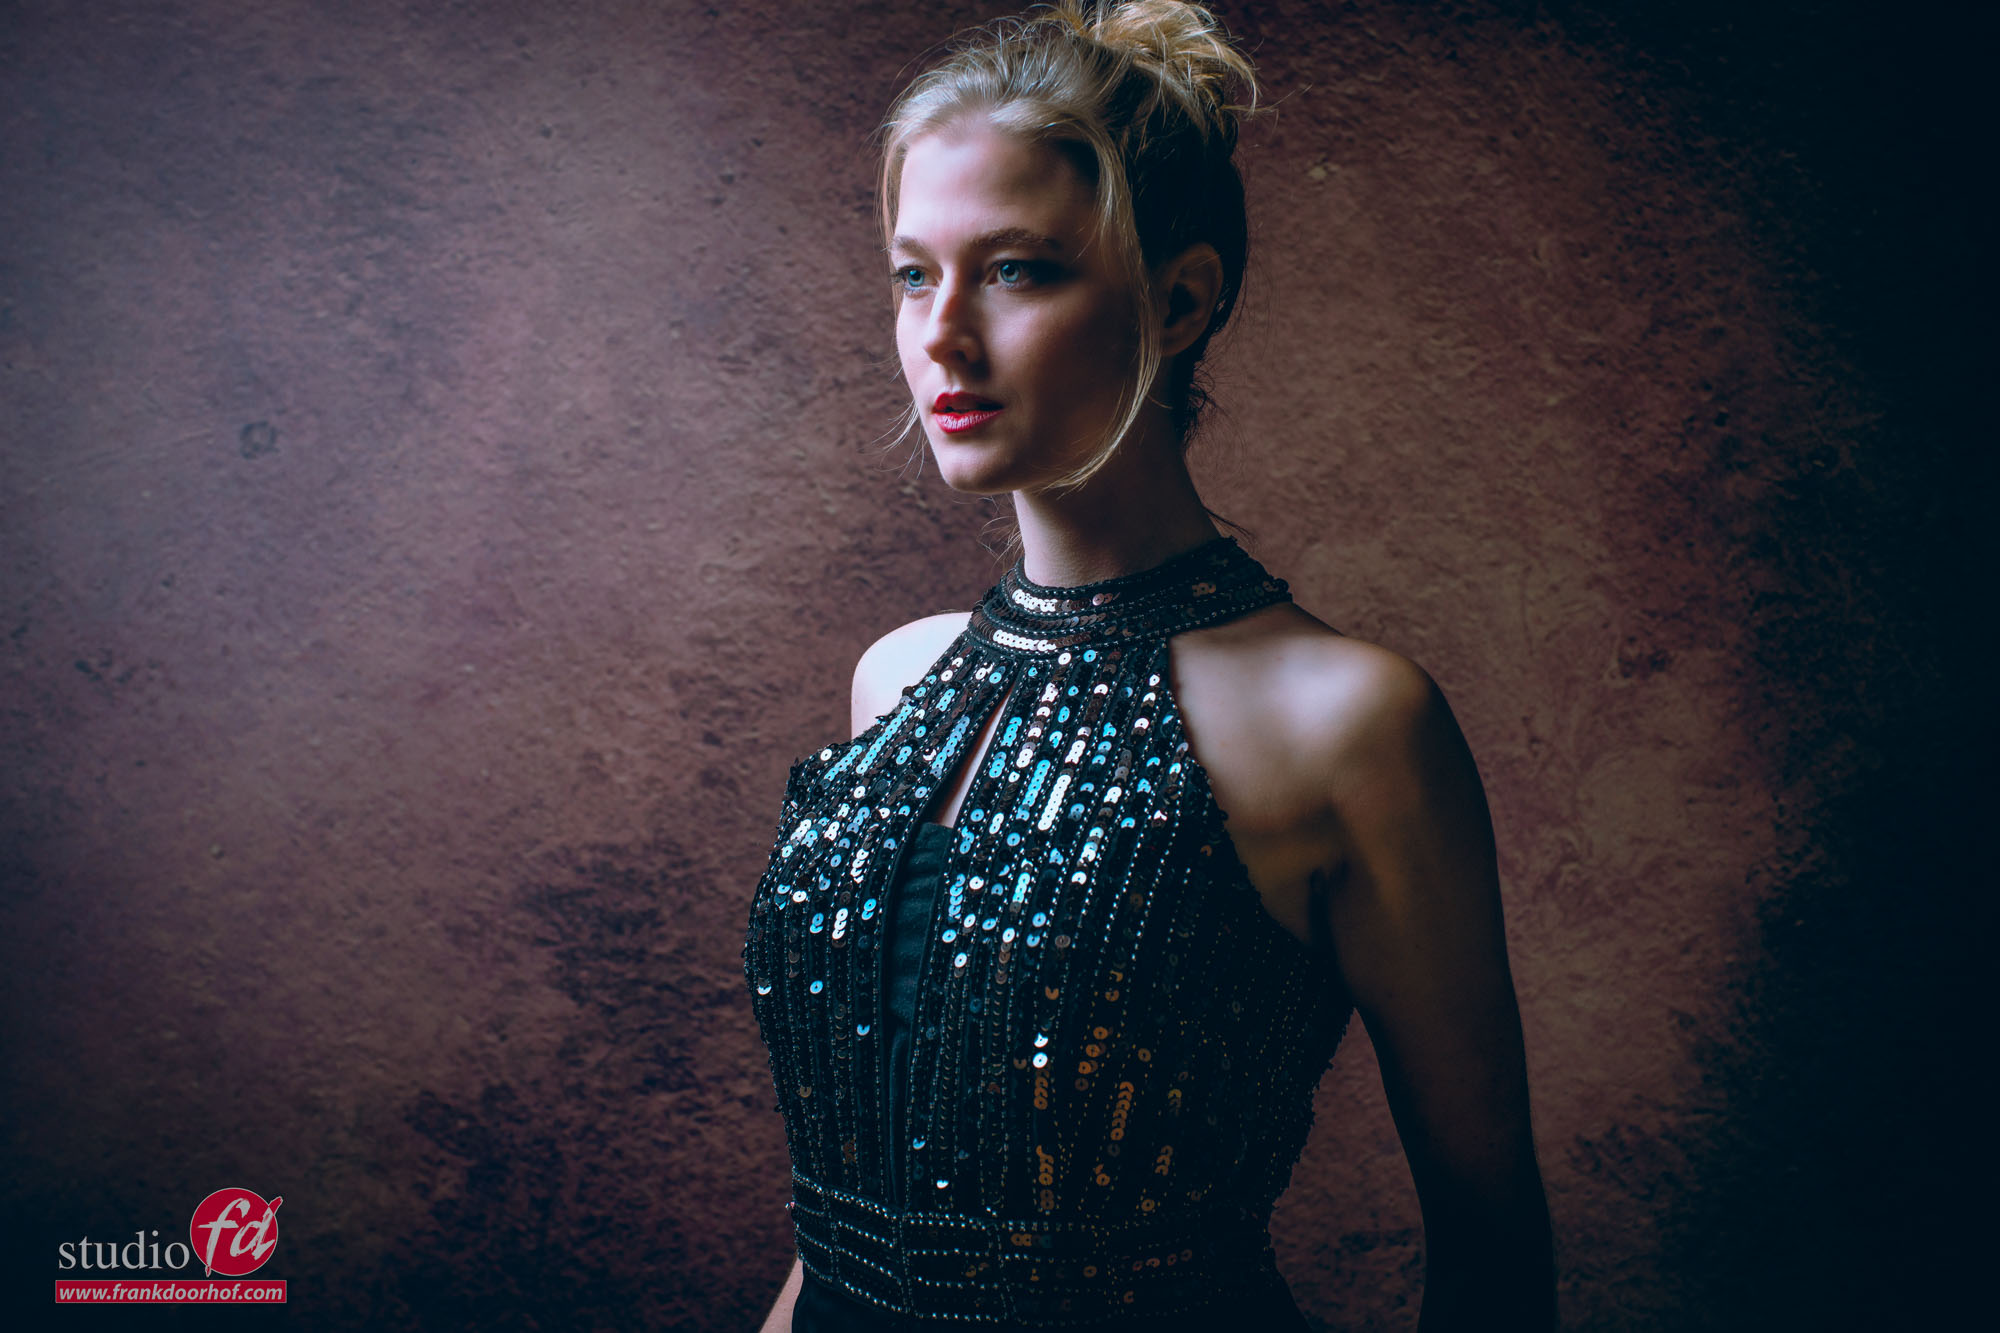
Here another setup with the umbrella and one accent light for the lens flare.
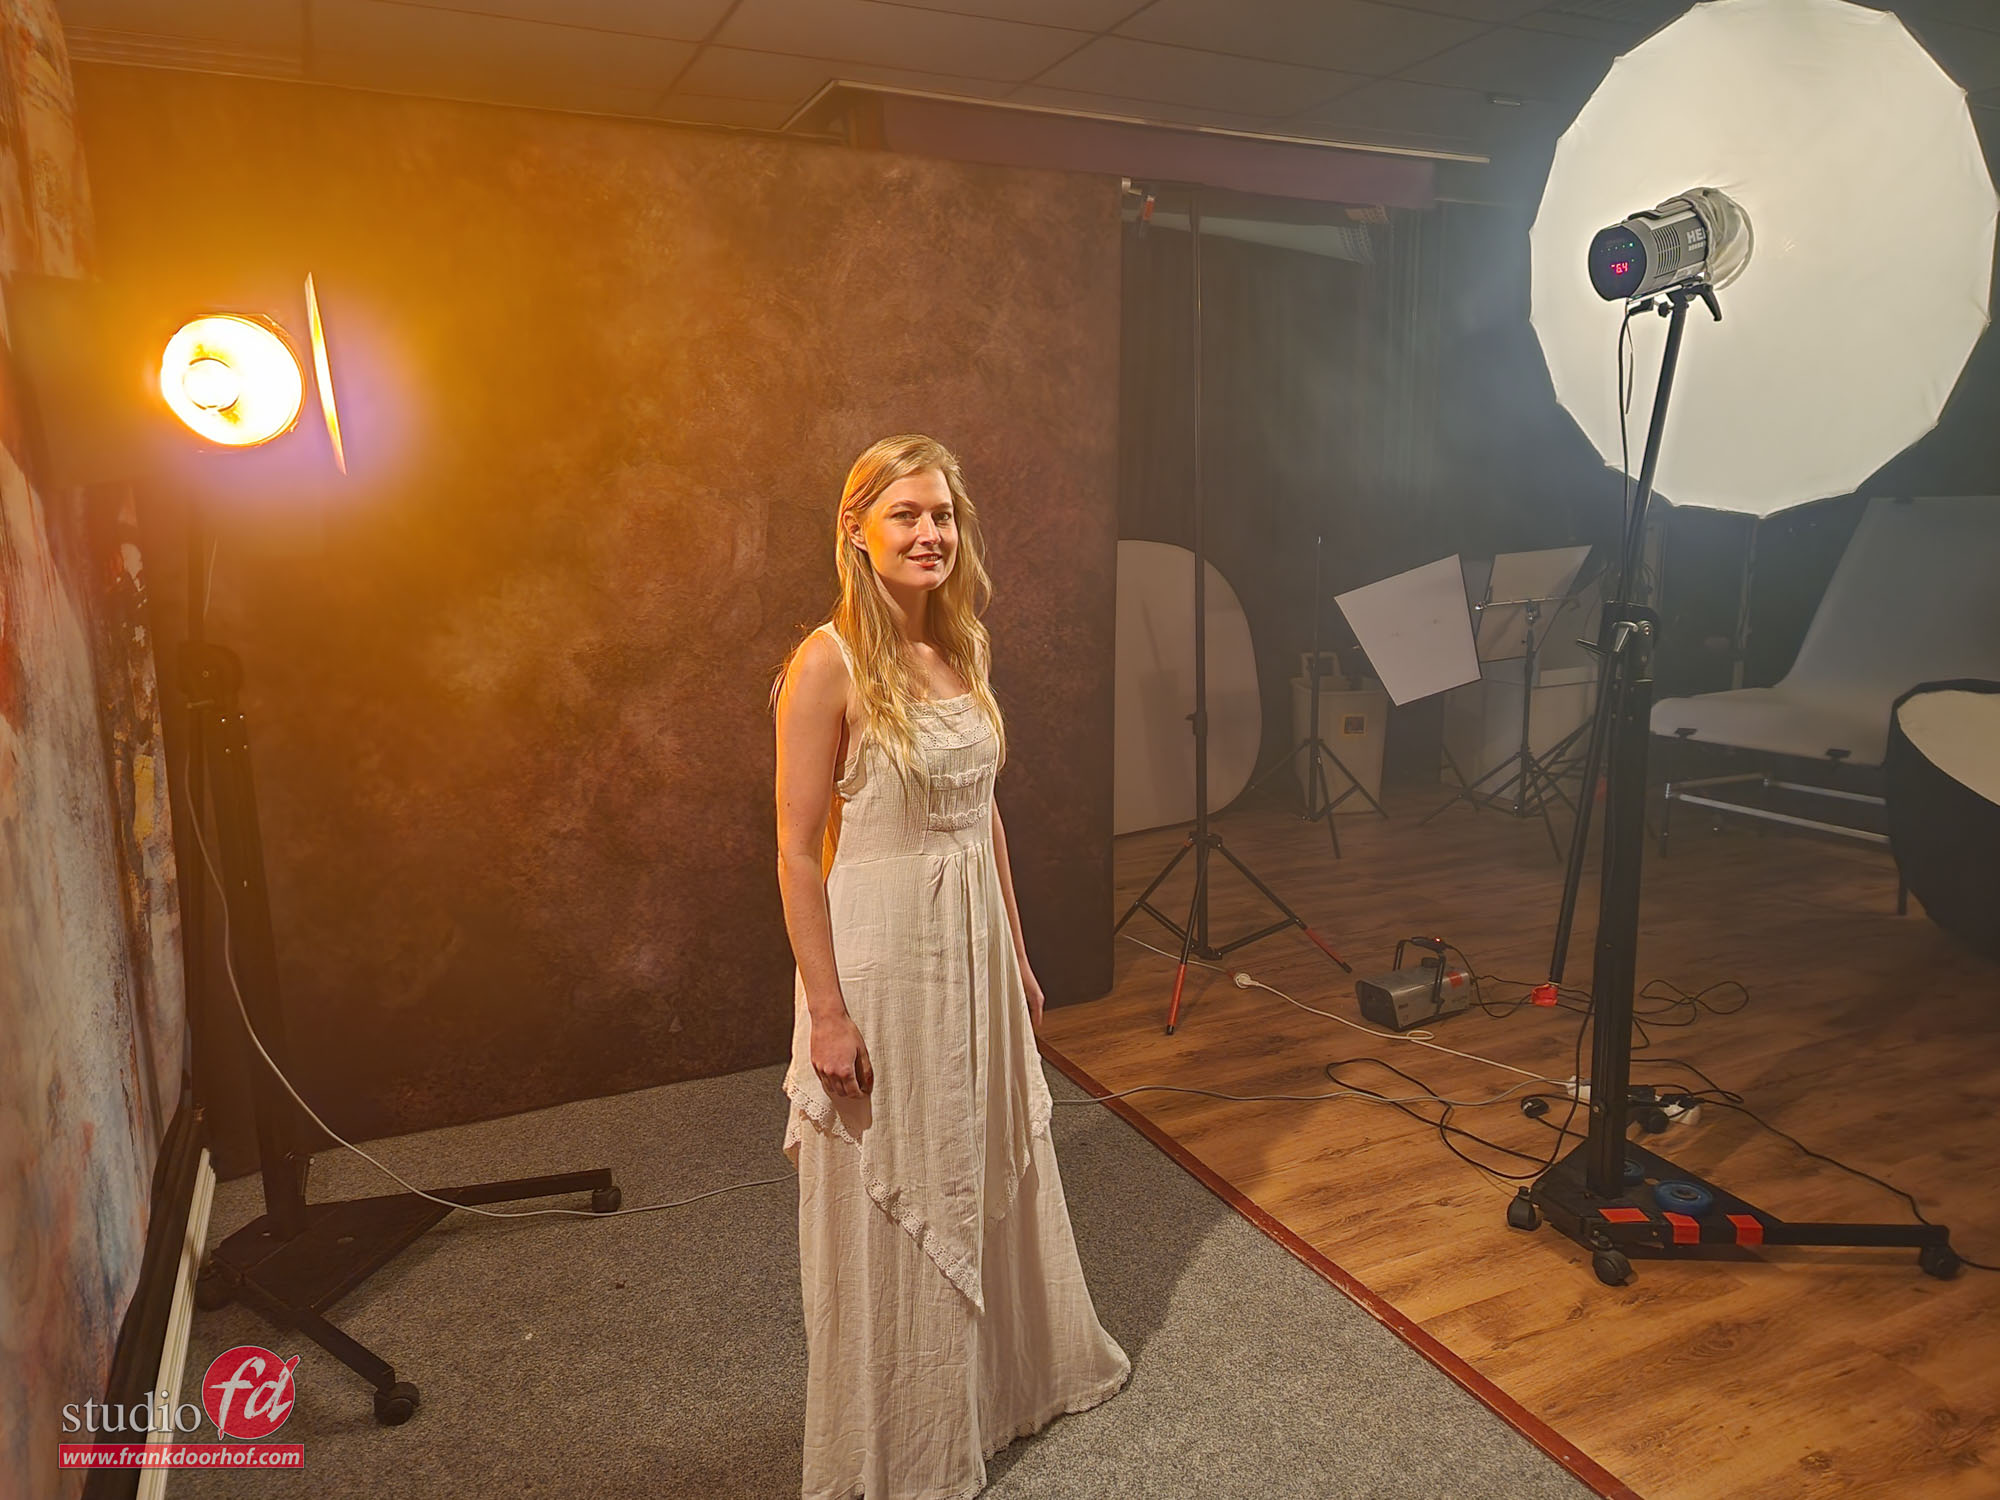
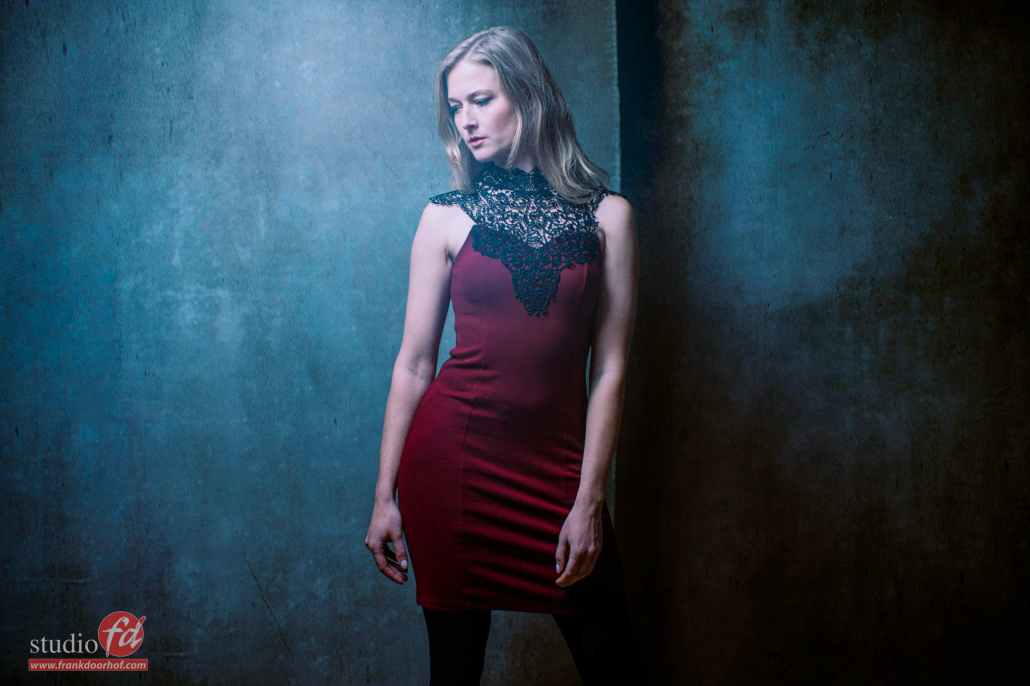
Normally I would use a softbox as mainlight. Now in this case we have plenty of room, but look at the space the umbrella needs and compare that to an average 1.20 softbox, I think it’s easily to see the huge advantages of using an umbrella 😀
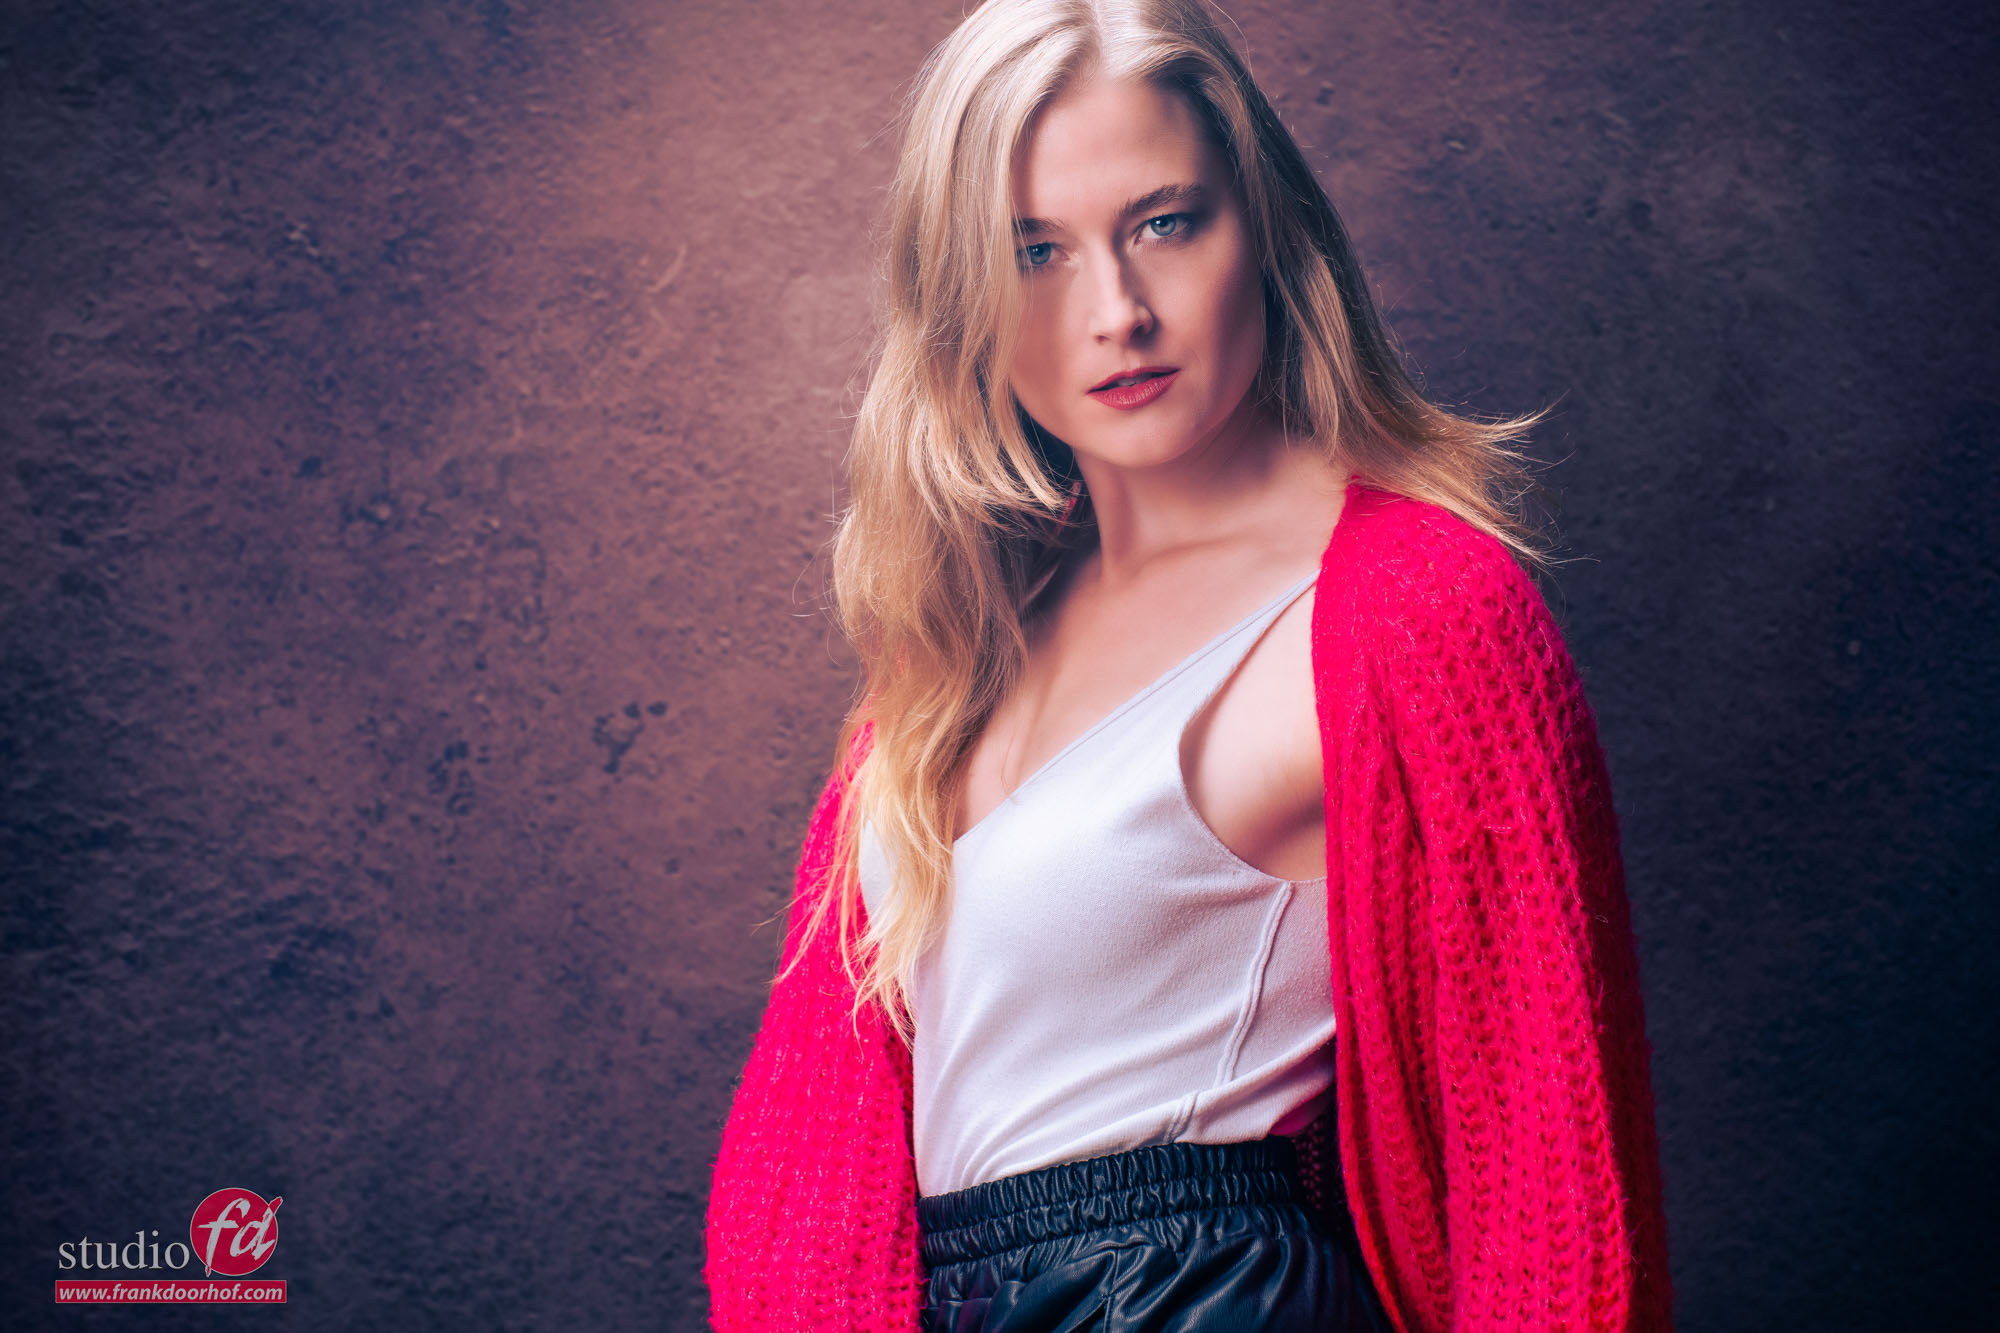
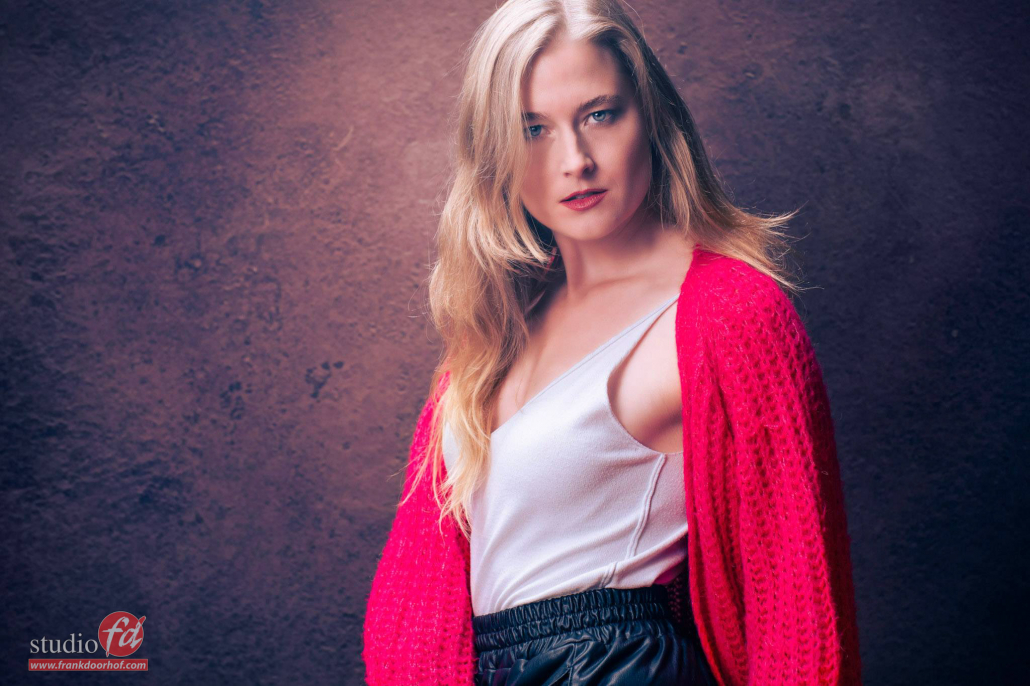
And let’s add some more images I shot with the umbrellas.
https://frankdoorhof.com/web/wp-content/uploads/2022/11/Linda-Okt-29-2022258-Edit-copy.jpg18852000Frank Doorhofhttps://frankdoorhof.com/web/wp-content/uploads/2015/03/studioFD_Logo-1FV.pngFrank Doorhof2022-11-07 11:13:572022-11-07 11:13:57Our brand new fiberglass umbrellas
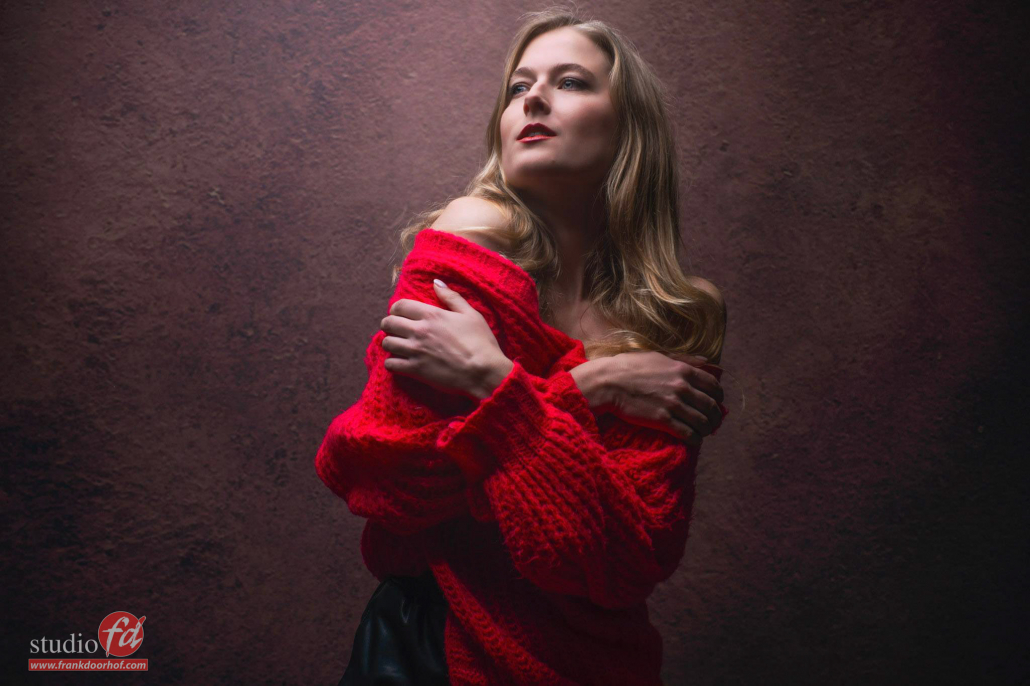
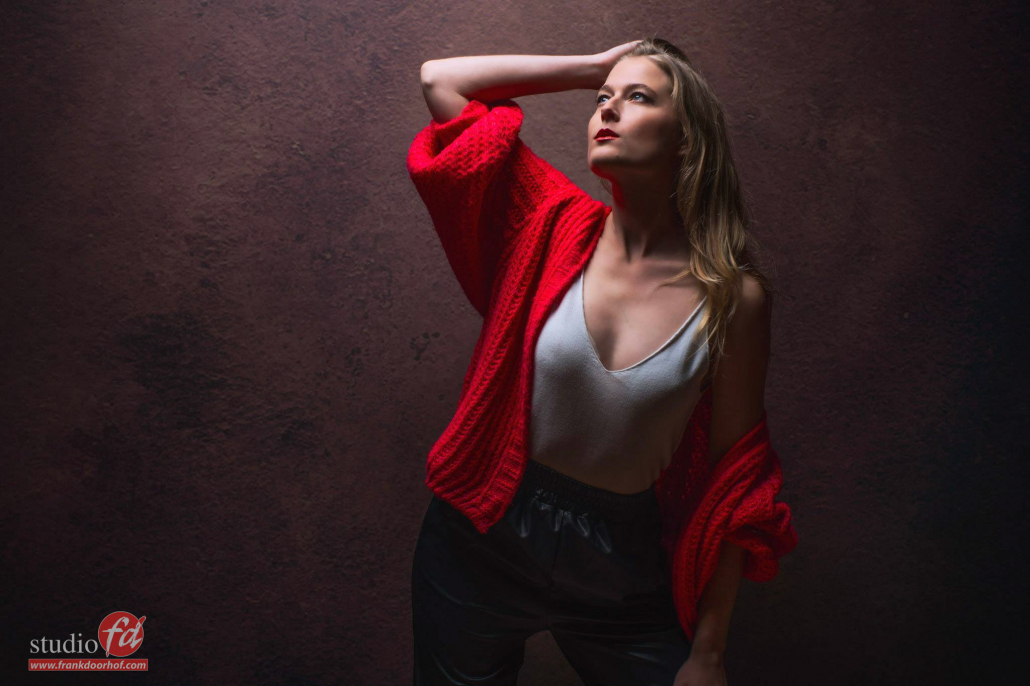
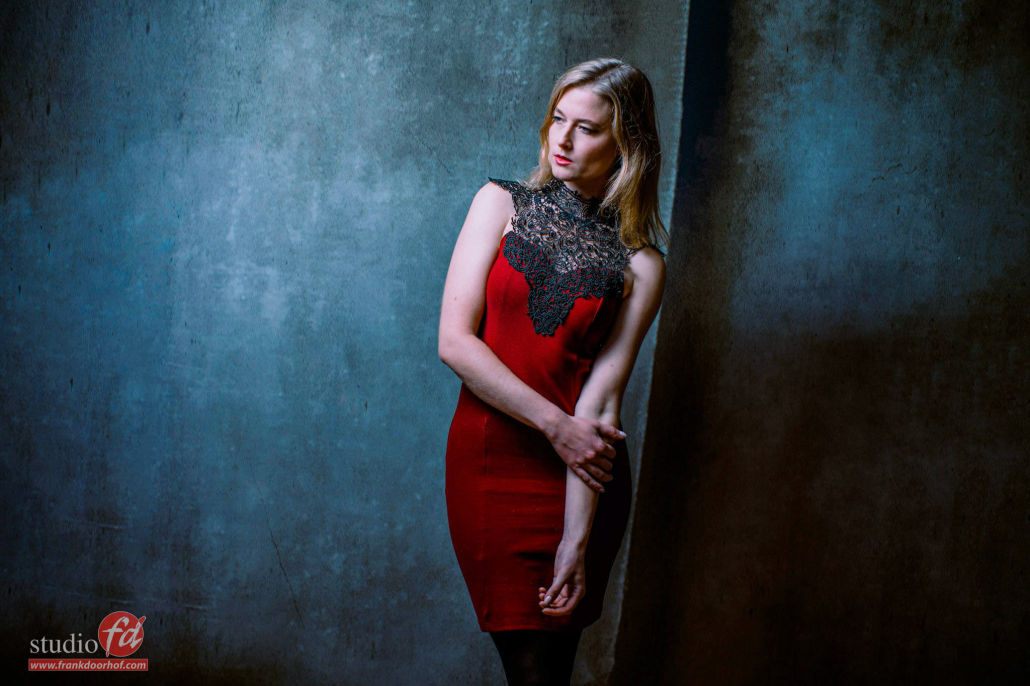
In this blogpost some results from our model Linda
These were shot during the livestream in our digital classroom series. During the shoot I show several ways to use umbrellas to not only create great shots but also add a lot of control to the way you use your lighting.
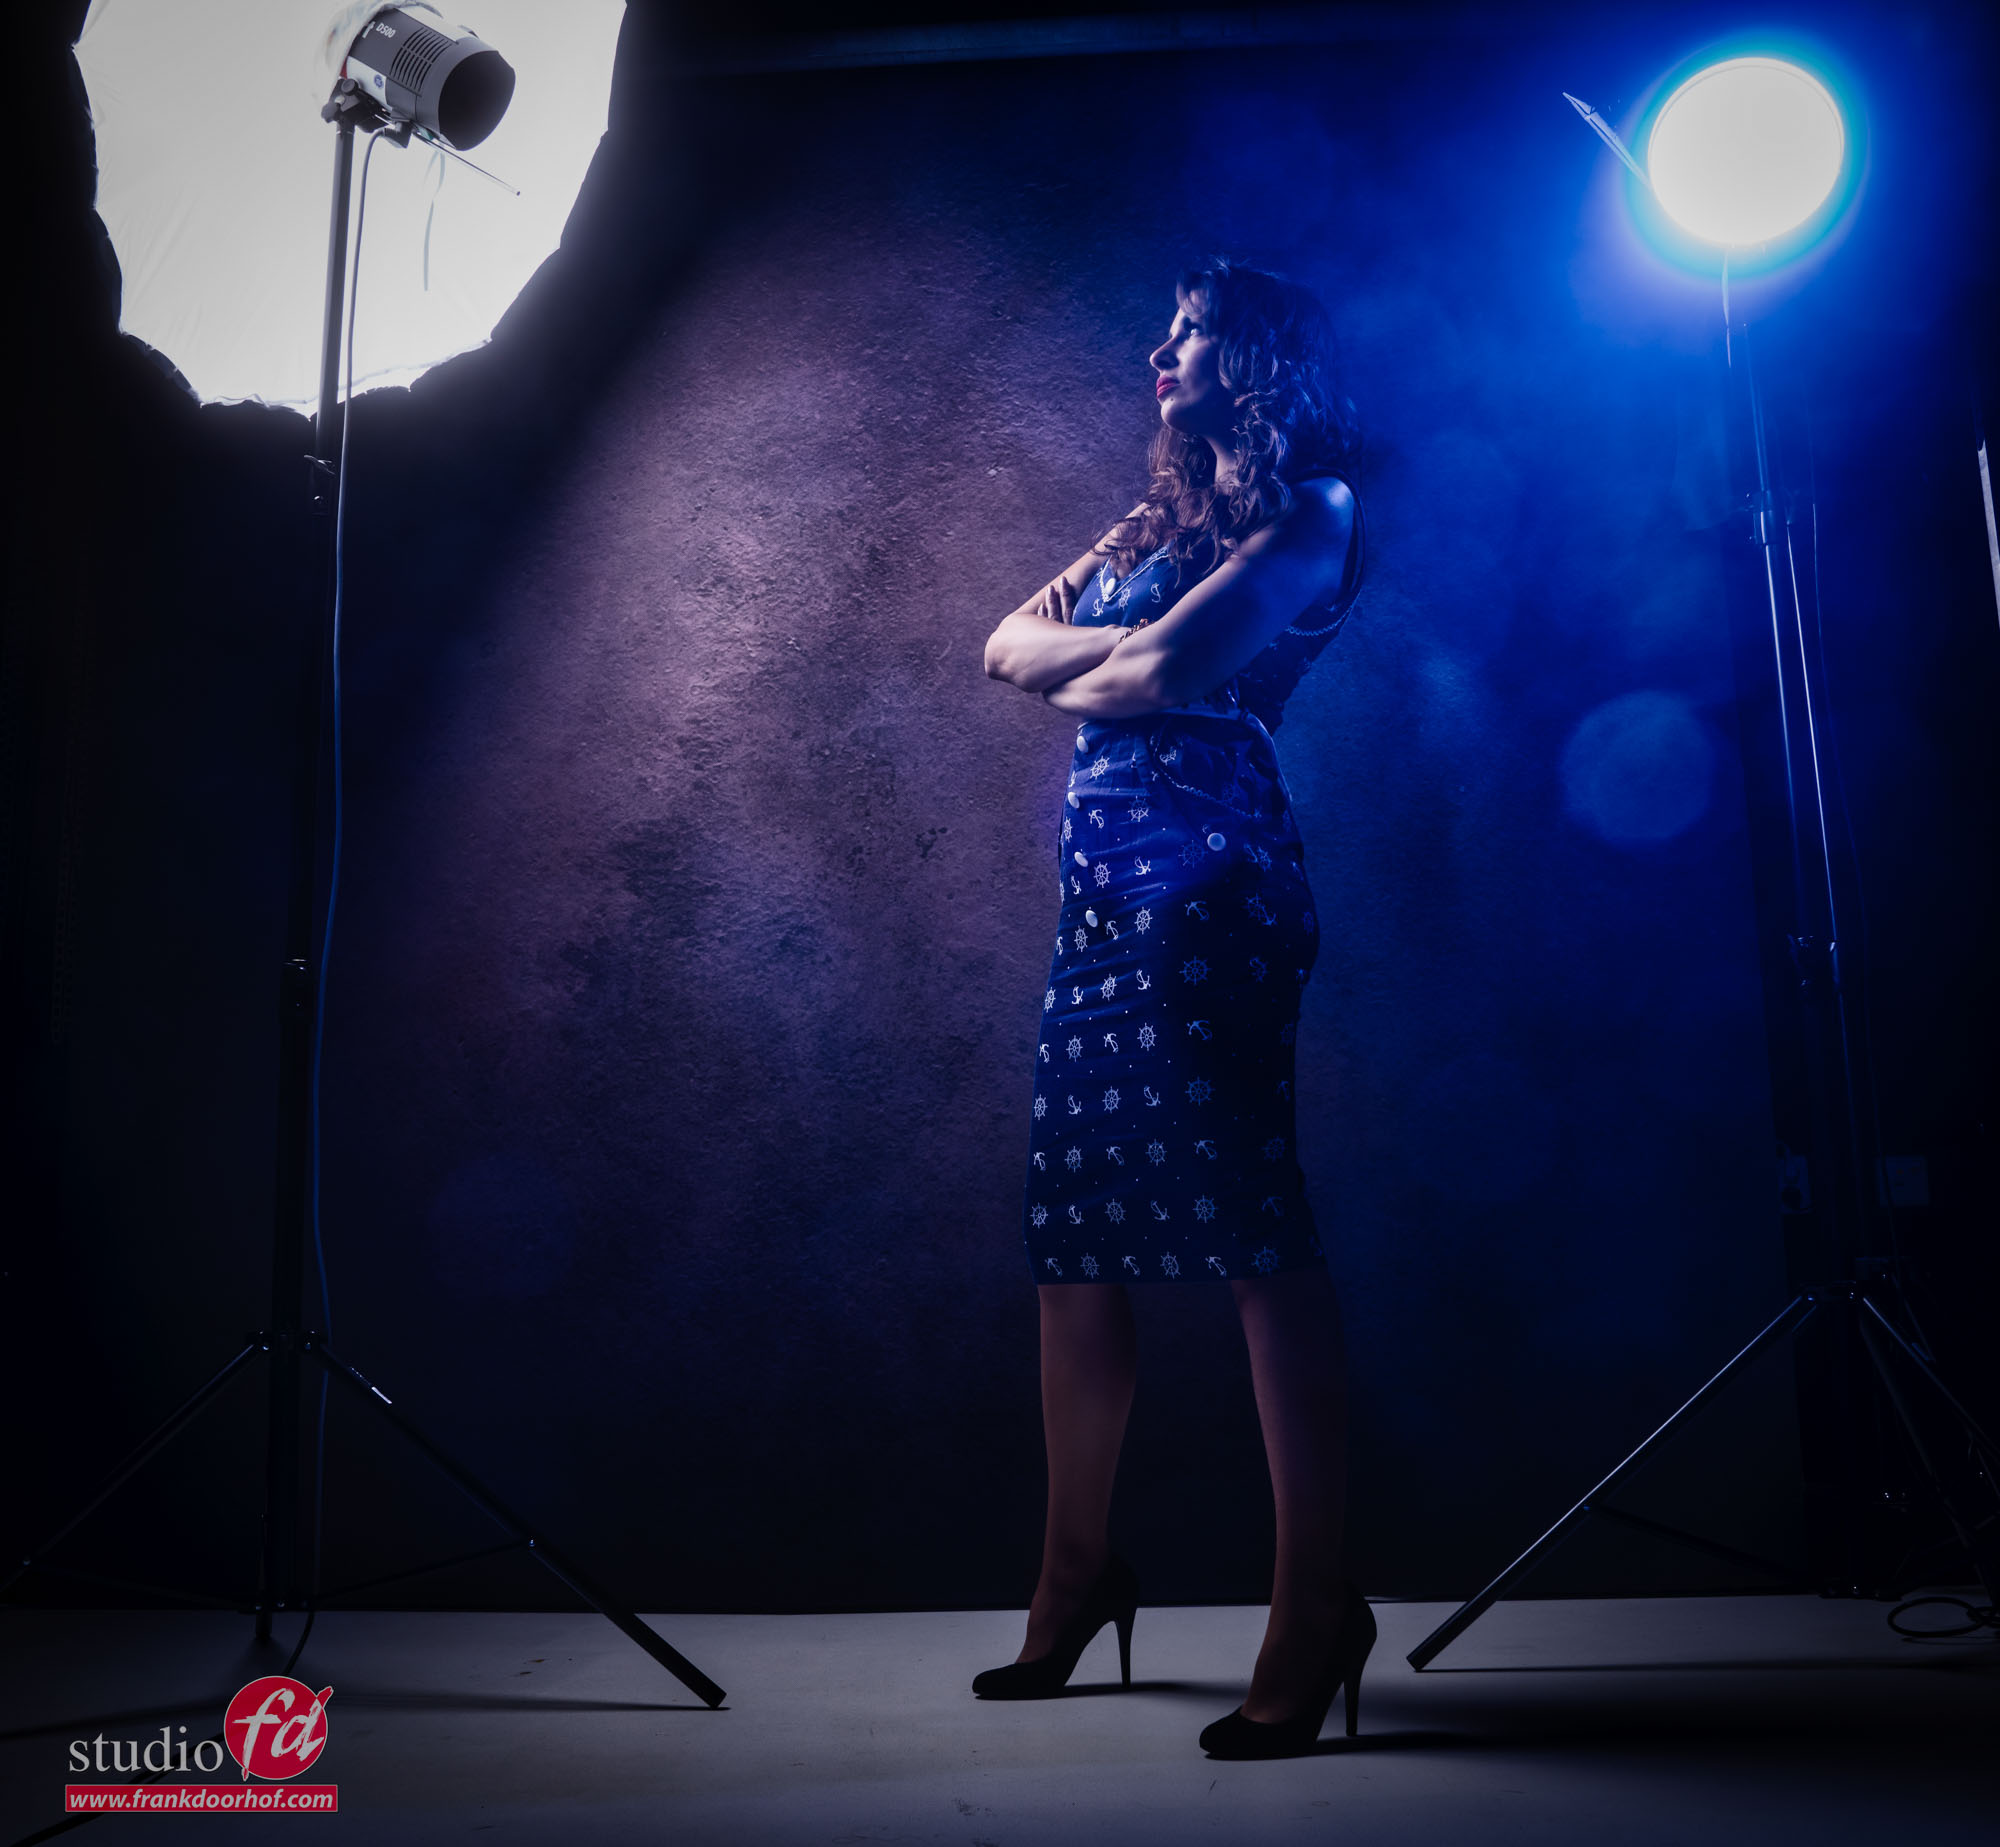
The new Rogue umbrellas are designed for different uses. In the kit is the familiar white umbrella which you can use for bounce or shoot through. This one is great as a very neutral fill in flash or very soft lensflare.
But you also find a black reflector umbrella with a sleeve. This one is my absolute favorite because the light is much more controllable and the sleeve gives the light fall off a very nice edge which is great for feathering.
The black and white umbrella are very suitable to light white backdrops depending on the area you want to cover. The white one will give some spill in the back. The black one will one light the backdrop behind the model with a very nice smooth transfer (no hotspots like with background reflectors).
https://frankdoorhof.com/web/wp-content/uploads/2022/10/Lindarogueumbrellas-Okt262022284029-Editcopy-1.jpg13652048Frank Doorhofhttps://frankdoorhof.com/web/wp-content/uploads/2015/03/studioFD_Logo-1FV.pngFrank Doorhof2022-10-27 16:31:272022-10-27 16:31:27Our new Rogue umbrellas in action and free tutorial