Guestblog retouching and repair
Today a guestblog by one of our regular visitors RikerVP foto.
I think it makes a nice connection with the vintage series you have been reading on the blog the last few weeks, because this is something that happens a lot, in our studio people often bring in negatives/slides/old photos with the question “can you save it?” and luckily often I can, but sometimes it’s way more work than they think.
Zuid Holland Foto Studio – Rikervp Foto Retouching & Repair
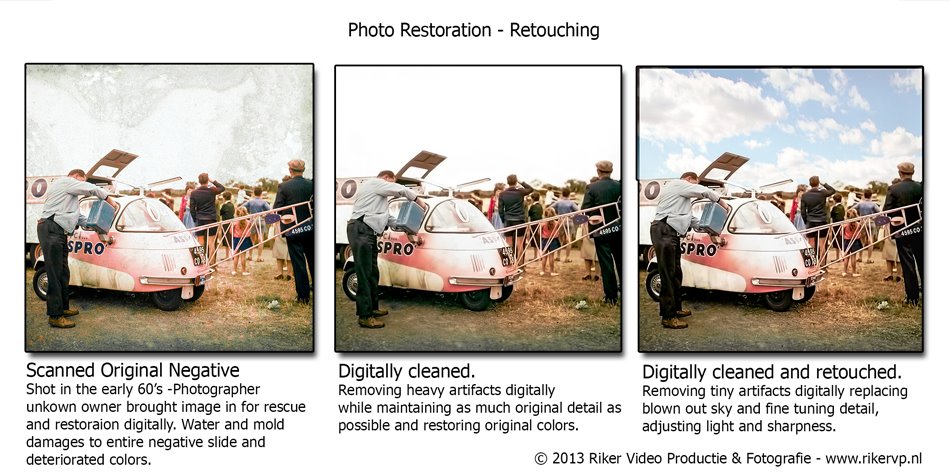
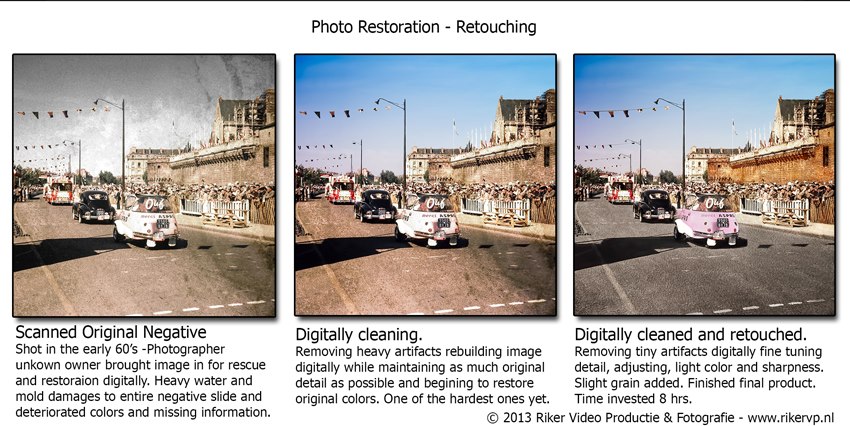
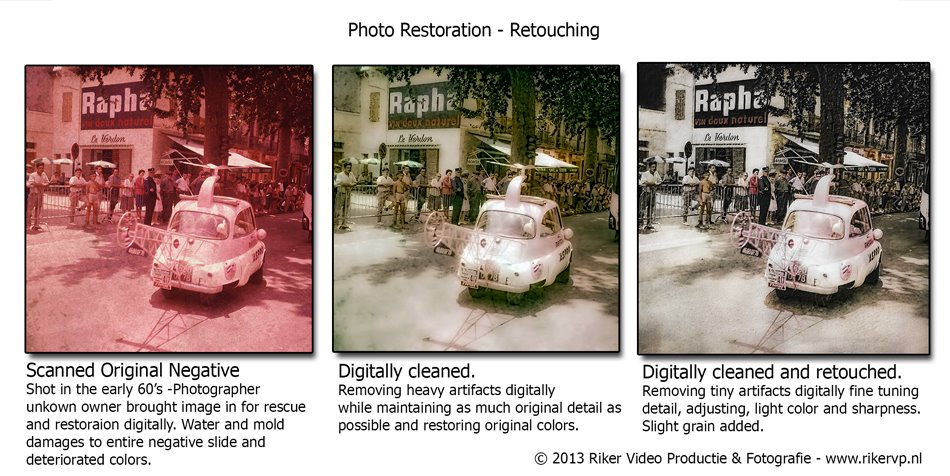
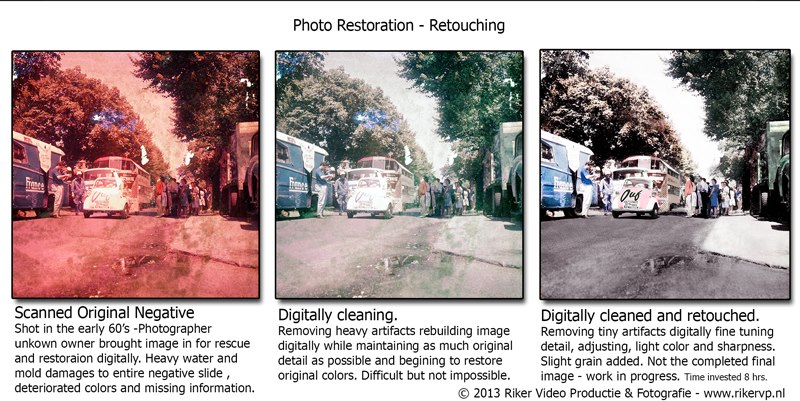
A little while ago, I had a gentleman bring me 10 extremely damaged 2.5 x.2.5 cm film negatives. These negatives were so badly damaged from water and mould, white spots with totally missing information. This man asked me to repair the images as best I could as these image were an important piece of history to him. The images you see before you were taken around 1961/2 during the 1961/2 Tour de France and featured the “ASPRO” automobile. Aspro was a well known aspirin manufacture / seller in Europe at that time period.
.
Out of the 10 images I selected 7 images that had a chance of being reconstructed digitally. The other 3 were well beyond repair. Over the span of several weeks I would work perhaps 10 – 18 hours on each image, repairing it in sections, working in sections is vitally important when working on complex images, removing mould digitally, artefacts and in most cases blown out skies and having to replace them with a natural looking sky . This was agreed to with the owner of the negatives and given the approval to make it so.
.
Working on images like these you could never make a living on as they are so labour intensive and require an extreme amount of patience. If you are to do this and charged an hourly rate to do them.. people could and would not afford to have them done. You either like the work, like the challenge and or like preserving a piece of history. In reality working on images like these.. they do not really pay for themselves.. You just got to have a love of doing them.
You also have to have an extensive amount of knowledge of Photoshop and be able to use a variety of techniques to solve whatever problems are presented to you in each image on an individual basis. Some of the images I have worked on have 150 to 200 layers or more just in rebuilding particular sections of each image. Some file sizes have reached almost 1.5 gig in Tiff or PSD format. Those images are then saved to disc and a copy burned to DVD. Completed images are then processed to a compressed jpg format.
.
While doing this particular set of images, I had done a lot of research on this particular car and event and ran across a lot of information about it.. it was truly a lesson in history that I actually enjoyed reading and it gave me fire to continue working on these images tirelessly for weeks. Searching for the original colours based on information retrieved from the internet and using colour charts and paint chips that I could find, it was no easy task.
.
Trying to get everything to look right, fine tune detail, rebuild streets, buildings, people’s faces and roads, even recreating existing shadows and maintain as much normal and natural look as possible whilst trying to maintain as much of the relevant information and mood in the revised image comparing to the original the images all through out the restoration process
“Not an easy thing to do in Photoshop without going overboard.”
.
As you can see below on the original negative that has been scanned is what I started from you will notice the colour is way off, missing a lot of information and if you blow up the images up to and more than 100 % you see missing faces, detail and a lot of other damages. Once I started the first image of the set, you start setting a routine you must follow and apply to all images you work on to make sure all the images look as good as the first one that was completed.
.
Thanks to a lot of Photoshop plug-in’s such as topaz lab’s, detail, denoise, remask, and on some images lens effects, I was able to restore as much of the original detail as possible and even pulled detail out of the image that was either barely there and almost non-existent. I have been using topaz labs for years and find their products invaluable in assisting me to get my job done with really great results.
Please note that my agreement with the owner of these images, I am allowed to post and discuss these images and the repair methods involved but I have a file size dimension restriction that would NOT allow me to post these images in bigger format and resolution. The final images are completed in high resolution really rocked and the owner is so satisfied with my results… lol, I fear I may be commissioned to do a whole lot more of them in the future, and yes I love a challenge.
I hope you too, can see just how much work is involved in restoring images like these…
The owner of these images easily had estimates of around 200-250 euro for each image reconstruction. The owner had 10 images… not hard to figure out the math on that one.
.
Once I did one test image, so the owner could see what results he could expect. Well really he was testing my abilities with Photoshop and my knowledge on doing these restorations… He immediately commissioned me to continue with the rest of the saveable images. This past weekend after having the negatives in my possession for about 8 weeks he picked them up and confided in me that once he saw the first completed and restored image.. He knew I was the man for the job. For me, I like creative challenges and I am always experimenting with Photoshop expanding my horizons and learning curve and fine tuning skills.
.
Nothing ventured.. nothing gained I sometimes say…
Colorizing foto’s.. next time..
thanks for your time and read.
Greetings Riker.
.
return to Rikervp home. click here.. http://www.rikervp.nl
